


LG 24U411A-B 24 Inch Monitor Unboxing.
Learn how to unbox and set up the LG 24U411A-B 24 inch monitor. This guide shows you what comes in the box, what to look for, and how to get it ready for use. I unbox this monitor so you know exactly what to expect.
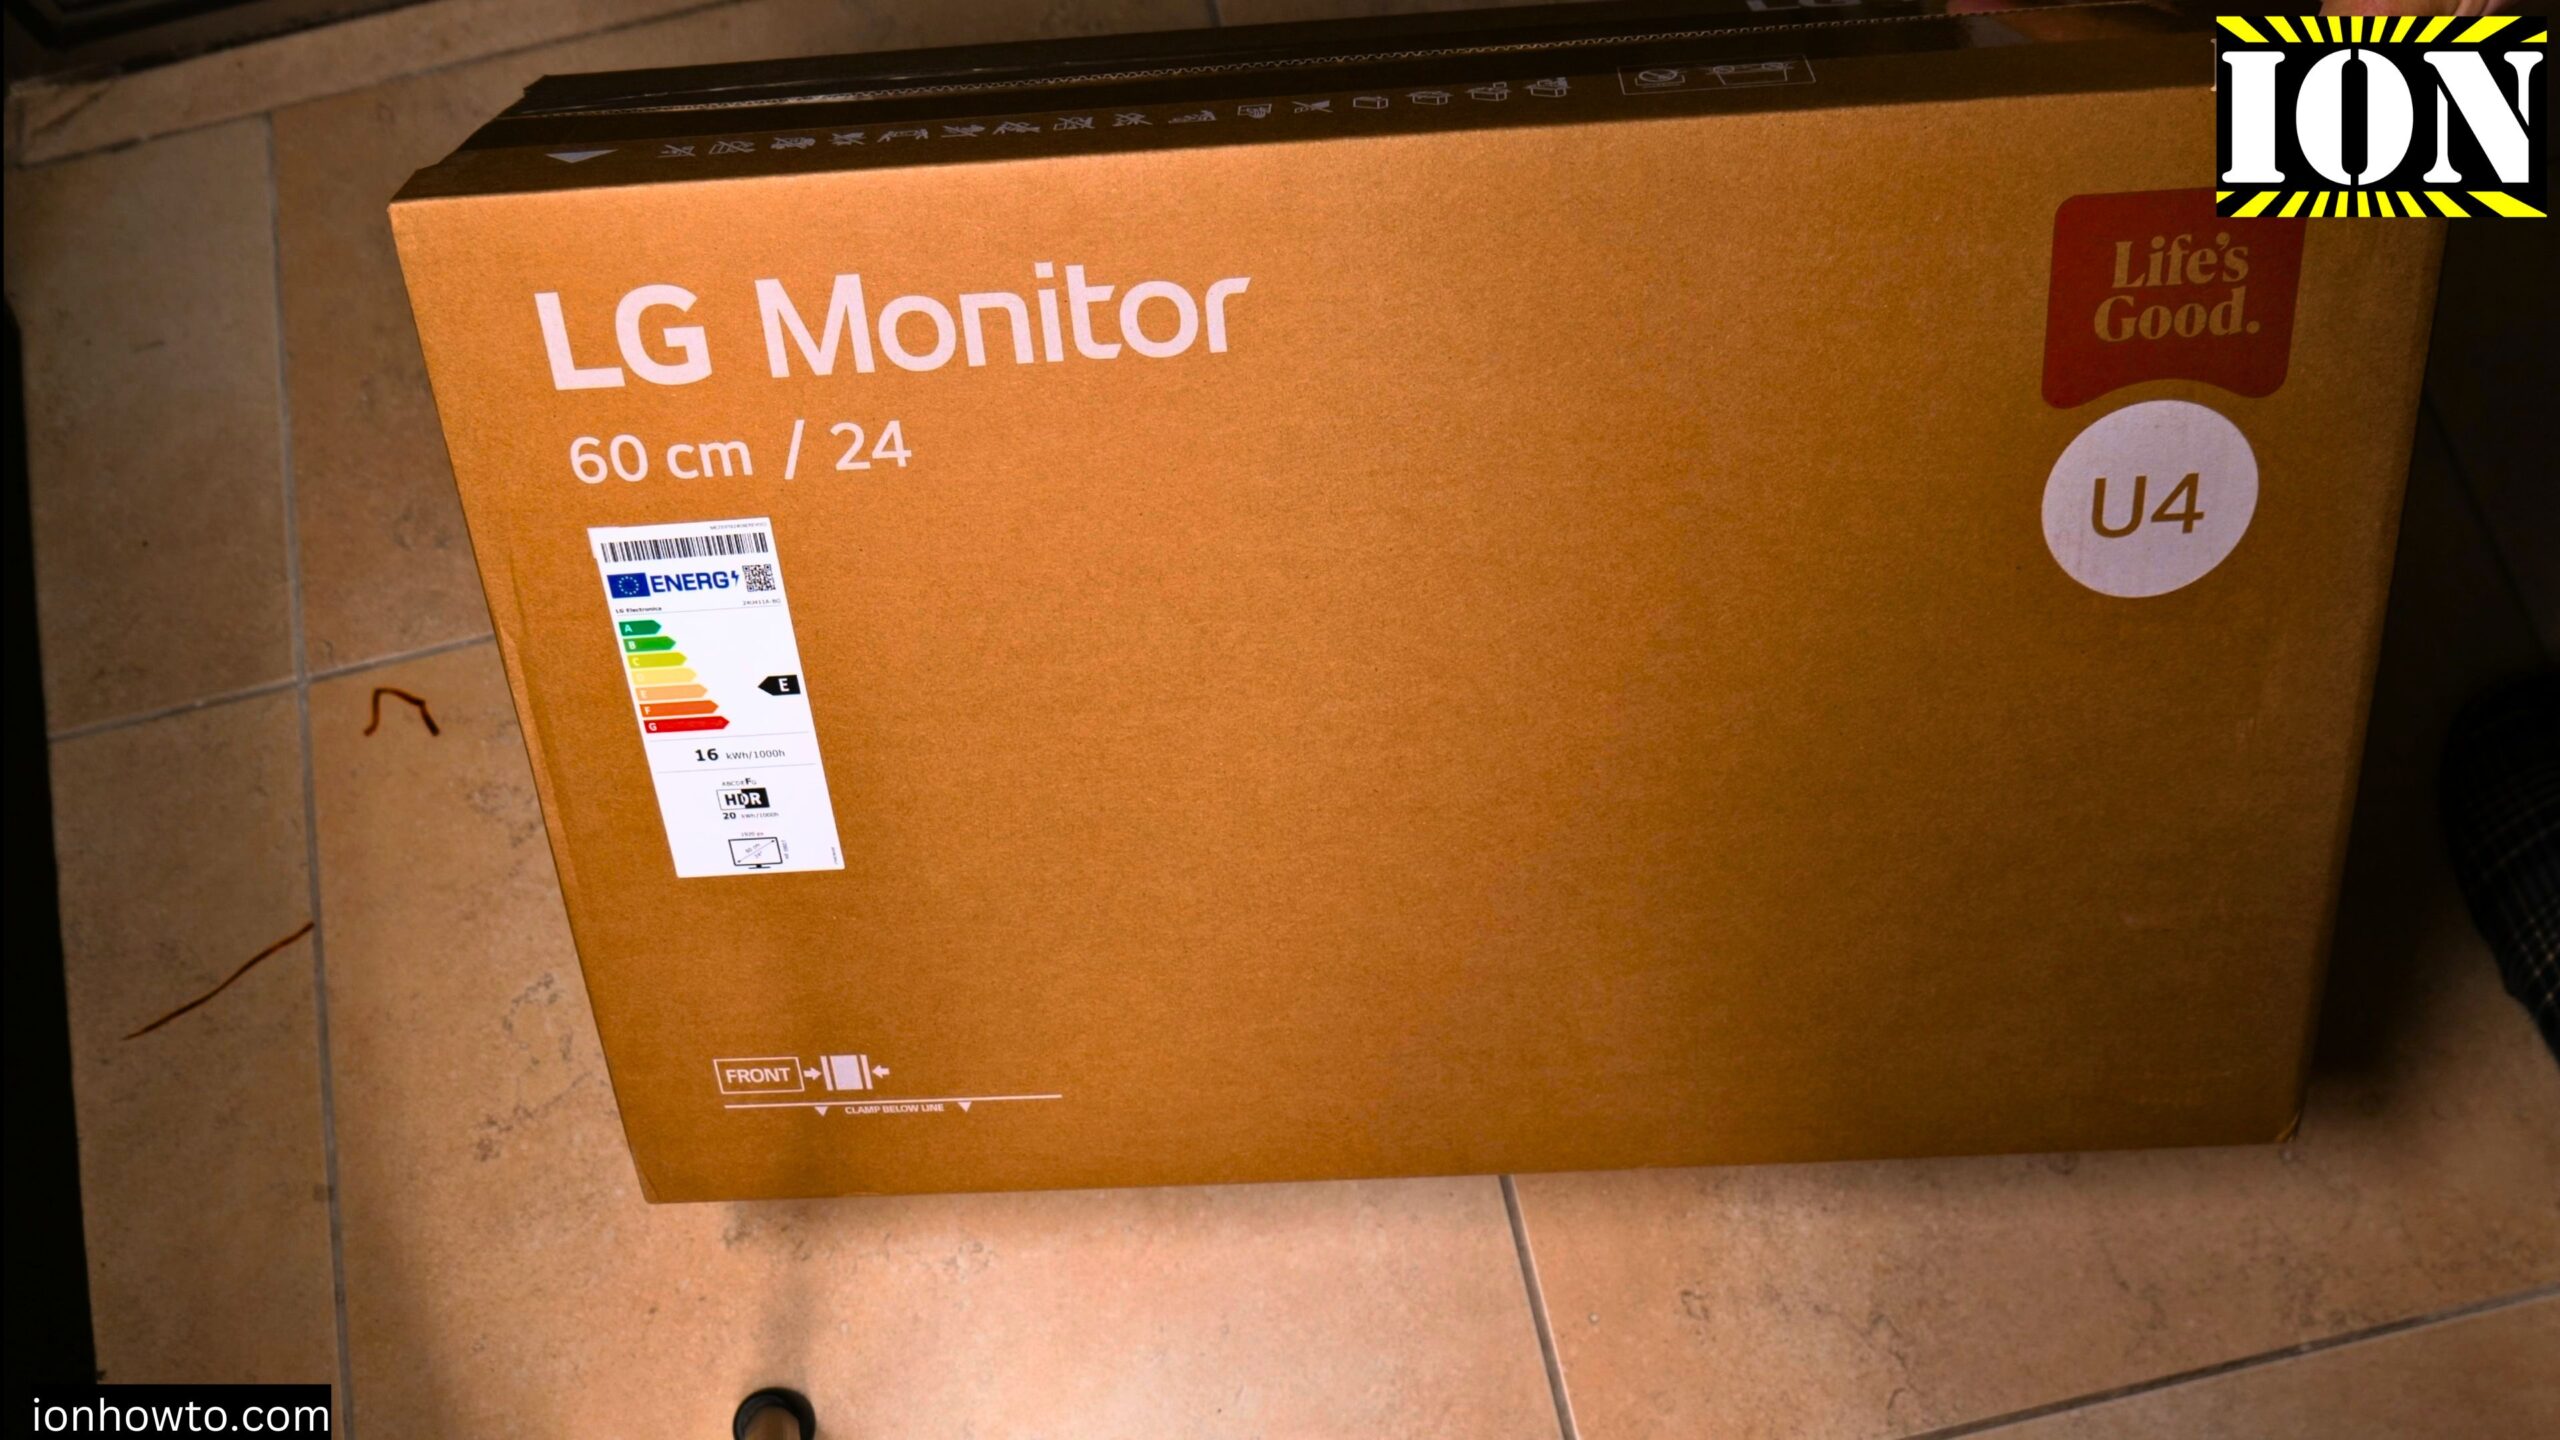
What Is the LG 24U411A-B?

This is a 24 inch IPS monitor from LG. The model name is U4 series. It has a Full HD resolution of 1920×1080. The screen measures 24 inches diagonally, which is about 60 centimeters. It includes HDR support, though turning that on affects power usage.
The monitor is made in China. The EAN barcode is 8806096543757.
Energy Rating and Power Consumption
This monitor has two different energy ratings depending on whether you use HDR.
With HDR turned off, it uses 16 kWh per 1000 hours of use. The energy class is E.
With HDR turned on, it uses 20 kWh per 1000 hours of use. The energy class is F.
So using HDR mode does increase power consumption by about 25 percent. If you want to save electricity, keep HDR off for everyday tasks.
What Is Inside the Box
The box contains everything you need to start using the monitor. No extra cables or parts to buy separately. Here is exactly what comes inside.
The monitor screen itself
The stand base
The stand neck or arm piece
Two mounting screws
One HDMI cable
The power adapter
A quick setup guide
Energy label sticker
Warranty and regulatory information
The Power Adapter Details
The monitor uses an external power adapter, not a direct power cord. Here are the specifications for that adapter.
LG power adapter
Model number: ADS-25FSF-19
Part number: EAY62768625
Input: 100-240 V AC, 50/60 Hz, up to 0.7 A
Output: 19 V, 1.3 A, 24.7 W
The adapter has a barrel connector with a pin inside that plugs into the back of the monitor. The power cord from the adapter to the wall is about 1.5 meters long.
One important note. In some countries like Cyprus, the adapter may come with a European style plug but no included adapter for local outlets. Check your box carefully to see if a local plug adapter is included. In this unboxing, it was not included.
The HDMI Cable
The included HDMI cable is HDMI to HDMI. It feels solid and well made. The length appears to be about 1.5 meters. That should be plenty to reach from your computer to the monitor on a standard desk.
Having an HDMI cable in the box saves you money. You do not need to buy one separately.
The Stand and Base
The stand comes in two pieces. There is a neck or arm piece that attaches to the back of the monitor. There is also a flat base piece that sits on your desk.
The base is heavier than expected. That is good because it keeps the monitor stable. You can even place small items on the base if you want.
The stand attaches to the back of the monitor using two screws. The screws are included in the same bag as the HDMI cable. Do not throw that bag away. The two screws are M4 size and both are identical.
Ports and Connections on the Back
On the back of the monitor, you will find these connection ports.
VGA port – This is an older connection type. Useful if you have an older computer.
HDMI port – Use this with the included HDMI cable for the best quality.
Audio out – Plug in headphones or external speakers.
Power port – This is where the barrel connector from the power adapter goes.
VESA Mount Compatibility
The back of the monitor also has VESA mounting holes. This means you can remove the included stand and attach the monitor to a wall mount or a desk monitor arm. This is great if you want a cleaner desk setup or need to adjust the monitor position more freely.
What the Quick Setup Guide Says
The quick setup guide has a few useful notes. It recommends using only the supplied components. It warns not to touch the screen during setup. Fingerprints on the screen are hard to clean.
There is also an important note about cables. Using a DVI to HDMI cable or a DisplayPort to HDMI cable might cause compatibility issues. Stick with a standard HDMI to HDMI cable like the one included in the box.
How to Assemble the Monitor
Here are the steps to put everything together.
Lay the monitor screen face down on a soft surface like a towel or the foam from the box. This protects the screen from scratches.
Take the stand neck and attach it to the back of the monitor. Line it up with the mounting area.
Insert the two M4 screws and tighten them by hand. Do not over tighten.
Take the base and attach it to the bottom of the stand neck. It should click or slide into place.
Flip the monitor back over and place it on your desk.
Plug the power adapter into the monitor and into the wall.
Connect the HDMI cable from the monitor to your computer.
Press the power button to turn it on.
Where Is the Power Button
The monitor has only one button. It is located on the bottom edge of the screen. That single button controls power and likely the on-screen menu for adjusting brightness and other settings.
Things to Check Before Using
Before you connect everything, check the screen for any damage. Look at the panel from different angles. Make sure there are no cracks, scratches, or dead pixels. In this unboxing, the screen looked fine with no visible damage.
Also check that you have all the parts. You should have the screen, stand neck, stand base, two screws, HDMI cable, power adapter, and the setup guide.
Quick Summary
Here is everything you get in the box.
LG 24U411A-B 24 inch monitor screen
Stand neck piece
Stand base
Two M4 mounting screws
HDMI cable (about 1.5 meters)
Power adapter with barrel connector
Quick setup guide
Energy label
Warranty and regulatory papers
Final Thoughts
This LG monitor is a basic but solid 24 inch display. It includes an IPS panel for good viewing angles. Full HD resolution at 1920×1080 is fine for everyday work, browsing, and watching videos.
The inclusion of an HDMI cable and power adapter means you can use it right out of the box. Just be aware that if you live in a country like Cyprus, you might need your own plug adapter for the power supply.
The energy rating of E or F is not the best, but that is normal for monitors in this price range. If you care about power savings, keep HDR turned off for regular use.
The stand base is nice and heavy, so the monitor will not tip over easily. You can also mount it on a VESA arm if you prefer.
If you have questions about setting up this monitor with a specific computer or need help with the power plug situation, let me know.
Leave a Reply Cancel reply