


How to Replace a Toilet Inlet Valve with a Siamp Valve Step by Step.
Learn how to replace your toilet inlet valve and fix problems like hissing noises, running water, or a toilet that won’t fill up.
If your toilet is making a hissing sound, keeps running, or fills up very slowly, the inlet valve might be the problem. I show you how to replace it with a Siamp inlet valve. This guide also covers the cheap washer inside that often fails first.
When Should You Replace the Inlet Valve?
Here are some signs that your inlet valve needs attention:
· The toilet makes a hissing noise even when not in use
· The toilet keeps running water into the bowl
· The tank fills very slowly or does not fill at all
· You have already tried cleaning the valve and it did not help
Sometimes you only need to replace a small rubber part inside the valve. This is called the inlet valve diaphragm or membrane washer. It is very cheap and easy to replace if you can find the right size.

What You Will Need
· A new Siamp inlet valve (or just the diaphragm washer if that is the only problem)
· An adjustable wrench or pliers
· A small towel or bucket to catch water
· The new seal for the water line (comes with the new valve)
Step-by-Step Instructions
Step 1: Turn off the water supply
Find the shut-off valve near the wall behind the toilet. Turn it clockwise to shut off the water. Then flush the toilet to empty the tank. Use a towel or small bucket to soak up any leftover water.
Step 2: Disconnect the water supply line
Use your wrench to loosen the nut connecting the water line to the bottom of the inlet valve. Have a towel ready because a little water may spill out.
Step 3: Remove the old inlet valve
Inside the tank, loosen the plastic nut holding the inlet valve in place. This nut is usually under the tank, around where the water line connects. Once it is loose, pull the old valve out from inside the tank.
Step 4: Install the new Siamp inlet valve
Place the new valve into the hole from inside the tank. Make sure it sits straight. From under the tank, tighten the plastic nut by hand first, then give it an extra turn with pliers. Do not overtighten or you could crack the plastic.
Step 5: Reconnect the water supply line
Attach the water line to the bottom of the new valve. Use the new seal that came with your Siamp valve. Tighten the nut firmly so the water line does not leak.
Step 6: Turn the water back on
Slowly open the shut-off valve counterclockwise. Watch for any leaks around the plastic nut and the water line nut. If you see water dripping, tighten both nuts a little more.
Step 7: Check for proper operation
Let the tank fill completely. Listen for hissing sounds. Flush the toilet and watch if the tank refills normally. Check again for leaks.
If the Toilet Keeps Running After Replacement
Sometimes the problem is not the inlet valve. It could be the flush valve (also called the outlet valve). If water is leaking from the tank into the bowl, the flush valve is not sealing properly.
How to check for a flush valve leak:
· Dry the inside of the toilet bowl completely
· Wait a few minutes without flushing
· Look for a streak of water flowing down from under the rim
If you see water running, the flush valve needs attention. Cleaning it might help, but replacing it is the best long-term fix. On my toilet, the flush valve is also a Siamp brand and has never needed replacement.
A Note About the Cheap Fix
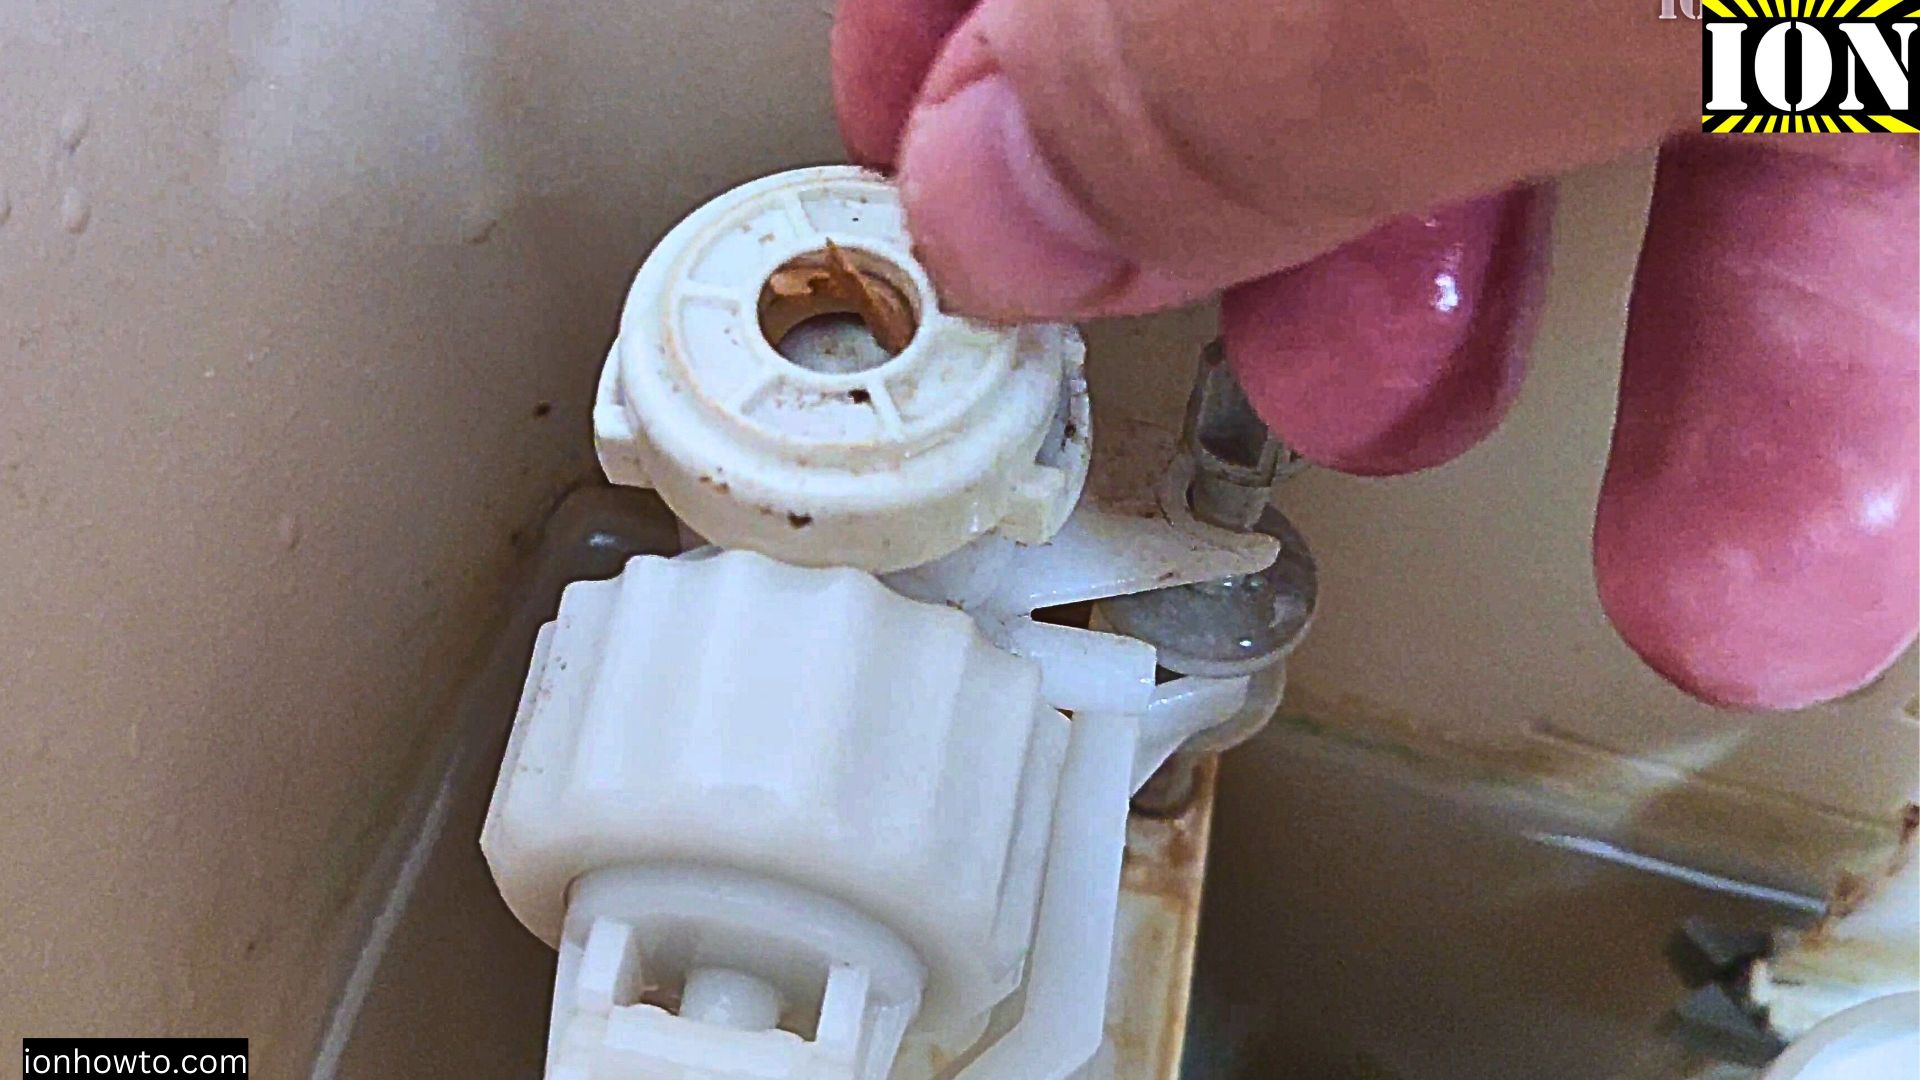
Before replacing the whole inlet valve, check if you just need a new diaphragm washer. This is the rubber part inside the valve. It can become rigid or crack over time. When that happens, water stops flowing properly.
To replace just the diaphragm washer:
· Open the top of the inlet valve (varies by model)
· Remove the old rubber washer
· Take it to a local hardware shop to find a matching replacement
· Install the new washer and reassemble
This fix costs very little and takes just a few minutes. But you must get the exact same model of washer. That is why you should bring the old one with you to the store.
Important Note for American Readers
In the United States, the inlet valve is often positioned on top of the tank and is a bit larger than European models like the Siamp. Make sure you get a replacement valve or washer that fits your specific toilet. Take the old part with you to the store to avoid buying the wrong size.
Clean Everything and Check for Leaks
After you finish the installation, wipe up any water inside and outside the tank. Check for leaks again after one hour and again the next day. A small drip can cause damage over time, so it is worth double-checking.
Leave a Reply Cancel reply