
Apple USB-C Cable Protector DIY Spring Support Life Hack.
Learn how to make your Apple USB cables last longer with a simple, free DIY trick. If you’ve ever had a USB or headphone cable fray and break right at the plug, this spring support method can help prevent that damage.
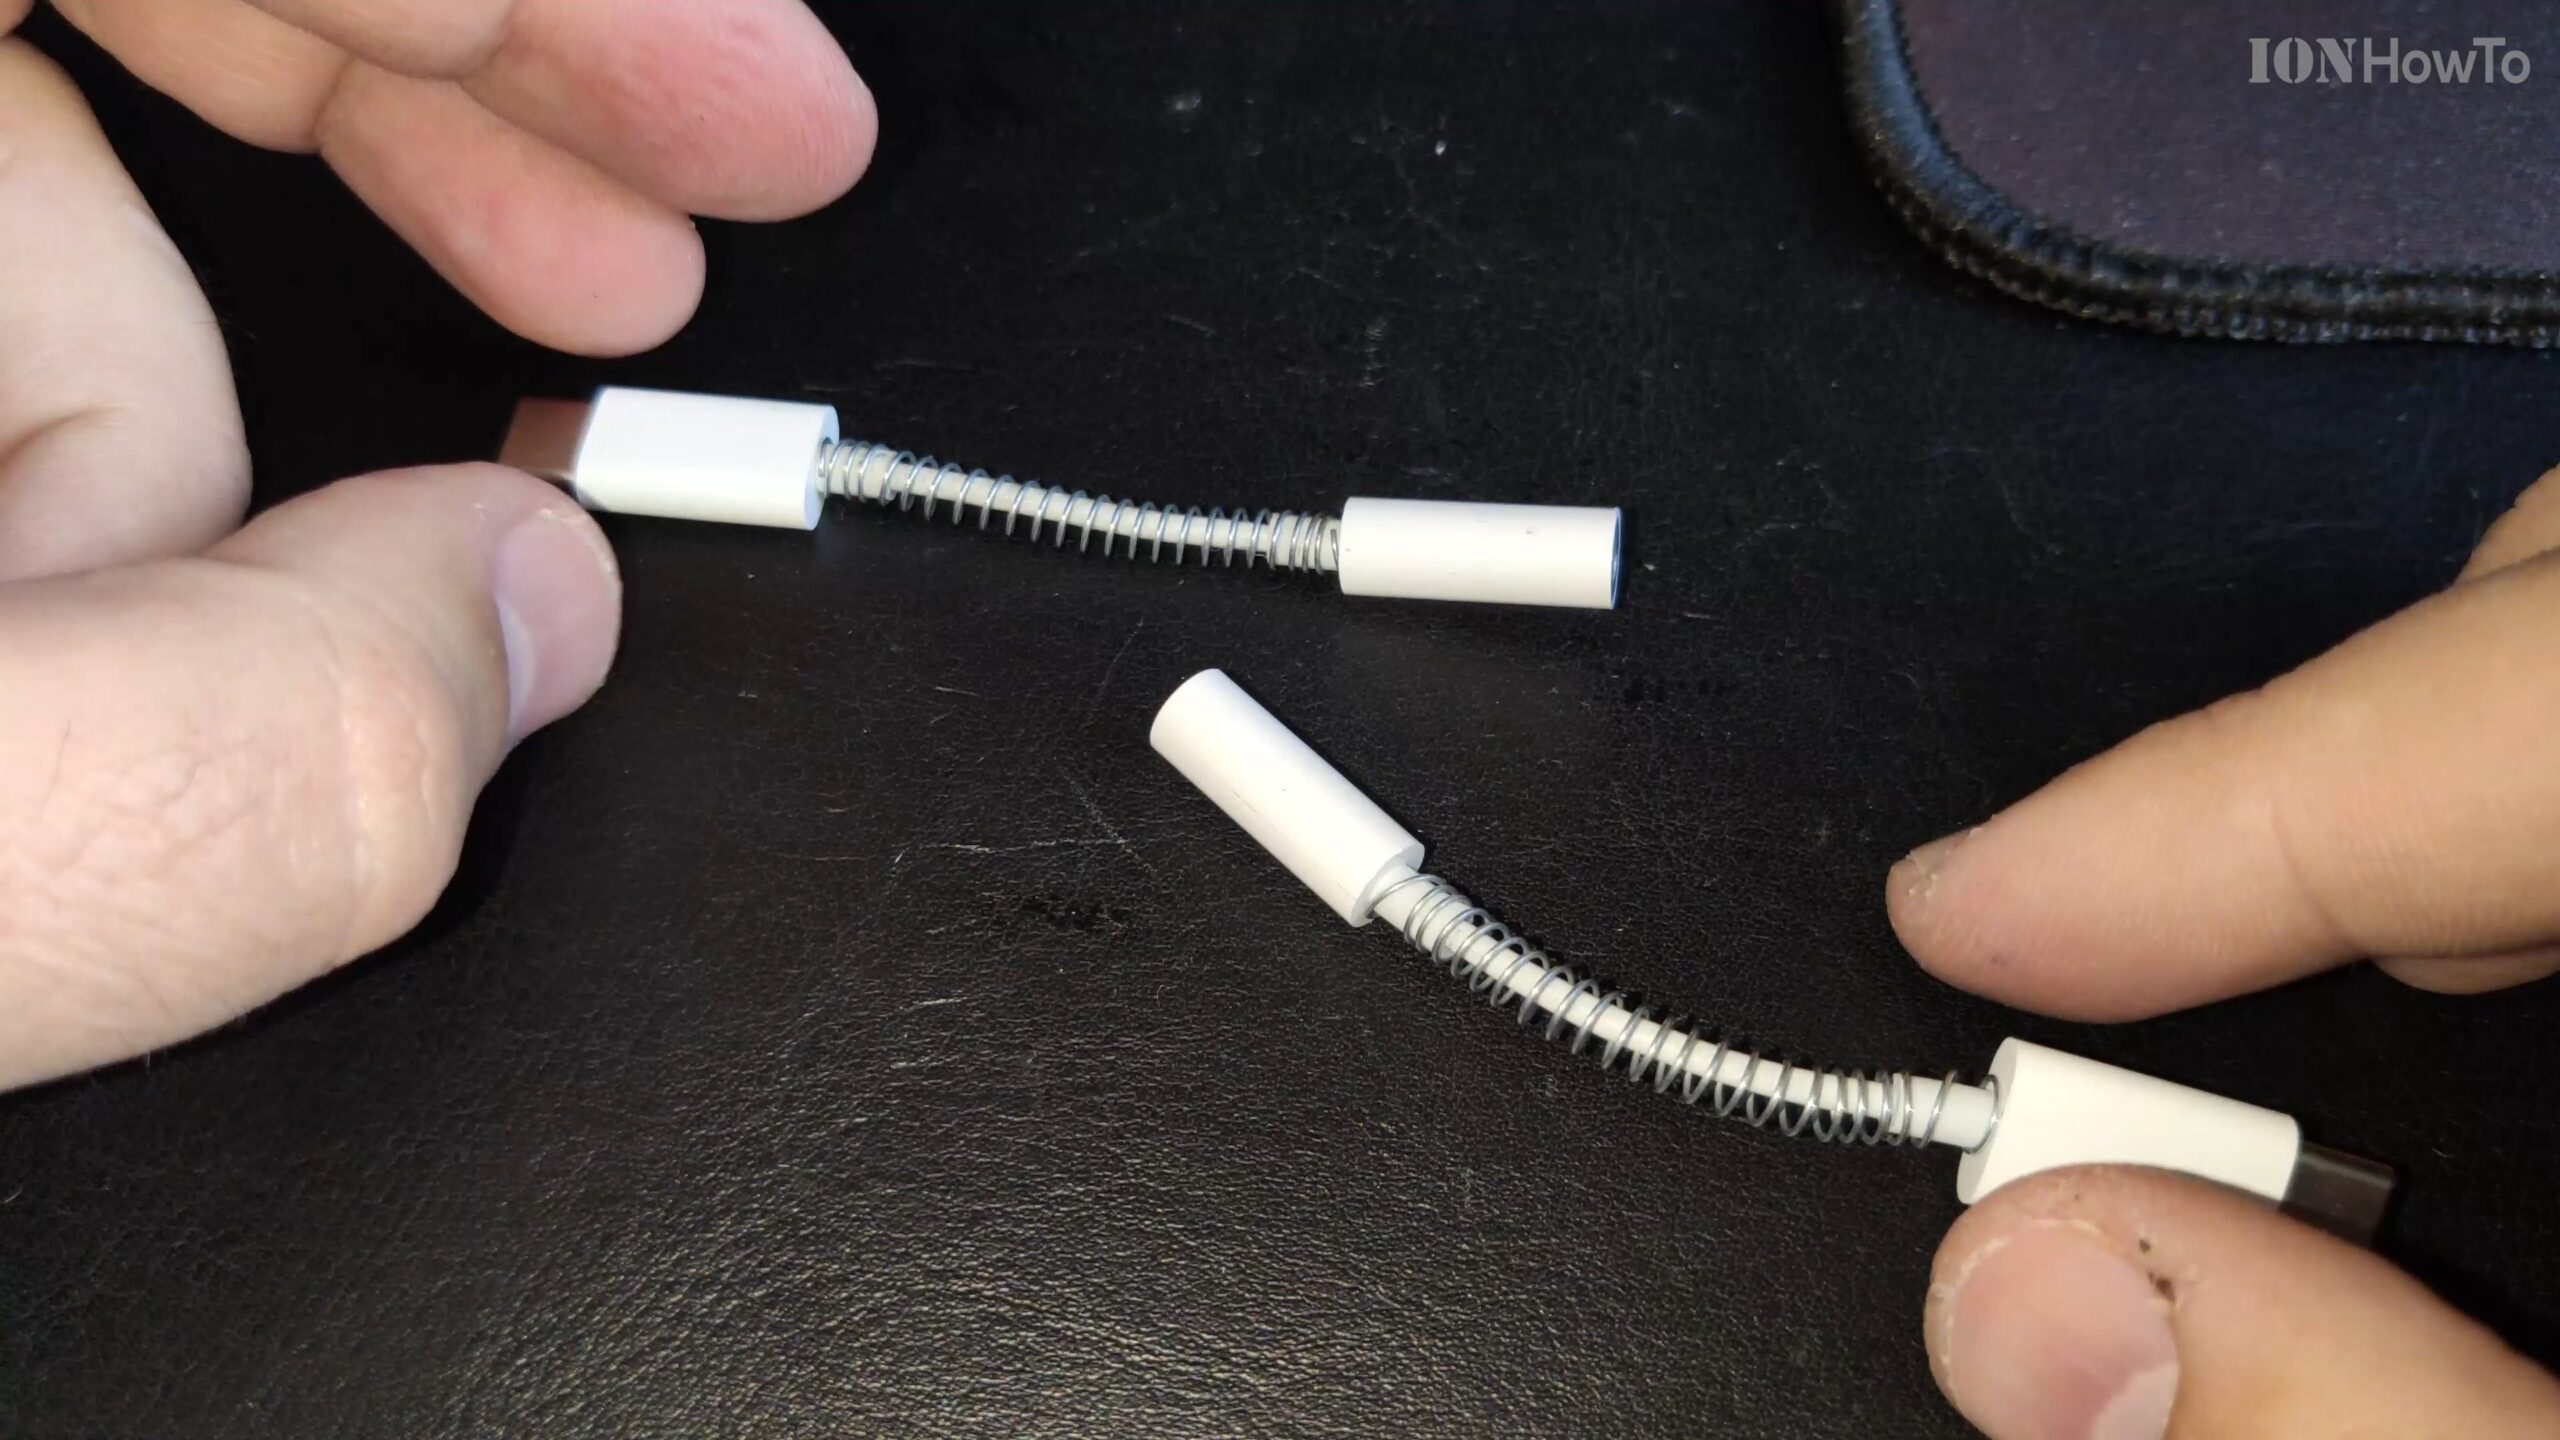
This life hack is demonstrated on an Apple USB-C to 3.5mm headphone adapter cable, but you can use it on any USB charging cable or headphone cable to add strength and flexibility at its weakest point.
Why Cables Break and How a Spring Helps
Cables often fail right where the flexible wire meets the stiff plastic plug. Every time you bend the cable at this sharp angle, the internal wires get stressed. After enough bends, they can fray and break.
Wrapping the cable with tape is one common fix, but it can make the joint too stiff and still might not last. A better solution is to use a spring from an old pen. The spring acts as a flexible skeleton, absorbing the bend and spreading the stress over a longer section of the cable. This prevents a single sharp kink from forming.
What You’ll Need
You don’t need to buy anything special for this project. Here is what you’ll need:
- A cable to protect (like an Apple adapter, USB cable, or thin headphone cable).
- An old pen or mechanical pencil that you don’t mind taking apart.
- A pair of small pliers (helpful, but not essential).
The Steps to Add a Spring Protector
Follow these steps to add a durable spring to your cable.
Step 1: Find and Prepare the Spring
- Take apart an old pen or mechanical pencil.
- Remove the small spring from inside.
- Look for a spring with plenty of coils; the more coils, the better the protection will be.
- Gently stretch the spring out to separate all the coils. You want it to be long enough to cover the vulnerable part of the cable, from the plug to about an inch or two down the wire.
Step 2: Attach the Spring to the Cable
- Hook one end of the stretched spring onto the cable, just below the plastic plug. Think of it like putting a key on a key ring.
- Begin carefully coiling the spring around the cable. As you twist it, the cable will naturally thread itself through the center of the spring.
- Keep twisting until the spring covers the entire stress point.
Step 3: Secure the Spring in Place
- Once the spring is wrapped, gently compress it back together slightly. This helps it grip the cable.
- Ensure the end of the spring isn’t digging into the cable’s outer jacket. You can use pliers to gently bend the very last coil outward if needed.
- That’s it! The spring should now be firmly in place, moving flexibly with the cable.
Tips for Success and Other Options
- Test Different Springs: Not all pen springs are the same. Some are thicker or have tighter coils. Try a few to find one that’s the right diameter for your cable.
- A Note on Heat Shrink: Some people use heat shrink tubing, but this requires a heat source and permanently stiffens the area. The spring method is non-destructive and can be removed or adjusted easily.
- When to Consider a Replacement: If a cable is already badly damaged internally, a spring can’t fix broken wires. For critical connections, a new cable is the safest choice.
This simple DIY trick takes just a few minutes and can save you from constantly replacing expensive adapter cables and chargers. By adding a spring, you give your cable a flexible shield that absorbs daily wear and tear, making it last much longer.


Leave a Reply