
USB OTG Y Cable – Power External HDD
Power an external Hard Disk Drive (HDD) with this DIY USB OTG Y Cable.
It’s simple to make and with this you can power external USB OTG devices that require more power than what a Smartphone or Tablet can provide.
You can use an old cable for this or use new parts.
Check the circuit diagram in the video.
USB OTG Y Cable Video
About the cable
Power an external Hard Disk Drive (HDD) with this DIY USB OTG Y Cable.
It’s simple to make and with this you can power external USB OTG devices that require more power than what a Smartphone or Tablet can provide.
You can use an old cable for this or use new parts.
Check the circuit diagram in the video.
Making the cable
Today we make a cable that will power an external Hard Drive.
You ca use it on your mobile phone and charge it at the same time.
For this you can use an USB cable
First, just cut one end and the other end also.
What we have now is one short Male USB connector and a USB cable that has no connector at any of the ends.
Prepare the both ends of the cable to solder them so remove the insulation and prepare the cables.
On the cable that has the male USB connector, we remove the white and green cables and cut them, just make sure they don’t get shorted later on so maybe not as short as I did here.
We will only use 2 cables, the black and the red one for power.
Prepare the USB connector and cut the cables so they are the same length and shorter than before.
Diagram
This is a normal diagram for OTG but in our case we will use the power later so we attach the power to black and red.
Black and red here will have the external power.
Here pin 1 goes to Positive +.
Just wire them as you’ve seen in the diagram and it’s not so difficult just take your time, don’t make it too fast.
Pins 1,2,3,4
Red, White, Green and Black
Also, cut the wires so they’re short and at the same length and this is how you connect everything.
Now the next step is to attach the male USB connector.
This is where the external power comes in and it’s just a matter of connecting the red to red and black to black.
Like this it’s a good connection and also you can protect it from mechanical stress later on.
Be sure that there is no short between those white and green wires from the short male USB cable.
Put a heat shrink on top of it and this one will really keep everything together.
Between pin 4 and 5 you can put either a wire or a 100k resistor.
I wanted to test both options and here I have a switch that enables me to switch between them.
Starting with the switch disconnected so it’s on the 100k resistor.
As soon as I plug it in, the tablet starts to charge but the USB doesn’t work on this USB Flash Drive.
The powerbank charges it while the USB doesn’t work so I’ve read that this could be different depending on the device so on my tablet, this doesn’t work with the 100k resistor.
You might want to make the cable with a switch so you can switch between modes.
When I turn on the switch it’s like having a wire between pin 4 and 5 and it’s just like a regular OTG cable but on this tablet it doesn’t charge when I do that, you will see it stops, after a while it just stops charging.
That’s not good news.
On other devices, it works… I will show you later.
I wouldn’t want to have a switch like that on the cable and for me the 100k resistor doesn’t really do anything.
So that was a good test but I’m going to remove it and I advise you don’t even use a 100k resistor. Just use a wire between pin 4 and 5 and that should do the trick.
You can use any wire, just as long as it’s small enough so it doesn’t interfere with the case.
When you’re ready put hot glue around the USB connector.
Especially the one where you joined the cables together.
So that there is protection from mechanical stress so the wires don’t break over time when you se the cable.
Put as much as you like, there is no right or wrong but I would say, don’t put too much, just put enough so you can cover it.
Then just placing as heat-shrink on top of the both cables and the magic of heat-shrink…. cable
does this.
It looks pretty good.
So that’s the cable
We have one male USB connector on one side, Female USB connector there and the micro USB that goes into the phone or the tablet here.
I just placed heat-shrink on that one also because I couldn’t really put the connector back on how it should have been.
It works and that’s the cable.
Test it.
You plug the HDD in the Female connector and then the male connector will go into a power-bank or a charger or anything that provides USB power (+5V).
The Hard Disk powers on a little, sees there is no data because now it’s only connected to power.
It powers off and goes into stand-by.
After we connect the power bank, we connect the tablet and look the magic happens.
The tablet can use this external Hard Drive which would normally not work with this tablet or any other tablet or a mobile phone because normally the tablet doesn’t have enough power, it doesn’t provide enough power for this Hard Drive to work.
But now we are using it on the tablet and could even use it on a phone.
That’s pretty useful sometimes.
The problem on this tablet is that while it can use the Hard Drive and the external device is powered.
This tablet is not charging while I use it like this.
Other devices do and I will show you that you can have
another device working.
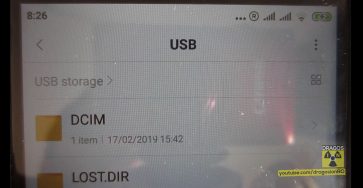
On the Xiaomi phone
The phone can access a flash card, a flash drive and the phone is also charging at the same time.
You can see while I’m browsing the card it’s charging.
I couldn’t make it work with the Hard Disk and I think it’s because of the phone that I couldn’t do it. It’s because of compatibility and file systems and I didn’t want to change the filesystem on the Hard Drive but as you see, it’s charging and using the USB at the same time.
Now the USB is disconnected.
I plug it back in and it’s shows up there. it’s ready to use and it’s charging.
That’s pretty good so this is charging with just a wire without any resistors. Don’t waste your time trying to put switches and resistors and all this.
Just make sure you have a device that is compatible. It depends on the OTG modes and which one is default.
You could even change it thru software if your device is rooted.
You could change the setting so that the OTG behaviour is how you want it.
This is it!
Like the video comment here on the article or in the video if you have any questions.
I hope you want to see more like this.
Let me know in the comments what you did
If you made this cable or if you have another device that you want to power it thru USB.
If you have any questions, feel free to ask in the comments section bellow.


Leave a Reply to Ebraheem Bambotia Cancel reply