
Building a UV LED Array and a PCB exposure box out of cardboard.. yeah.
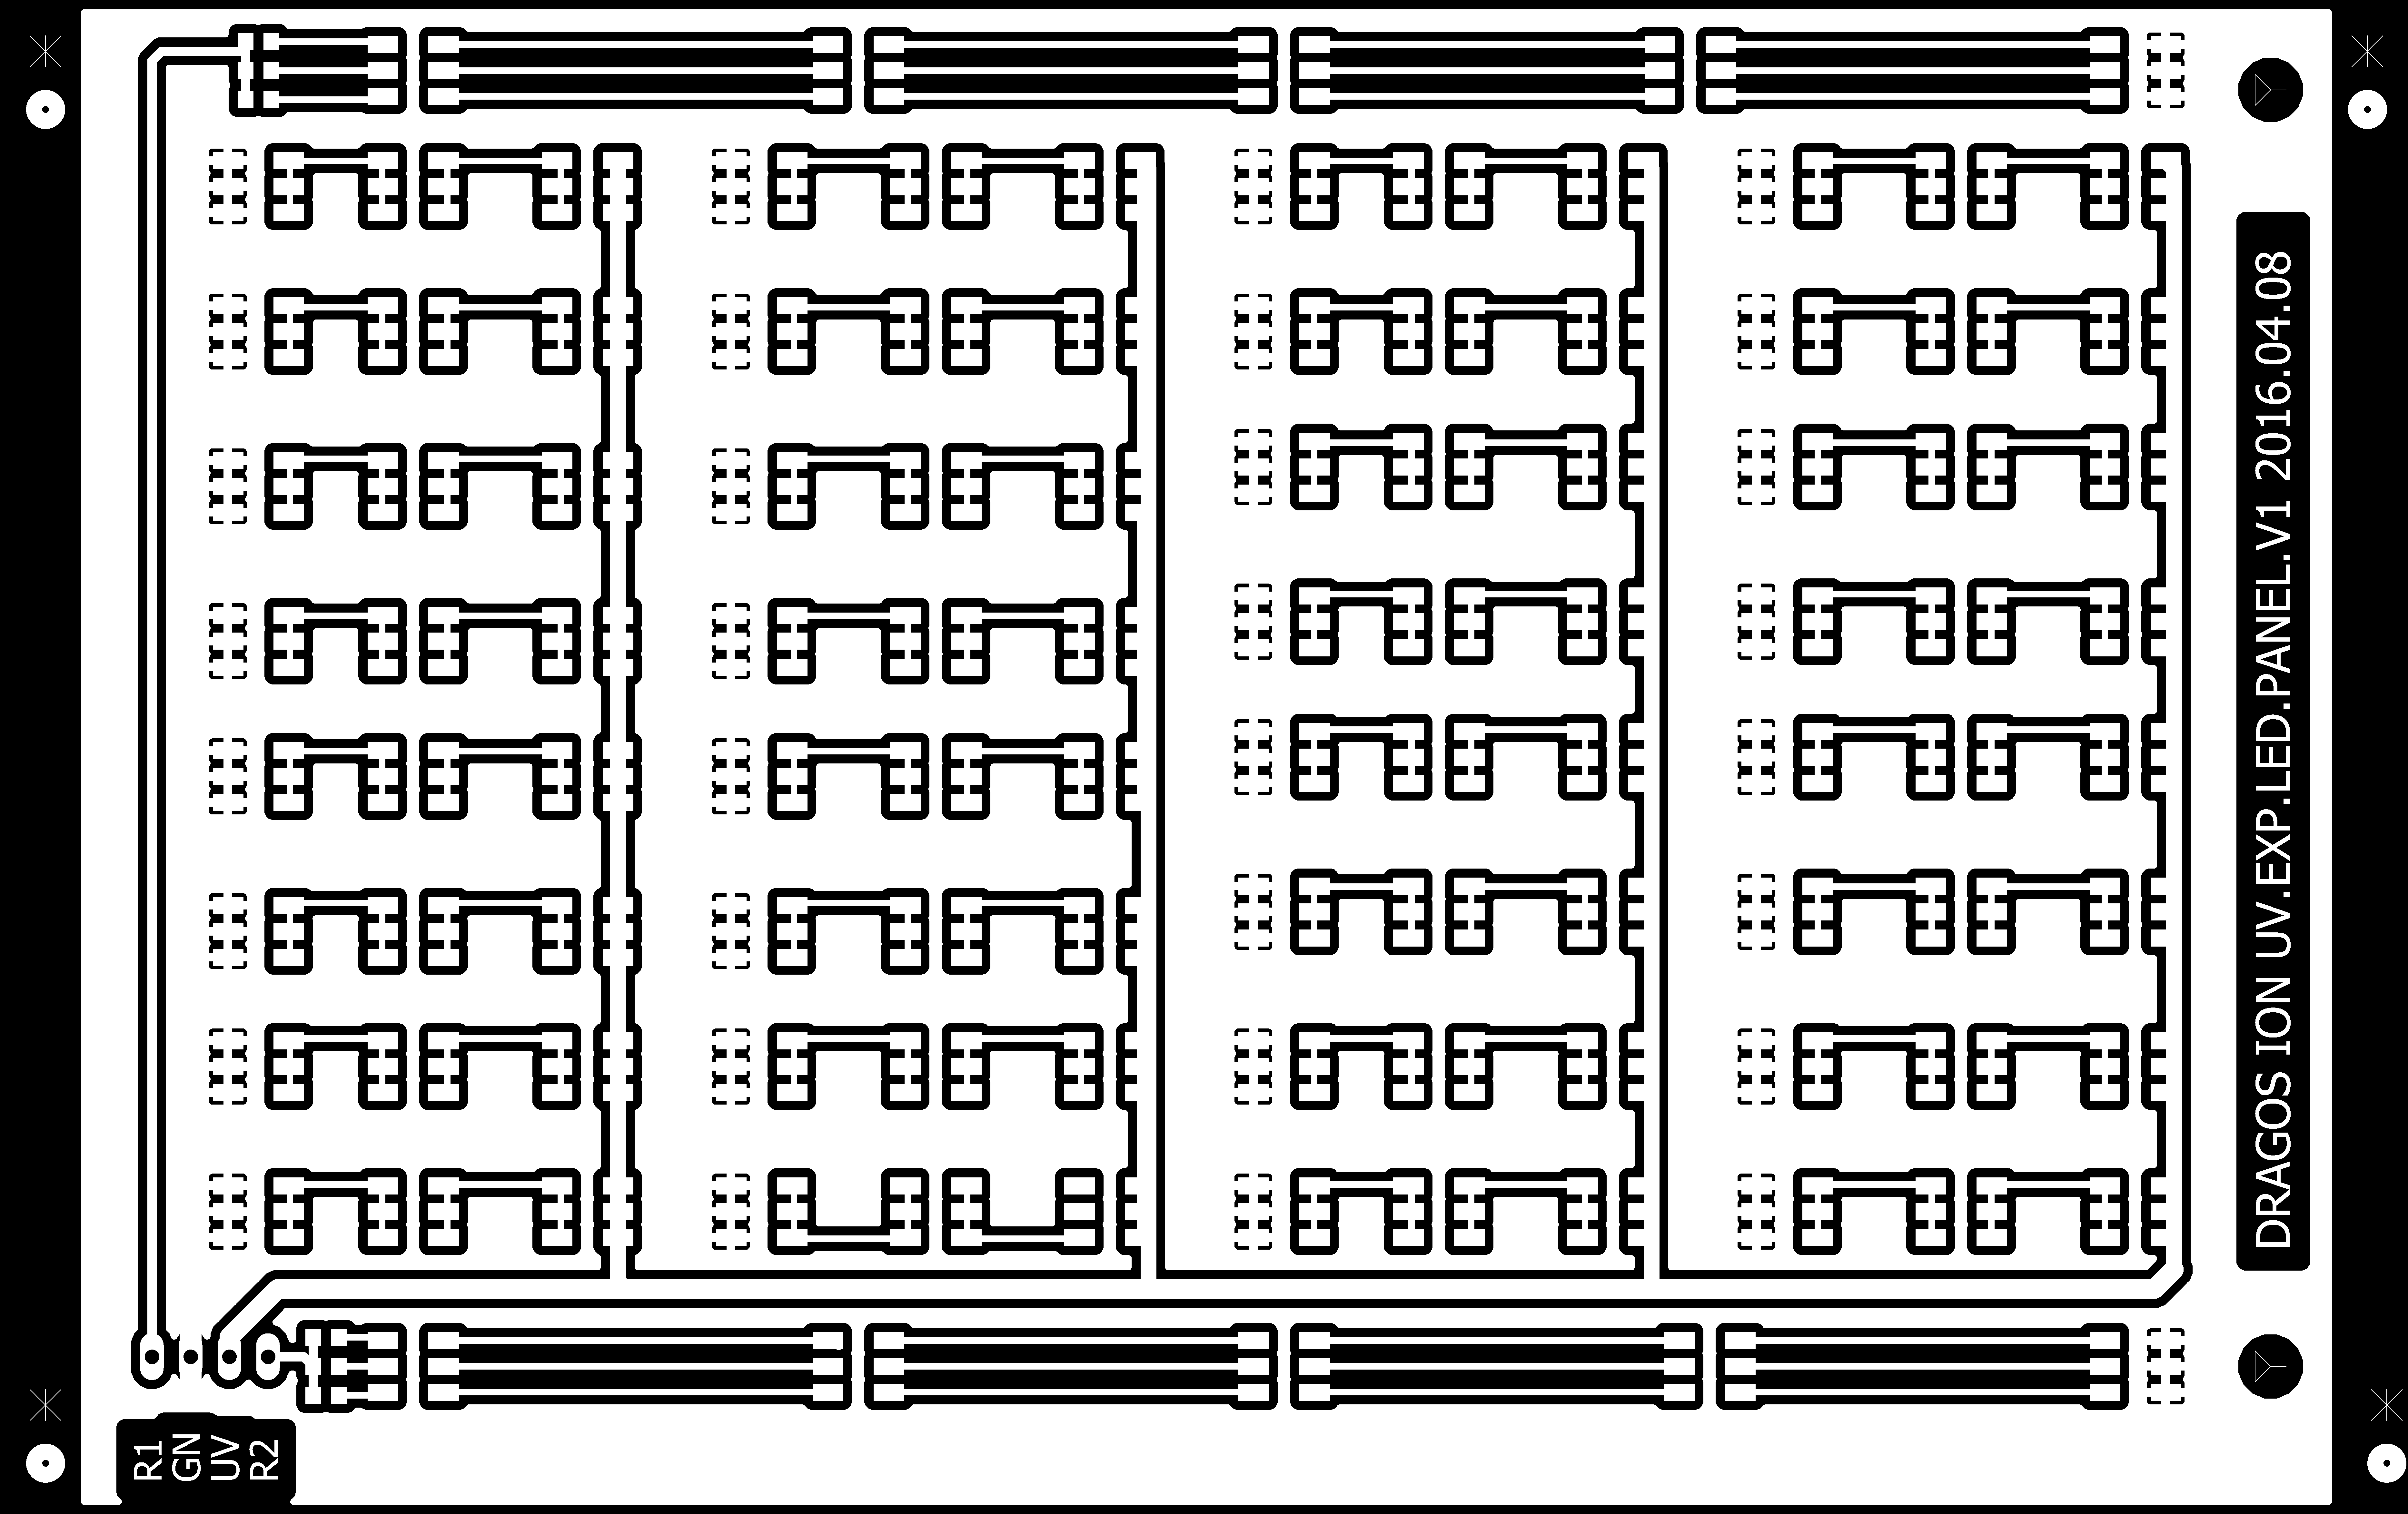
This UV LED Array and box pcb are DIY home built 🙂 with a simple design. This exposes a PCB in 2,5 – 3 min using aproximately 1,2A at 12V I use a 2A 15V power supply that powers a simple LM317T constant current module that keeps the LEDs from burning out. Constant current is at about 1-1,2A, 12V. R1 is 1 Ohm and at least 2W.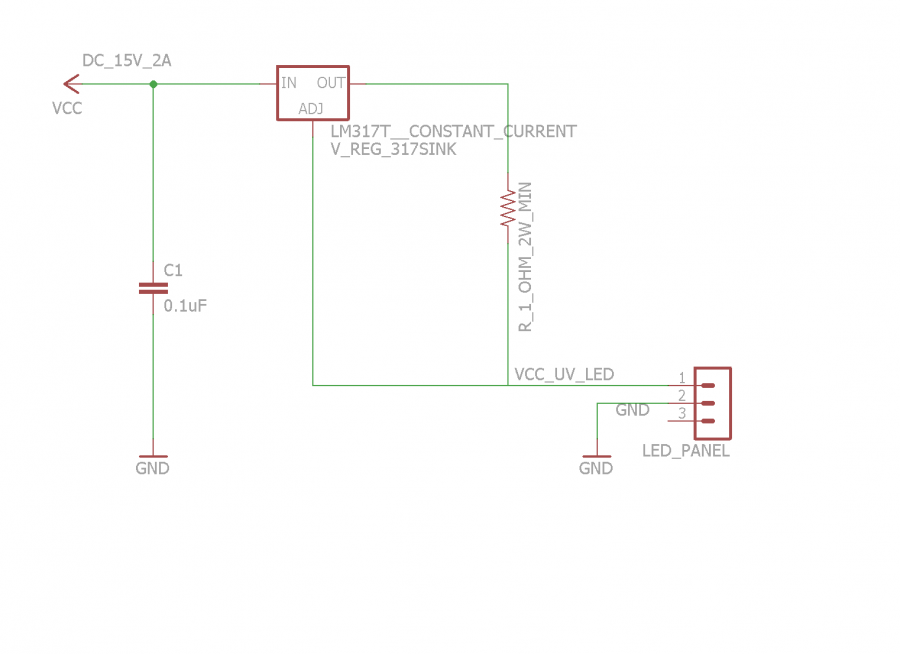 Led Current(I) = 1.25/ R1 Where 1.25 is the reference voltage of the LM317. If you want to use the bellow PCB design, you are free to do so and if you want, please share this page 🙂 Right click and download the bellow 2 images, they are PNG – 1200dpi. Top layer(single) for negative photo resist:
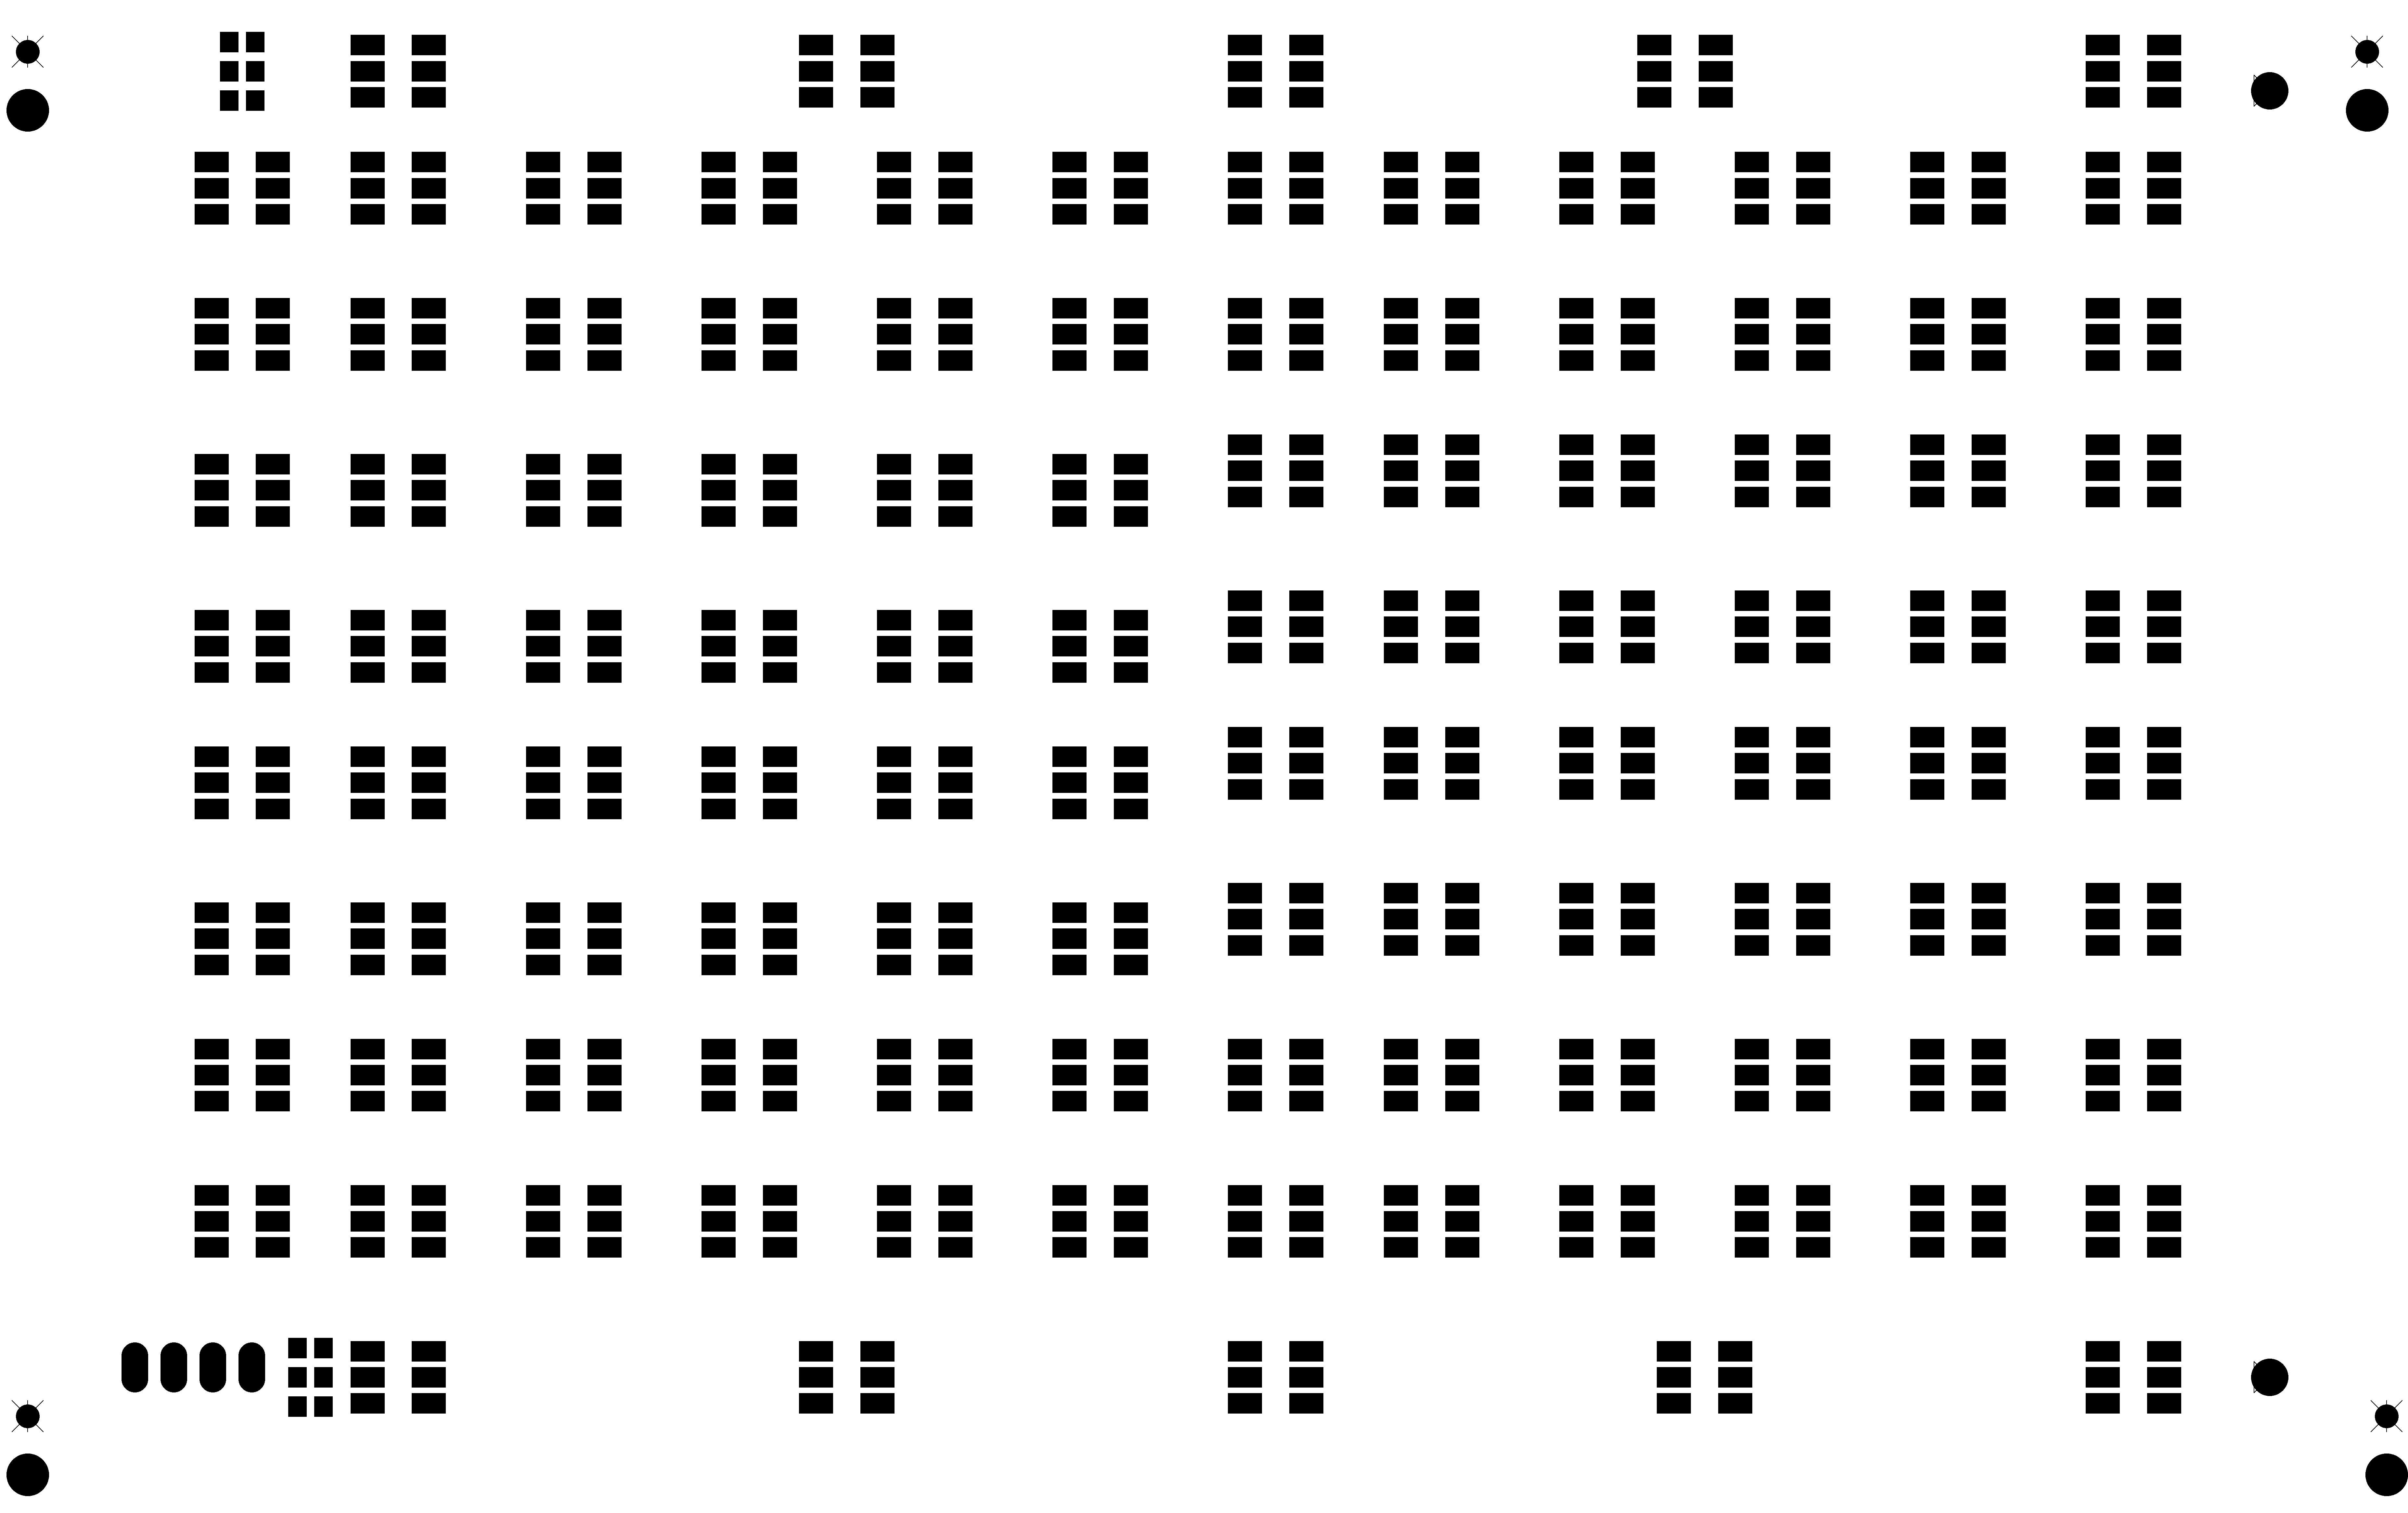
 Solder mask – positive:
 Making the LED Array PCB: The constant current module with everything built in a cardboard box. yes cardboard… 🙂
Related Guides and Helpful Resources
If you found this guide helpful, check out these related step-by-step tutorials and category resources on ION HowTo:
- How to Replace AC Remote Batteries with a Ballpoint Pen: Lever out stubborn AAA batteries from deep remote slots without tools.
- Clean USB-C Port with Paper: Simple household trick to clean lint and debris from loose charging ports safely.
- IKEA KOPLA B22 to E27 Socket Converter Guide: Convert older UK bayonet lamp fittings to fit modern screw-in LED bulbs.
- DIY Hacks and Life Solutions: Explore our full collection of tutorials and step-by-step articles in this category.


Leave a Reply