Category: Home Studio

  • DaVinci Resolve Speed Editor Unboxing Setup First Use

    DaVinci Resolve Speed Editor Unboxing Setup First Use

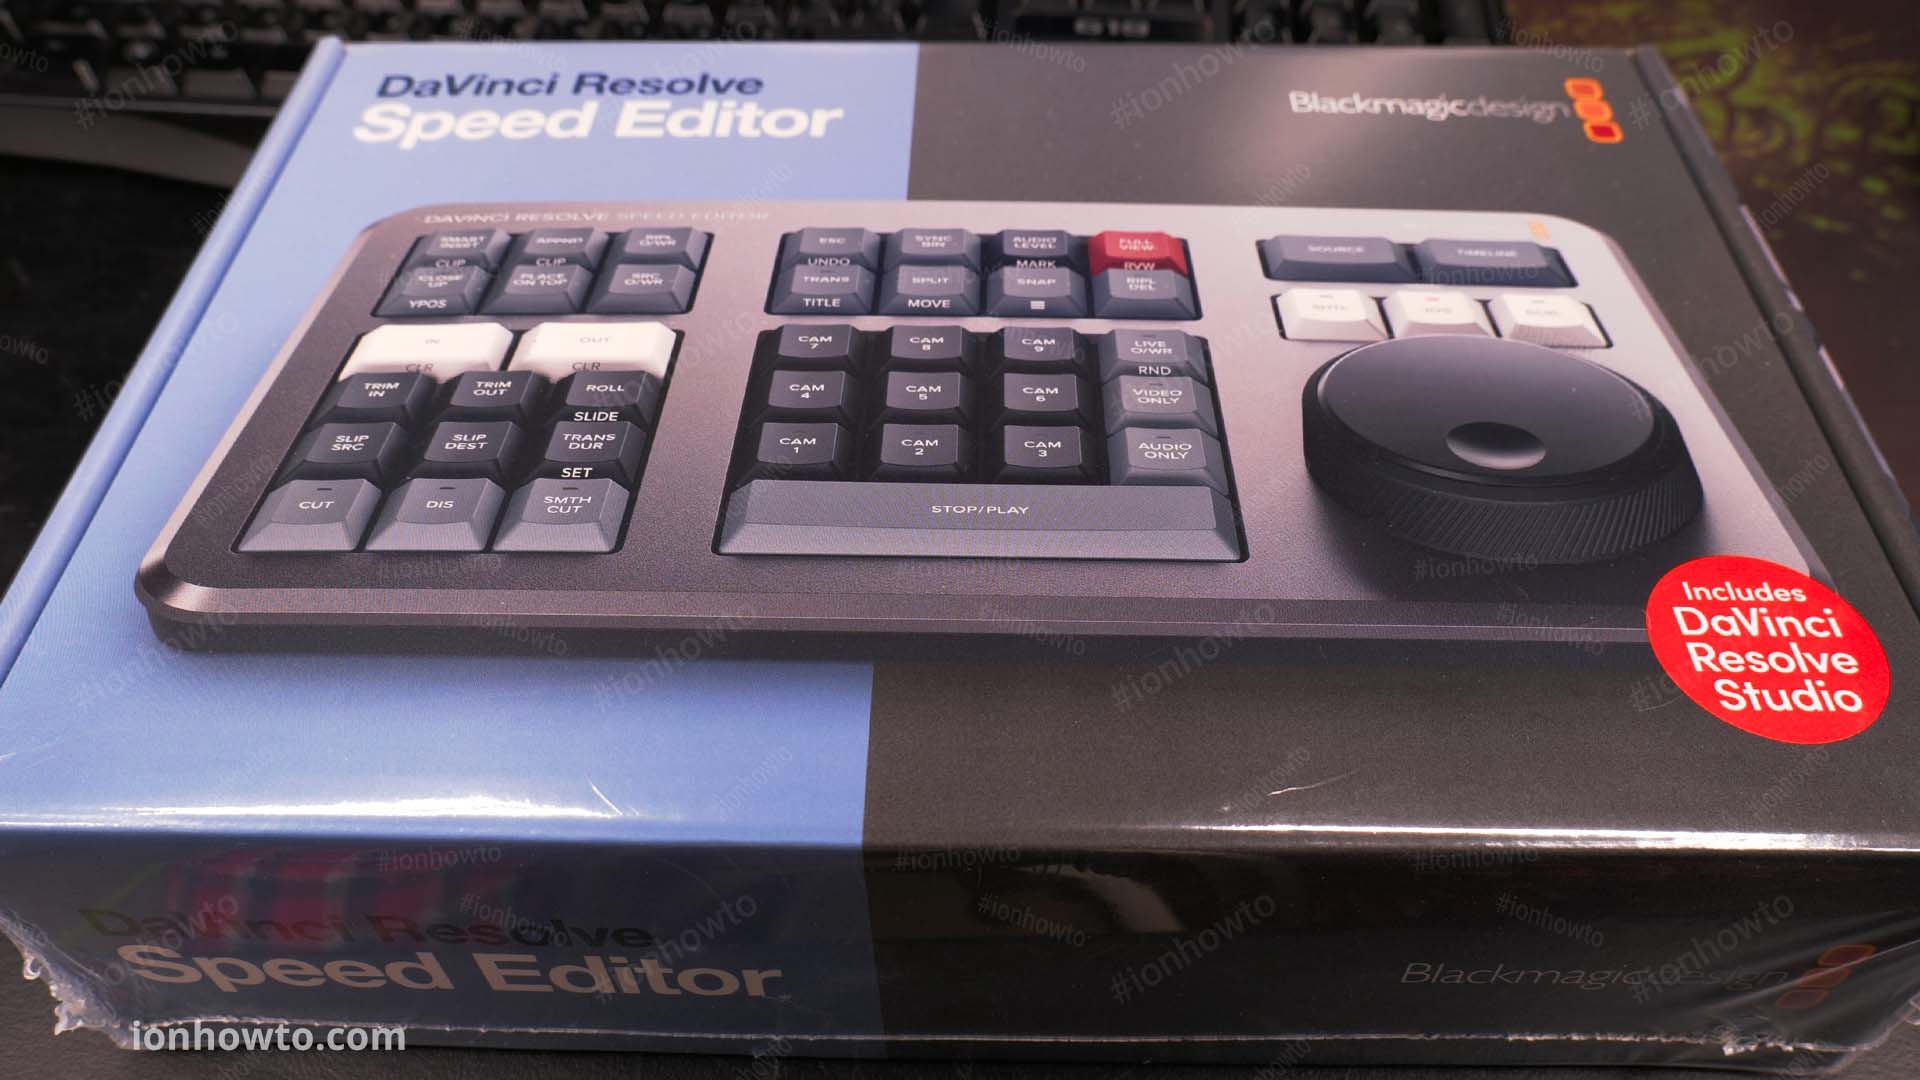
    DaVinci Resolve Speed Editor keyboard unboxing, setup and first use.
    Unboxing the Blackmagic Design DaVinci Resolve Speed Editor keyboard and trying the DVR speed editor for the first time ever.

    Check prices

    Must buy extras

    DaVinci Resolve Speed Editor Unboxing, Setup and First Use

    First Use

    Feel of the buttons is a bit stiff at first but got used to them. They feel very similar to my Logitech G19 PC keyboard and love them.

    DaVinci Resolve Speed Editor Keyboard
    DaVinci Resolve Speed Editor Keyboard

    The jog wheel of the speed editor feels really locked-in with the timeline or source monitor.

    Any small slight movement on the jog wheel reflects in real time on the screen timeline as if there was a physical belt connecting the speed editor jog wheel and DaVinci Resolve Studio.

    The rotating dial feels luxurious with solid weighty feel but very well balanced as seen in the video.

    DaVinci Resolve Speed Editor Jog Wheel
    DaVinci Resolve Speed Editor Jog Wheel

    Jog wheel can function as a shuttle wheel which I personally don’t like much and for fast scrolling thru the timeline. The scroll feels really effective at going thru a lot of footage fast finding what is needed.

    In the video you can also see my first edit with the speed editor and how easy it is to use to put a timeline together.

    DaVinci Resolve Speed Editor Keyboard First Use

    Good things about the DVR Speed Editor

    The DVR Speed Editor comes with a full DaVinci Resolve Studio 18 license (18.1 at the moment works great).
    Not only that but you can activate one license on 2 computers at the same time. In this way it’s like having 2 licenses.

    DaVinci Resolve Studio 18.1 License Speed Editor
    DaVinci Resolve Studio 18.1 License Speed Editor

    Was suspicious when saw the 1 activation left notice after activating it.
    Tried it and it works on 2 devices. After second activation it says no activation left.
    If you try to activate a third device with the same license, one of the previous activation will be deactivated automatically once connected to the internet for updates I guess.

    The rubber pads on the bottom of the DVR Speed Editor will keep it from sliding on your desk. Rubber feet just became rubber mattresses on this one.

    What’s bad about the DVR Speed Editor

    Shipped with low battery

    Shipped with very low battery – sitting on a shelf a long time I guess.

    Speed Editor had 0% – 2% battery and no reaction when plugged in. I thought it was a bad unit.

    Got the Blackmagic Design speed editor keyboard. Was worried it’s a brick for 15 min. – no reaction at all. Turns out the battery was 2% when DaVinci Resolve 18 finally sees it.

    Then asks to update immediately at 8% battery. I’m glad it has a chance to work still.

    Anyone getting their speed editor, let it charge on USB for a few hours.
    Charging can be slow and could take 3-4 hours even. Reached 43% unplugged for a few minutes then back in and showed 17% initially. Now it’s always plugged in because of the next bad thing about the speed editor.

    Bluetooth doesn’t work for me

    It is supposed to work via Bluetooth only but for me it does not.
    The Resolve Speed Editor connects to Bluetooth fine and the Bluetooth dongle I use blinks like it’s doing things.

    The Speed Editor has Snap and Jog buttons illuminated but not responding to any keys and can’t change Jog mode to Scroll or Shuttle. Nothing happens when pressing any buttons.

    Restarted DaVinci Resolve several times, using latest Resolve Studio 18.1 version and updated the Speed Editor Firmware as required via USB. Still not working thru Bluetooth.
    I suspect it might be the Bluetooth dongle I’m using so already ordered another dongle to try if the speed editor could work via Bluetooth.

    On a laptop it might work fine but because I use a desktop PC, I have to use a USB Bluetooth adapter dongle.

    Not all USB Bluetooth dongles will work with the Resolve Speed editor.

    Update after trying different Bluetooth dongles

    The DaVinci Resolve Speed Editor does work with a PC via Bluetooth but only if the PC has a compatible Bluetooth adapter dongle.

    I noticed the Bluetooth dongles that do work with the Speed Editor are the 5.0 LE versions. So Bluetooth 5.0 Low Energy profiles for your Bluetooth adapter is required.

    After pairing, you can use the speed editor from your bed or lounge without problems.

    The USB Cable

    The USB Type-C to Type-C cable provided is very bulky and difficult to manage on the desk.

    DaVinci Resolve Speed Editor first use
    DaVinci Resolve Speed Editor first use

    Also the length of the USB-C connectors on the provided cable are very long and will not make it easy to have the speed editor in front of you on the desk with the PC keyboard behind it as that for me feels like it really the best way to use it.
    I like to be able to use the keyboard with macro keys and mouse when needed. Not often on the cut page but on edit and color, you still need a full sized keyboard or use the full sized and more expensive DaVinci Resolve Editor Keyboard.

    Make the USB cable provided with a right-angle low profile connector to keep people from damaging the USB-C connector because of it sitting on the USB cable connector.

    I use a USB 2.0 Type-A to Type-C 480 MB cable from IKEA and it works fine and it’s less bulky than the cable provided from Blackmagic Design.

    No charge indicator

    No physical charge indicator on the device, you can only see the battery level in DaVinci Resolve – Control Surfaces or on Bluetooth devices list when connected thru Bluetooth.

    No Power button

    There is no way to turn off the speed editor but it does seem to enter a sleep mode if not connected to Bluetooth or USB for some time.

    Before First Use

    Before first use, plug in the USB cable to charge 2-3 hours minimum.

    Use the DaVinci Control Panels Setup utility found in DaVinci Resolve Studio – Help menu.

    Update the speed editor firmware when asked but only if the speed editor battery is more than 30%-50%.

    Conclusion

    I love it really love the solid feel of the wheel with rubbery edges.

    Used it on 3-4 videos already and feels like learning to assemble a timeline with the speed editor is much easier than I initially thought.

    Wish I’d purchased the speed editor earlier.

    Using a shoes dust cover to keep dust away from the Speed Editor surface. Even though the keyboard buttons are mechanical switches it feels like an old-school keyboard in a good way – solid metal and heavy for it’s size.
    I wish they had some battery indicator on the device and a dedicated power On/Off button on the device.

    The speed editor has many functions for quick transitions and cut options.
    The multi-cam features seem interesting but I have no idea what half of the buttons are for on this keyboard. Time to learn some more and be amazed how easy multi-cam is with this.

    One really interesting feature is the close-up feature to use a slightly zoomed-in version of the current clip for a quick close-up suspense builder wow.

    Update after 1 week of heavy daily use

    The DaVinci Resolve Speed Editor really does make editing faster.

    The cut page together with the speed editor will save you a lot of time. It already makes it easier for us.

    The Speed Editor connected via Bluetooth and a pair of Bluetooth headphones enables you to literally edit your video while laying in bed. Literally in bed editing looking at the PC screen in full-screen mode (red key on the speed editor) makes it very easy to edit videos.

    I suspect you can actually use an Android tablet with DaVinci Resolve and the Speed Editor by connecting to the PC with the remote desktop app and via Bluetooth with the Resolve Speed Editor and Bluetooth headphones.

    You would have to be within Bluetooth range for this to work but it’s still an amazing way to use the powerful editing workstation PC while sitting in a lounge or bed on the veranda.

    The next step up from this is to use DaVinci Resolve on a decent laptop with the Speed Editor Keyboard or the new iPad DaVinci Resolve app together with the DaVinci Resolve Speed Editor.

    If you don’t have it already, try to ask a friend who has it to borrow it or just get it and be amazed how fast you get used to it while still keeping your JkL editing muscle memory intact.

    Check prices

    Must buy extras

  • SanDisk Extreme Pro 200MBs vs 95MBs Speed Test

    SanDisk Extreme Pro 200MBs vs 95MBs Speed Test

    SanDisk Extreme Pro 200MBs in Kingston MobileLite Plus SD Card Reader speed test. Fastest third-party card reader speed tested. Reaches 150MB/s write speed and 185MB/s read speed.

    SanDisk Extreme Pro 200MBs in Kingston MobileLite Plus SD Card Reader Speed Test

    Sandisk extreme pro 200mb vs 95mb speed test in third-party reader. 

    SanDisk Extreme Pro 200MBs 256GB Speed Test
    SanDisk Extreme Pro 200MBs 256GB Speed Test

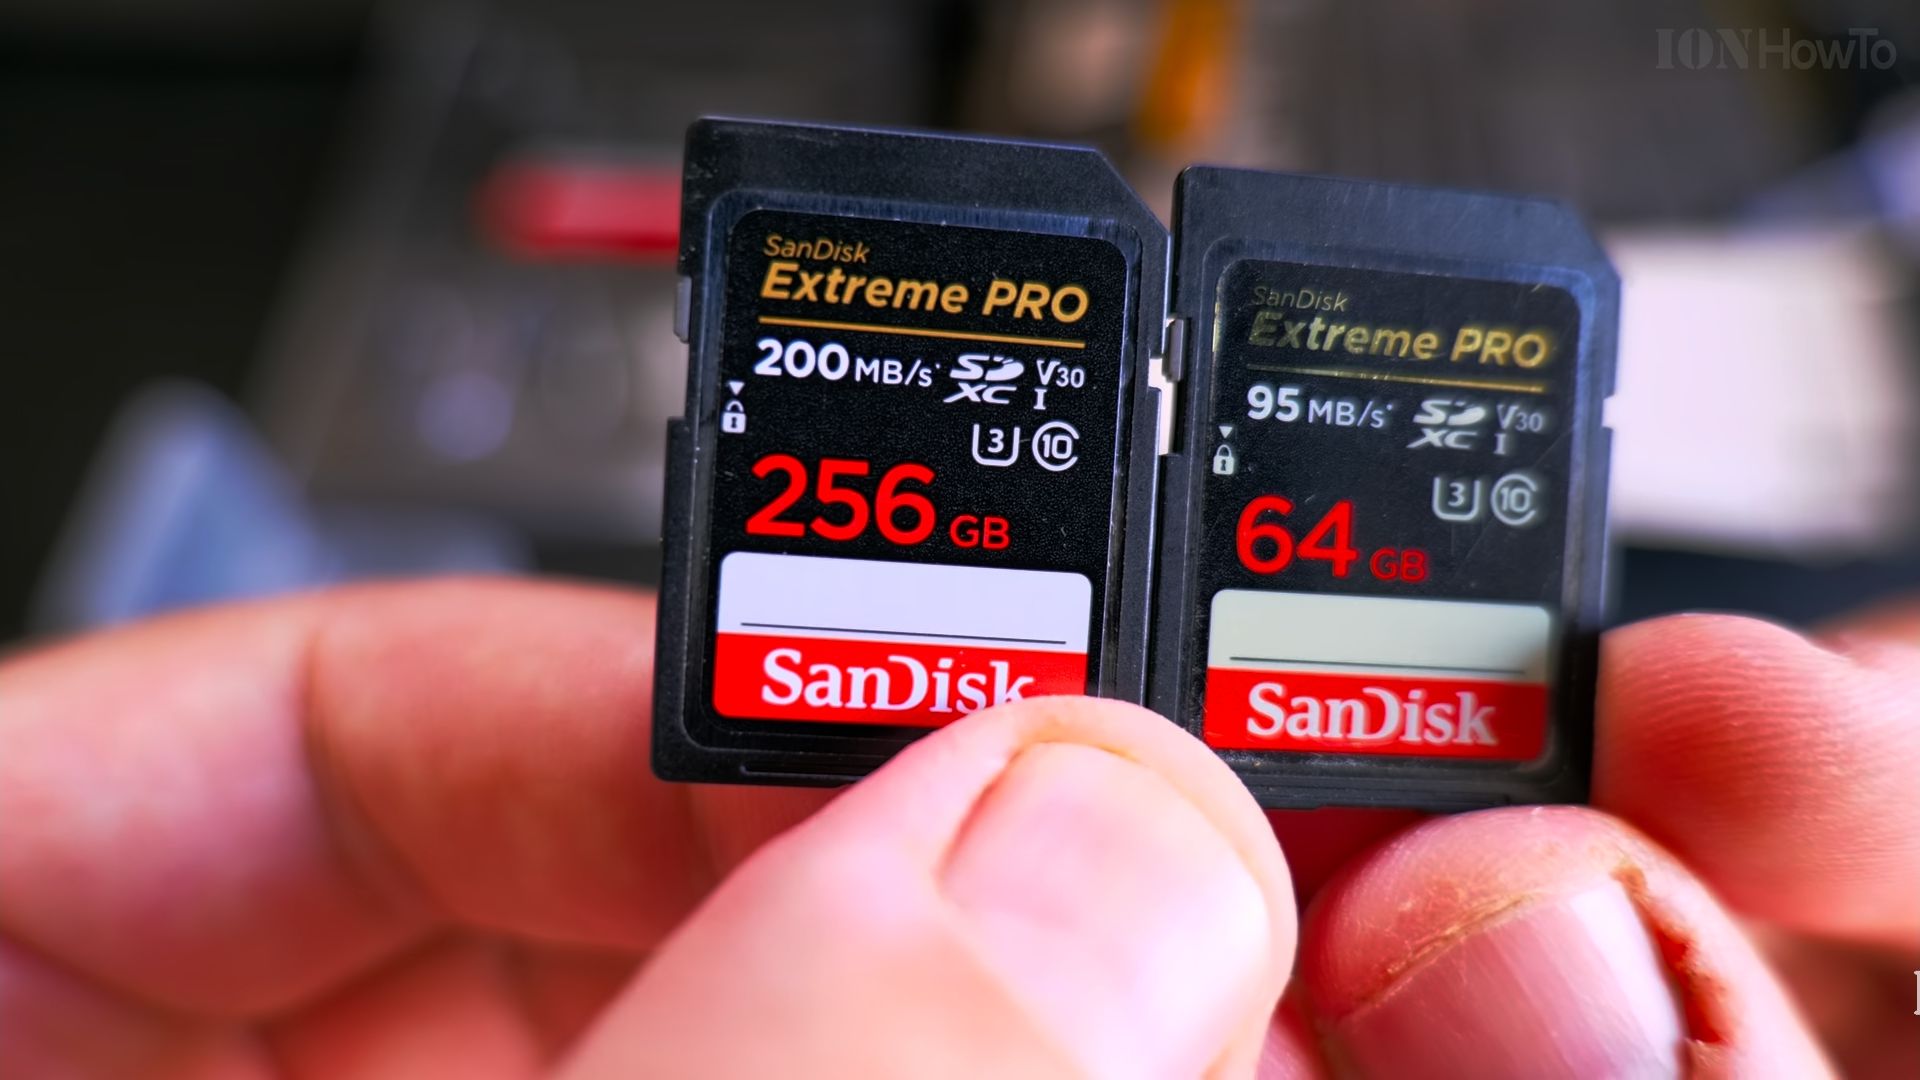
    Compare Sandisk Extreme Pro200MB/S with Extreme Pro 95MB/S SD card fake or original text printed on SD card looks fake but not sure.

    This is the unboxing of the SanDisk Extreme Pro 95MB/S

    Sandisk Extreme Pro 95MB/S Unboxing

    Unboxing of Sandisk Extreme Pro 200MB/S.

    Sandisk Extreme Pro 200MB/S unboxing

    Sandisk Extreme Pro 200MB/s vs 95MB/s speed test.

    Sandisk Extreme Pro 200MB/s vs 95MB/s

    The reader is Transcend and it does not reach anywhere near the 200mb/s speed.

    Speed tesf of Sandisk Extreme Pro 95MB/s SD card.

    SanDisk Extreme Pro 95MBs 64GB Speed Test
    SanDisk Extreme Pro 95MBs 64GB Speed Test

    Speed tesf of Sandisk Extreme Pro 200MB/s SD card.

    SanDisk Extreme Pro 200MBs 256GB Speed
    SanDisk Extreme Pro 200MBs 256GB Speed

    Sandisk Extreme Pro SD card speed of 200MB/S is achieved on the Sandisk Exteme Professional SD and MicroSD card reader.

    Third party card readers can reach 140MB/S and not sure in the camera what will be the writig speed but on Panasonic Lumix S5 I was able to use an old Extreme Ultra SD card without problems but I only use the 72MB/s bitrate codec HEVC 10 bit HLG2100.

    When filming with higher bitrate codecs, a faster card is needed.

    The cards tested in rhe video are Sandisk Extreme Pro UHS-I v30 SD cards.

    A Sandisk Extreme Pro 300MB/S would need a professional SD card reader.

    The Lumix S5 has 2 SD card slots and slot 1 sulports UHS-I and UHS-II SD cards while slot 2 only supports UHS-1 cards.

    With Panasonic Lumix S5 you don’t need to use an expensive Uhs-ii card.

    A Sandisk Extreme Pro 170MB/S or Sandisk Extreme Pro 200MB/S will work great!

    You can even use Sandisk Extreme.Pro 95MB/S.

  • Do it Yourself headphones holder stand

    Do it Yourself headphones holder stand

    Do it Yourself headphones holder stand.
    Keep headphones organized on your desk at home or at work.

    Headphones holder stand

    You can make a DIY headphone stand for $1 or even for free if you have a DIY clamp sitting around unused.

    This life hack trick is very simple, use a  DIY clamp to hold the headphones.

    Attach rhe DIY clamp to your desk or to a shelf near your desk. you can mount it horizontally or vertically rhen place your headphones on the clamp using a clamp as a headphone holder.

    You can easily move it around or remove it if needed.

    Any type of clamp can work but the best type of clamp to use is as seen in rhe viseo. This clamp is easy to fit to multiple surfaces and the holding power is more than enough to hold a few pairs of headphones at the same time.

    If you prefer sometimg that looks nicer you can use wooden or decorative items that have a headphone stand function aswell.

    The clamp is a quick and cheap alternative.

  • Zip folders to separate files

    Zip folders to separate files

    How to zip folders to separate files.

    If you have a few folders and you want to create one archive for each folder.

    Video how to steps.

    Zip folders to separate files

    Setup environment

    How to create individually separate archives there is a way you can zip all folders to separate archives using the 7-Zip command line to you can install 7-Zip from the 7-zip website download page.

    Once you have 7-Zip installed, you can run this command below in a batch file you can create a .bat file.

    Auto zip folders script

    The batch file contents are just text commands to run as part of the .bat script or batch file.

    You can name the .bat file anything you like.

    How to run it

    To run the .bat file in the current directory where you have your folders ready.

    Copy the .bat file next to your directories and double click to start to zip all folders into separate archives – folders in the current directory where the .bat file is saved.

    Zip folders into separate archive files script

    This is the script, please do NOT run this .bat script until you read ALL of this post.

    You try this at your own risk, no liability accepted, no support.

    for /d %%n in (*) do "%ProgramFiles%\7-Zip\7z.exe" a "%%n.zip" "%%n\"

    The auto zip script explained:

    for /d %%n in (*) do

    It goes thru all directories in the current folder and does the next action.

    “%ProgramFiles%\7-Zip\7z.exe” a “%%n.zip” “%%n\”

    Calls 7-Zip to the default install location (you might have to change this) and passes parameters to 7-Zip in CLI mode – command line interface. Add / archive zip file name using target folder.

    Then goes to the next folder and runs the same steps until there is are no more folders to archive left.

    The script does not delete anything, it olny creates zip files from subfolders.

    How I use it

    The way I have it set up is the .bat script is in the folder where I keep the folders I want to be zipped.

    It’s looking at all the current folders in the current folder where the script is saved and it will go through each folder creating a zip file archive for all the folders and the files inside the folders.

    Most importantly to be sure it’s ok you’ll also want the files that are contained within this folders and afterwards, check the folders count.

    I check the count of the zip files first you should also check try to extract a few of the zip files make sure that the zip file actually contains the correct files you want.

    Once I make sure that all the files and folders were archived in the zip files.

    I delete the archived folders and I move the zip files to the archive location.

    This is the way I do it and hopefully this is helpful.

    It’s a very simple Windows script using built-in functions of Windows.

    Verify

    There is nothing special about this. The most dangerous thing would be that it is not archiving all the files you want to archive so before you delete anything make sure that you have all your files from inside the zip folder to inside the zip file. First few tries, extract all zipped files and compare file/folder count with the original source folders.

    Right click – properties on both and see file count and size. File count and size should be identical between source and extracted folder.

    I really only checked the count to count of folders I checked if there are 10 photos that should be 10 files and the size is not too small for them I did two folders and I archive the files without too much trouble but the first time you tried to do this make sure you extract the zip files all of them actually extract all the files.

    Make sure that all the parts are from folders you have so that there’s not one missing the first one or the last one is missing so the count should be the same of zip files and folders in the content should be the same after extracting them.

    Hopefully this is helping you. Thanks for reading!

    How to create zip files

    How to Create a Zip File in Windows 10 or 11

    Extract multiple archives in separate folders

    How to extract multiple archives in separate folders in the same way as zipping.

    All you have to do is make another .bat file call it anything you like extract_all.bat seems ok.

    contents of the extract zip archives (untested) bat:

    for /f %%n in (*.zip) 
    do "%ProgramFiles%\7-Zip\7z.exe" x "%%n.zip" -o "%%n\"

    this time we look for each file in the current directory /f that ends with .zip – you can change it to ” for all files.

    Then run 7zip and pass the x argument to extract preserving full directory path and -o to set the output directory to a sub-folder with the same name as the zip archive file.

    It’s easy to adjust both zip all folders and extract all archives scripts to fit your needs.

    Enjoy your scripts!

  • Panasonic Lumix S5 External Stereo Microphone Test Primo EM172

    Panasonic Lumix S5 External Stereo Microphone Test Primo EM172

    Panasonic Lumix S5 test external stereo microphone Primo EM172 / Lom Usi / Clippy stereo.

    Tests done in the video bellow, use headphones.

    Lumix S5 stereo external microphone Primo EM172

    Testing and comparing the Panasonic Lumix S5 camera built-in stereo microphone.

    Testing Lumix S5 external microphone diy Primo EM172 / Primo EM272 – plug-in power active.
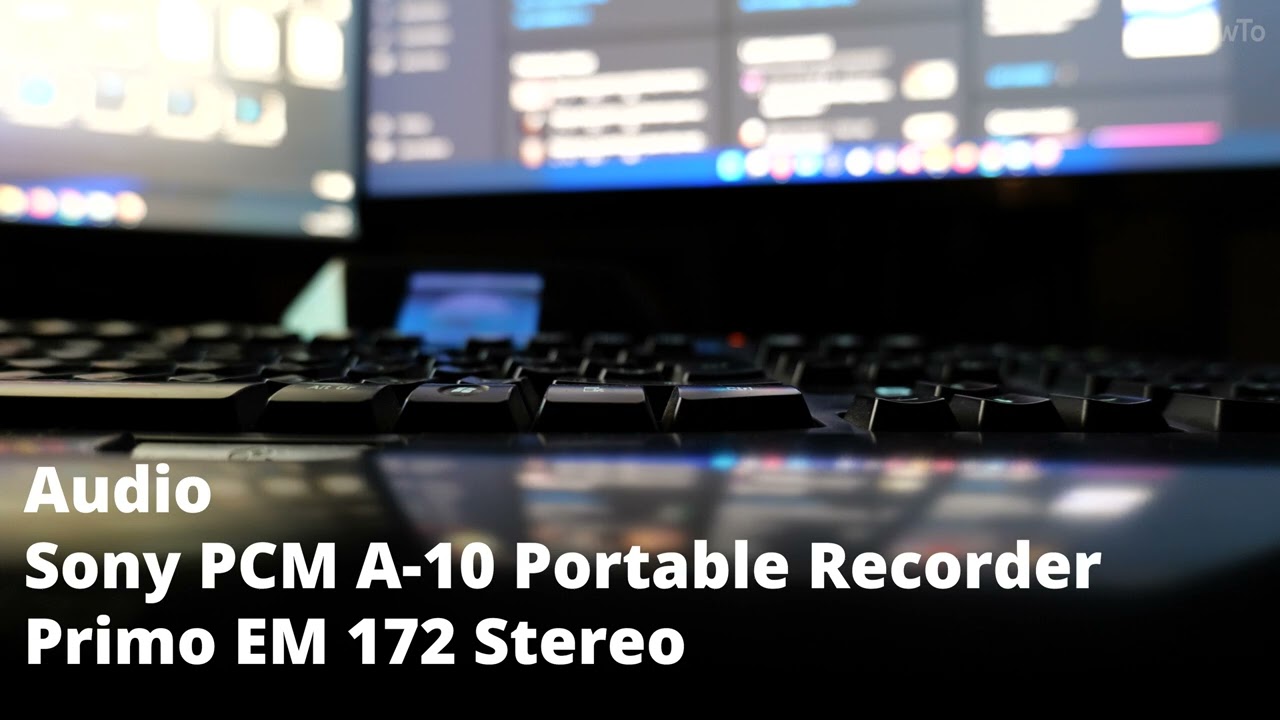
    Comparing the sound of the same Primo EM172 / EM272 when plugged into the Lumix S5 and a portable digital recorder Sony PCM A-10.

    To me the sound from the camera sounds a bit too bright but sounds good from the dedicated recorder Sony PCM A-10.

    What do you think sounds better?

  • Sony MDR-7506 Replace earpads material flaking pleather

    Sony MDR-7506 Replace earpads material flaking pleather

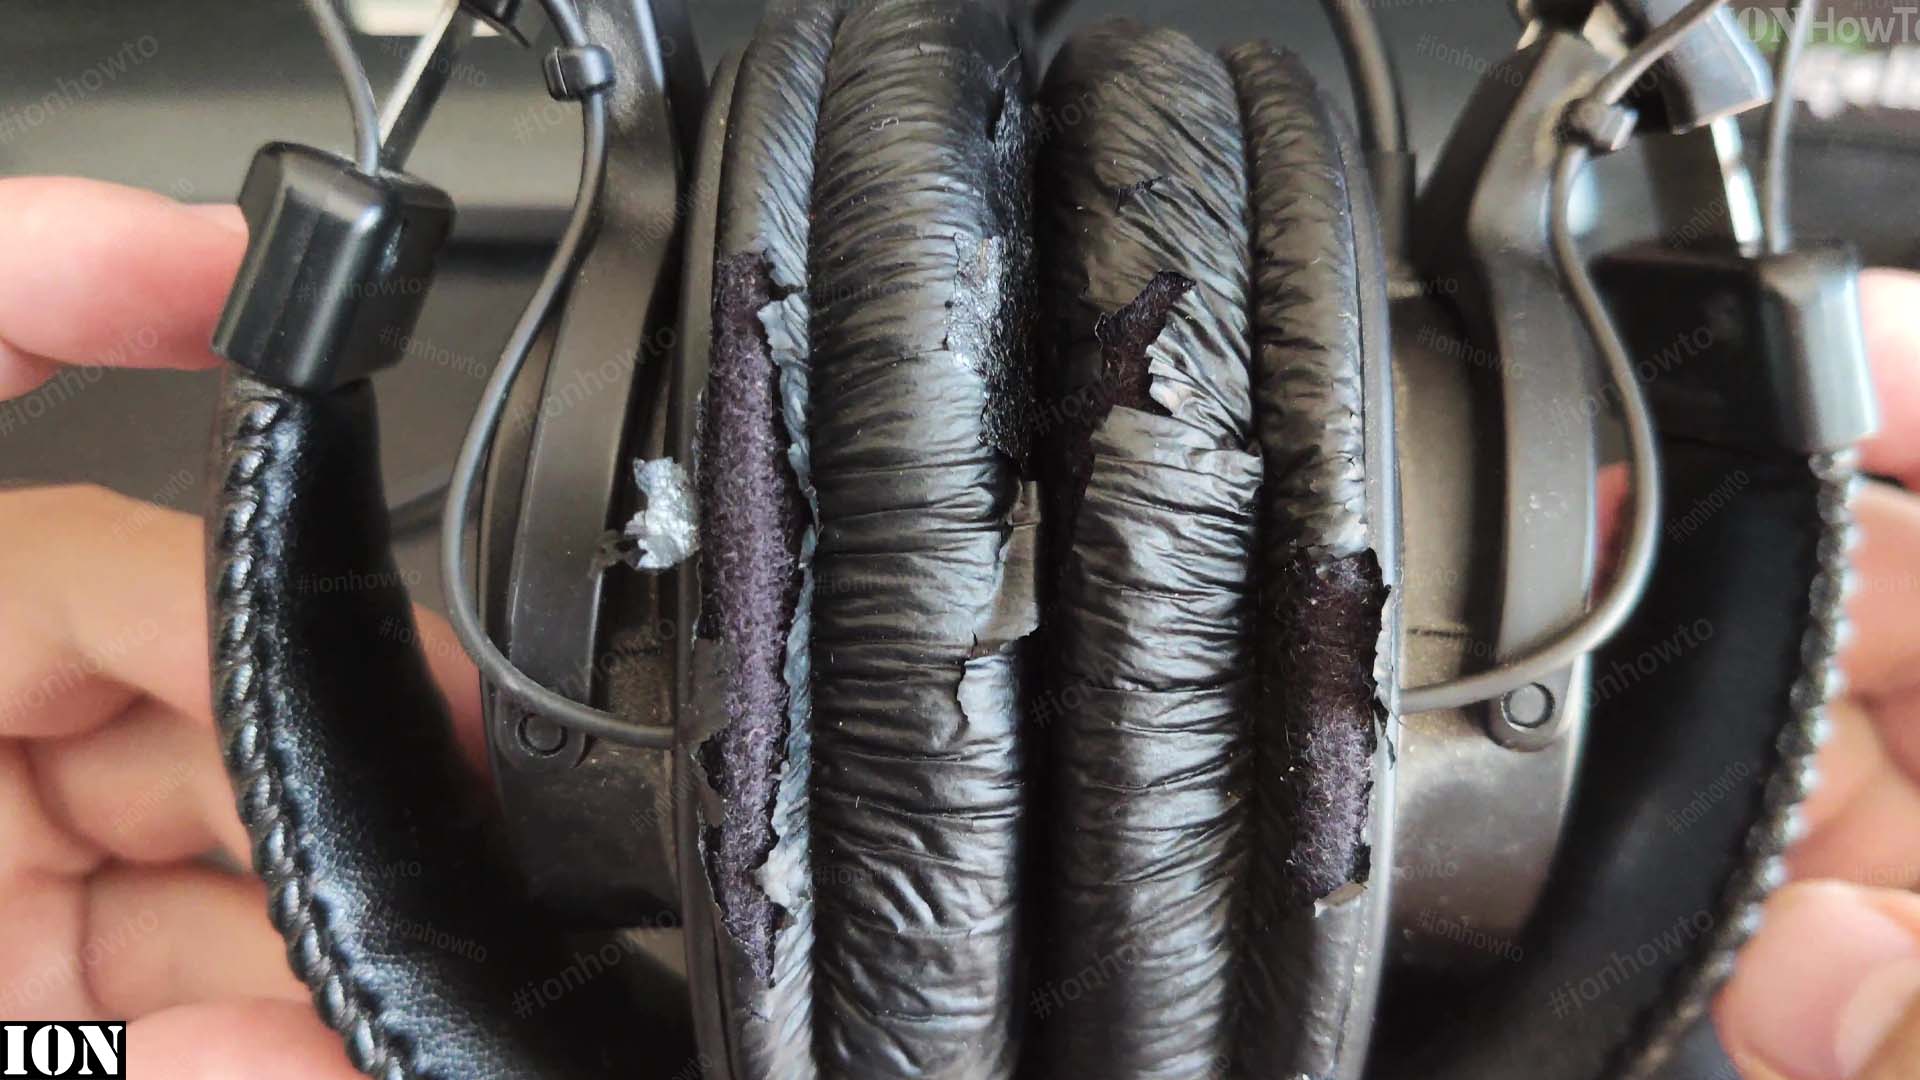
    Sony MDR-7506 Replace ear pads material flaking pleather flakes and earpads falling apart.

    Sony MDR 7506 Replace earpads pleather flakes
    Sony MDR 7506 Replace earpads pleather flakes

    These are professional studio monitor headphones. With a flat frequency response curve, you hear music and audio in general the same as it was meant to be heard.

    They reveal more details in music and it’s really interesting to use them. Bass is less boomy than other headphones but they do have a deep clean and accurate bass.

    How to video

    Sony MDR-7506 Replace earpads material flaking pleather

    Speaker

    Model MDR-7506//Q

    Sony MDR 7506 speaker driver
    Sony MDR 7506 speaker driver

    Amazon

    Thomann

    Remove Pleather Flakes

    You can replace the earpads as shown in the video or pull the flaking pieces of faux leather or leatherette or pleather.

    Sony MDR 7506 Replace earpads pleather flakes peeling
    Sony MDR 7506 Replace earpads pleather flakes peeling

    Once most flakes are removed, you can still use the headphones and the material under the flakes is more sturdy textile fabric.

    Sony MDR 7506 earpads sponge material
    Sony MDR 7506 earpads sponge material

    To upgrade the Sony MDR-7506 studio monitor headphones, you can use replacement ear pads made for Beyerdynamic dt770 pro on the Sony MDR-7506.

    Sony MDR 7506 speaker
    Sony MDR 7506 speaker

    Upgrade to Better Ear Pads

    The Beyerdynamic DT 770 Pro ear pads are made of velour fabric and do not flake like the Sony-mdr-7506.

    Beyerdynamic dt770/880/990 replacement ear pads *

    Sony MDR 7506 earpads remove pleather
    Sony MDR 7506 earpads remove pleather
    Sony MDR 7506 earpads no pleather
    Sony MDR 7506 earpads no pleather
  • Test Condenser Microphone on Discord Rode NT1

    Test Condenser Microphone on Discord Rode NT1

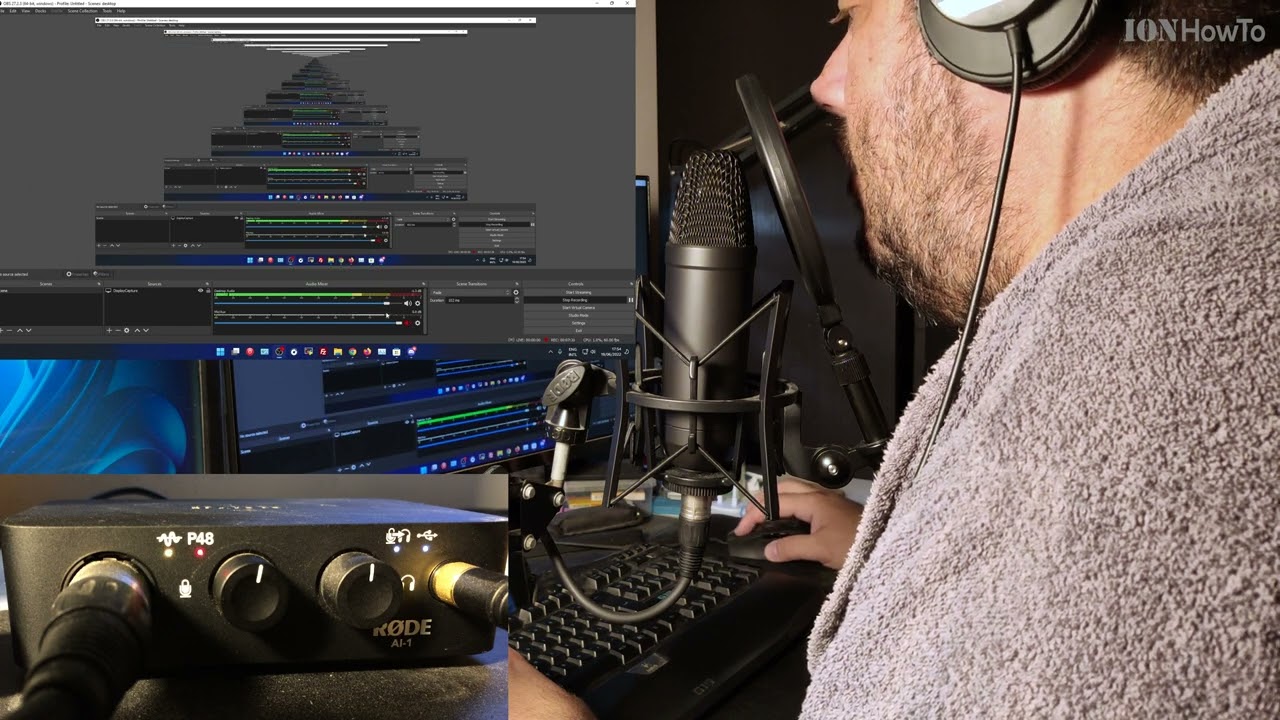
    Test Condenser Microphone with Discord Rode NT1 mic. and Rode AI-1 audio interface.

    Test Condenser Microphone on Discord App Rode NT1 microphone and Rode AI-1 audio interface on Discord tested.

    Kit components

    Rode NT1 Large Diaphragm Condenser Studio microphone.
    Rode AI-1 Audio interface
    Rode SM6 Shock mount system
    Rode XLR Cable Female to Male 6m long XLR cable.

    Amazon

    Rode NT1 Studio Kit https://rex.red/rode-nt1-studio-kit *
    Rode NT1 Microphone https://rex.red/rode-nt1-microphone *
    Headphones https://rex.red/sony-mdr-7506  *
    Kit with Mic Stand https://rex.red/rode-nt1-mic-stand *
    Rode Ai-1 https://rex.red/rode-ai-1 *
    Rode Ai-Micro https://rex.red/rode-ai-micro *
    Mic Desk Stand https://rex.red/rode-microphone-stand-desk *

    Thomann

    Rode Studio Kit https://rex.red/th-rode-complete-studio-kit *
    Rode NT1 https://rex.red/th-rode-nt1 *
    Rode AI-1 https://rex.red/th-rode-ai-1 *
    Headphones https://rex.red/th-sony-mdr-7506  *
    Ai-micro https://rex.red/th-rode-ai-micro *
    Mic Stand https://rex.red/th-rode-mic-stand *

    Test condenser microphone on Discord App

    Test Rode NT1 on Discord App in Windows 11 desktop setup.
    If your Rode NT1 microphone volume is low, check that you set the gain level to 12 O’clock and most important check that P48V Phantom Power 48 volts is Enabled as seen in the video.
    If you don’t have phantom power enabled your microphone level will be very low.
    If the phantom power in the audio interface is enabled and still not loud enough, try to talk closer or increase the microphone gain but then you can get more noise also.
    Hope these tests helps someone.
    Test talking from far and talking closer to the microphone.

    Video tests

    Test condenser microphone on Discord App

    Subscribe and Ring the Bell to watch more videos.
    ION HowTo https://rex.red/ion-howto
    RedNumberONE https://rex.red/rno

    Buy merch https://rex.red/ionhowto-store
    Check it, buy it, post it and
    tag it #ionhowto or #rednumberone

    Join this channel to get access to perks:
    https://www.youtube.com/channel/UCx4Qbp3iC97kQzj7e7g7slg/join

    Contact email for business inquiries ONLY diyrno ( at ) gmail.com

    Any questions?
    Feel free to ask in the comments section bellow.
    Subscribe, Like and SHARE this video.

    We earn money from qualifying purchases using our affiliate links.
    Affiliate links are marked with a star. *
    When you use our * links, you support this channel.
    As an Amazon Associate I earn from qualifying purchases.

  • WWF Recycled Plastic Backpack For The Future collection

    WWF Recycled Plastic Backpack For The Future collection

    WWF Recycled Plastic Backpack For The Future collection.

    Label details

    World Wide Fund For Nature (formerly World Wildlife Fund).

    With WWF panda symbol.

    For The Future WWF a range of products cobranded with WWF Outdoor bagpack.

    Main material, lining and webbing are made from post consumer recycling of PET bottles.

    Made from approx. 21 pet bottles 550ml / 18 oz.

    Made in China

    Dimmensions: in cm. 30 x 43 x 15 in inch 11.8 x 16.9 x 5.9

    Fabric made from Recycled PET.

    Material: Recycled Polyester. PCV Free.

    Product code: P507871 EAN Barcode: 5054903817567

    Is it any good?

    The exterior material feels a bit weak and thin. It looks like fine fiber hairs are coming out of it too easily and does not look waterproof.

    The inside material is very good with nice padded shoulder straps and the bottom of the bag is also foam padded so that you don’t break any device inside the bag if it falls from your shoulder.

    The shoulder straps have a bit of padding but not much reinforcement.

    The rough exterior material may be useful on the shoulder straps to prevent the bag from sliding on your shoulder if you like to wear the bagpack on only one shoulder.

    There is zero heat dissipation on the area in contact with your back so wearing it on one shoulder may be the only option with this bag.

    Video

    Bag material inside pockets and and what fits inside the bagpack.

    WWF For The Future bagpack

    Conclusion

    Not bad but external material should be much better to protect what’s inside the bag.

  • Carabiners uses life hacks

    Carabiners uses life hacks

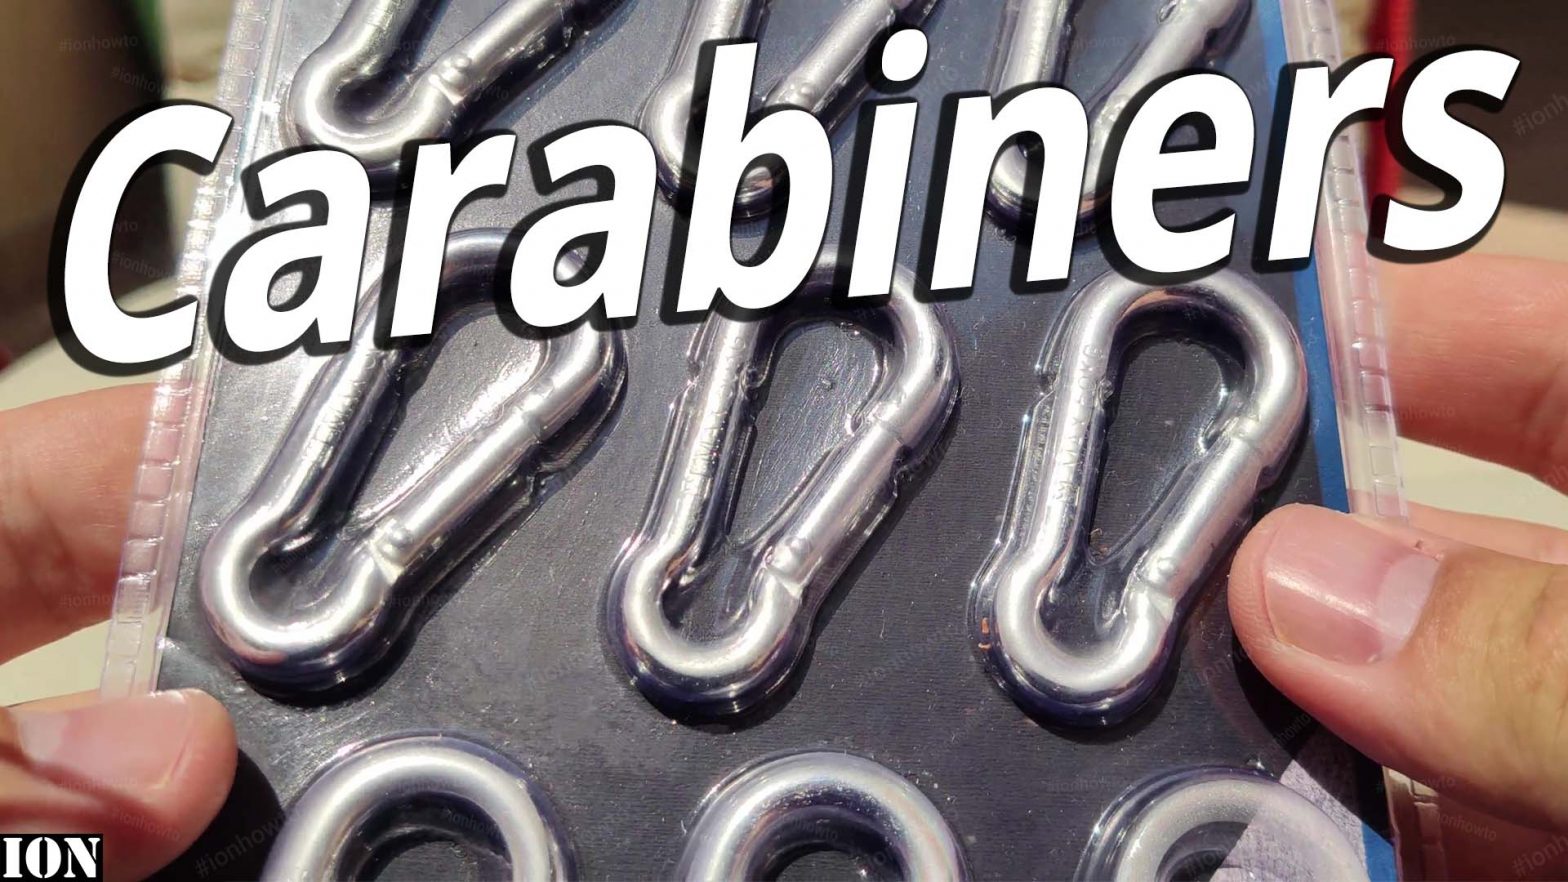
    Carabiners uses life hacks. What to use carabiners for at home, in the car or while camping outdoors.

    Most important is to know the maximum weight a carabiner can support before it breaks. Half that, half it again and you use a quarter of the maximum weight of the carabiner.

    Carabiner uses life hacks

    These carabiners are NOT made to support the weight of a person. For that please find another video on YouTube, there are many.

    These carabiners have a max. weight of 50 kg but I would only use them on weights up to 15 – 25 Kg. just to be safe.

    Carabiners work great on bag packs to hold a bottle of water on the exterior or a tripod while hiking.

    Carabiners are perfect keychains. You can easily add or remove keyrings from a carabiner.

    Carabiners can be easily attached to uninterrupted cables or ropes because the eyelet can open and close easily.

    What do you use carabiners for?

  • Rode NT1 microphone buzzing noise ground loop or RF problem fixed

    Rode NT1 microphone buzzing noise ground loop or RF problem fixed

    Rode NT1 microphone buzzing noise ground loop or RF problem fixed in less than 1 minute.

    Rode NT1 microphone buzzing noise ground loop or RFproblem fixed.
    Rode NT1 microphone making humming buzzing noises when touching the microphone grille the noise gets louder.
    Unplug the XLR connector and reinserting fixes the noise problem but only temporarily.
    Troubleshooting a grounding issue when using a condenser microphone.
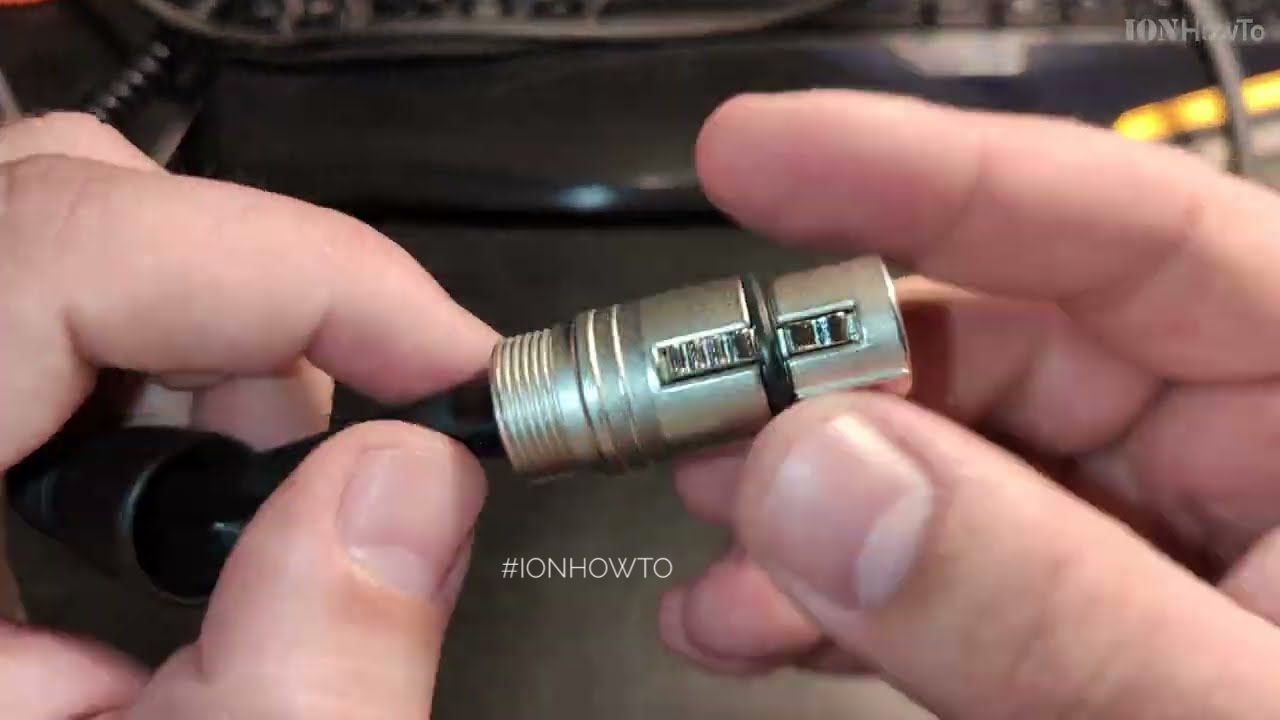
    Checking XLR cable with digital multimeter. Checking XLR cable resistance for continuity or damages.
    This can be caused by a faulty audio interface, faulty XLR cable or a faulty microphone.
    Rode NT1 is a large diaphragm condenser microphone.
    In my case the fix was super easy. The hard part was finding what was wrong without having to send the microphone and audio interface kit for a lengthy repair.
    All works OK so far!
    This video is very long but had to keep all hardware troubleshooting steps so that you know what to check on your microphone too until you can find your microphone problem.

    Comment bellow if you just fixed your microphone humm noises or RF issues and say how you fixed it.

    Rode microphones was trying to help as good as they could with finding the problem but they never told me to check if the microphone base is srewed in securely before going further and talking about returns and service taking who knows how long.

    My guess is they would screw it in and then spending a week + trying to figure out why I say it’s buzzing when for them it’s ok.

    If you have a Rode or any condenser microphone that has a case with screwing in tubing, tighten everything and try again. Problem gone haha.

    Video troubleshooting microphone and audio interface grounding problems

    troubleshooting microphone and audio interface grounding problems

    Some long story hardware ground issues troubleshooting but got it working eventually.
    Didn’t have to take it to Rode for service or their local distributor service center.
    Fastest fix once you know it.
    Contacted Rode support and they were suspecting the xlr cable and usually that’s the problem.

    I’d imagine someone else might have this problem too and would save them wasted time with slow support troubleshooting steps and returns or service.