
Amazon links
As an Amazon Associate I earn from qualifying purchases:
- Rode NT1 Studio Kit
- Rode NT1 Microphone
- Headphones
- Kit with Mic Stand
- Rode Ai-1 audio interface
- Rode Ai-Micro
How to Set Up the Rode NT1 AI-1 Studio Kit: A Complete Guide
What’s in the Boxes
The Rode NT1 AI-1 Studio Kit comes with everything you need to start recording professional-quality audio:
– Rode NT1 Large Diaphragm Condenser Studio microphone
– Rode AI-1 Audio interface
– Rode SM6 Shock mount system
– 6-meter XLR Cable (Female to Male)
Detailed Setup on PC
Setting Up Your Studio Kit – Step by Step
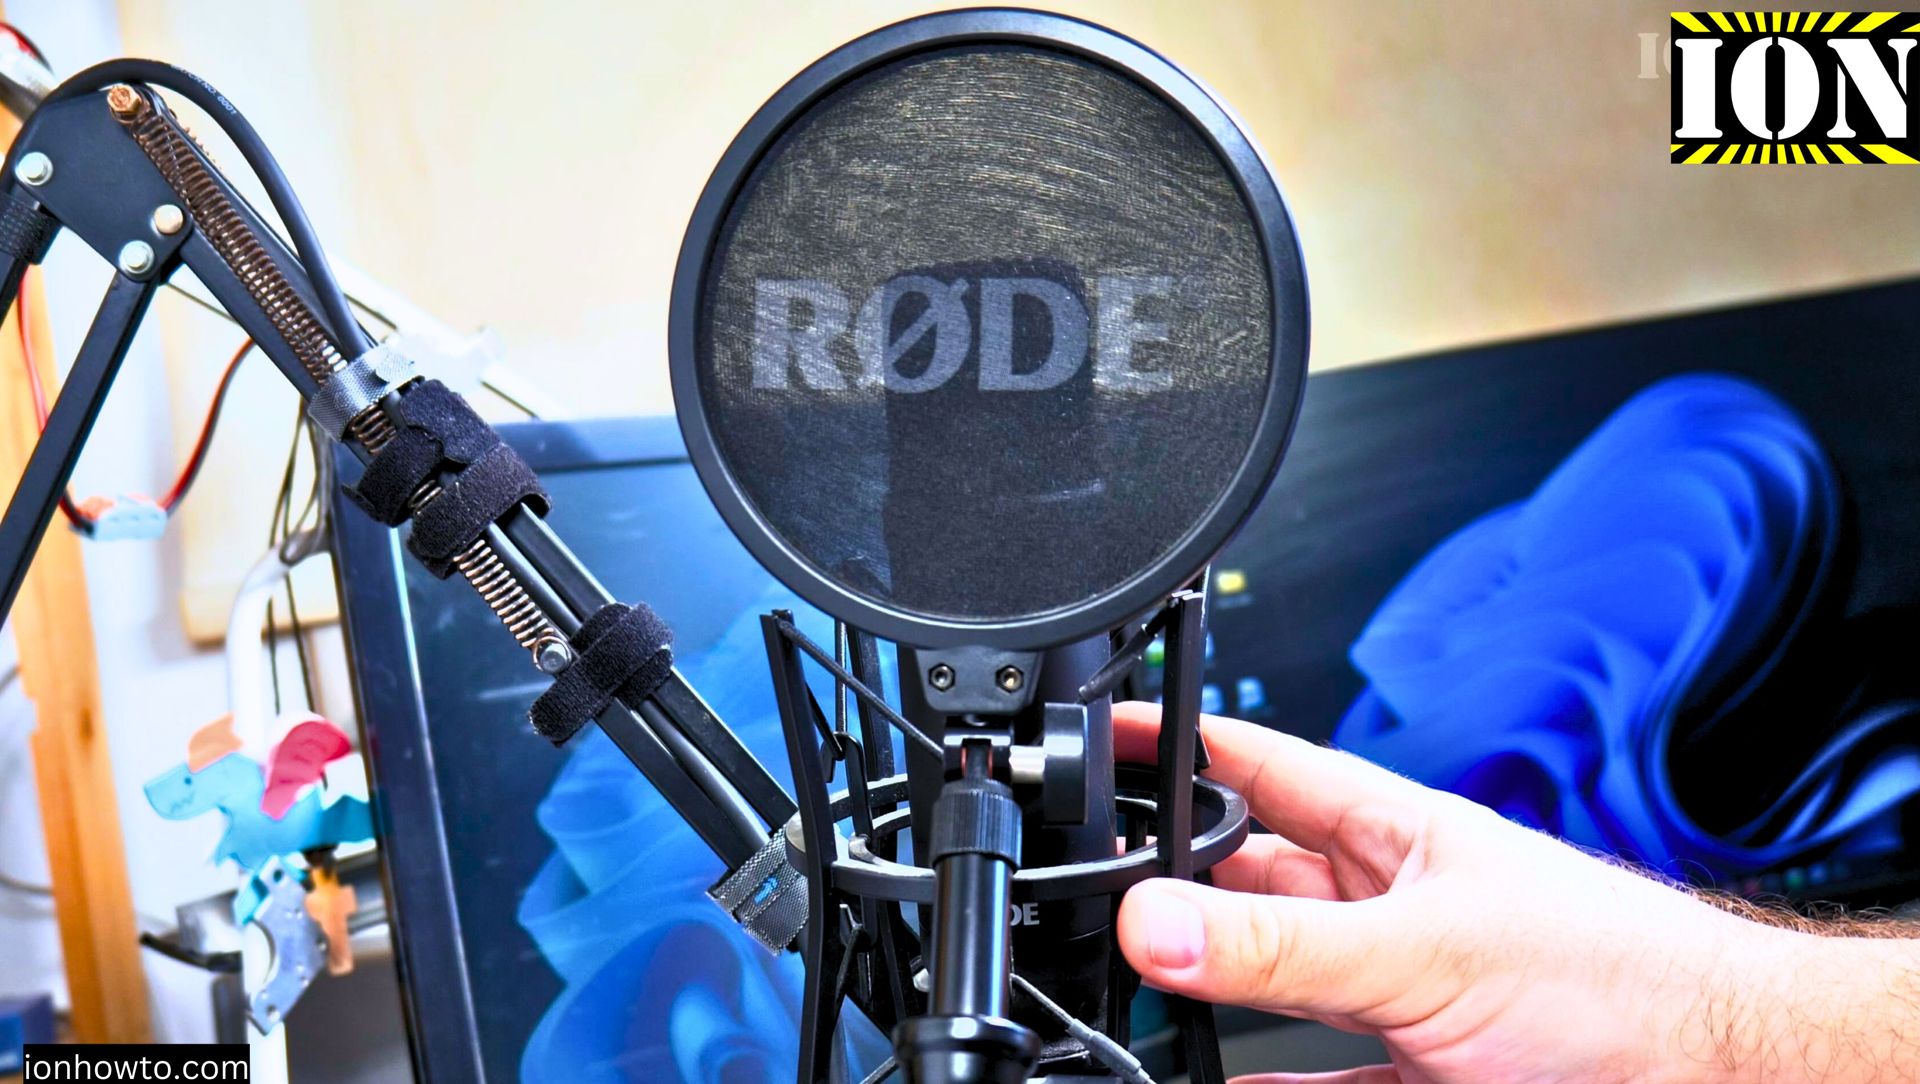
Step 1: Assembling the Shock Mount System
- 1. Take out the Rode SM6 shock mount and pop filter
- 2. Attach the pop filter to the shock mount by sliding it into the designated slot
- 3. Ensure it’s securely fastened and can be adjusted easily
Step 2: Installing the NT1 Microphone
- 1. Carefully remove the NT1 from its protective dust bag
- 2. Align the microphone with the shock mount clips
- 3. Gently press until you hear a click, confirming it’s locked in place
- 4. The microphone should be able to move slightly within the mount – this is normal and helps reduce vibration
Step 3: Cable Connections
- 1. Connect the XLR cable to the bottom of the NT1 microphone
- 2. Plug the other end into the back of the AI-1 interface
- 3. Connect the USB-C cable to the AI-1 interface
- 4. Plug the USB end into your computer
Step 4: Mounting Setup
- 1. Attach the SM6 shock mount to your desk stand
- 2. Tighten all knobs securely – the NT1 is heavier than it looks
- 3. Position the microphone at a comfortable speaking height
- 4. Adjust the pop filter to sit about 2-3 inches from the microphone face
Step 5: Audio Interface Setup
- 1. The AI-1 interface will power on automatically when connected to USB
- 2. The gain knob LED indicates your input level:
- – Green: Good recording level
- – Orange: Warning, getting loud
- – Red: Too hot, reduce the gain
Quck Setup Video
Software Setup and Registration
Getting Your Ableton Live Lite
Software
- 1. Visit the Rode website
- 2. Register your product
- 3. Wait for the approval email with your Ableton Live Lite product key
- 4. Download and install the software
Recording Tips
- – Keep the gain in the green for clean recordings
- – Use the pop filter to reduce plosive sounds
- – Maintain consistent distance from the microphone
- – Monitor your levels through headphones connected to the AI-1
Troubleshooting Tips
Microphone not detected:
- 1. Check all cable connections
- 2. Ensure the AI-1 is receiving power (LED should be on)
- 3. Select the AI-1 as your input device in your recording software
Recording Software
While Ableton Live Lite is included, the kit works great with:
- – OBS for streaming
- – Audacity for basic recording
- – Any DAW that accepts USB audio interfaces
Rode NT1 dust protection using dust covers
Rode NT1 AI-1 studio kit setup and storage for dust protection using dust covers.
Keep the Rode NT1 microphone clean and free of dust to avoid damage to the large diaphragm condenser microphone capsule.
Rode NT1 microphone making humming buzzing noises
Rode NT1 microphone making humming buzzing noises when touching the microphone grille the noise gets louder.
Unplugging the XLR connector and reinserting fixes the noise problem but only temporarily.
Troubleshooting a grounding issue when using a condenser microphone.
Checking XLR cable with digital multimeter. Checking XLR cable resistance for continuity or damages.
This can be caused by a faulty audio interface, faulty XLR cable or a faulty microphone.
Rode NT1 is a large diaphragm condenser microphone.
In my case the fix was super easy. The hard part was finding what was wrong without having to send the microphone and audio interface kit for a lengthy repair.
All works OK so far!
Rode NT1 How to Sound Better Using Voice Tricks and Tips for Voiceover and Commentary
How to talk into a microphone and sound good.
There are a few tricks and tips to use when recording voice overs even if your voice is not great, you can make your voice sound better with these tricks.
I don’t have a great voice but I can get talking after a few times trying.
You can remove any parts you don’t like after the recording so nothing to worry about.
Keep the Rode NT1 microphone clean and free of dust to avoid damage to the large diaphragm condenser microphone capsule.
Large Diaphragm Condenser Microphone vs Small Electret Lavalier
Large Diaphragm Condenser Microphone vs Small Electret Lavalier Microphone Test and Compare
Compared Condenser microphone Rode NT1 Gen 4 LDC with 48V phantom power.
Lavalier microphone is a DIY microphone I built that is using the same parts as Lom USI or Micbooster Clippy microphones.
The DIY lavalier or lapel microphone is made with a Primo EM172 capsule, Mogami lavalier cable and Neutrik right angle 3.5mm TRS gold plated connector.
Plugged into the SONY PCM A10 recorder.
It’s housing is made of heat shrink tube and using a lavalier microphone clip.
Rode NT1 is connected to the PC.
Rode NT1 AI-1 studio kit setup with desk microphone arm to use for voice overs.
Recording in DaVinci Resolve fairlight.
All audio is processed how we usually do with DaVinci Resolve Studio Voice Isolation AI background remover and Dialogue Leveler.
Gain might be a bit different but tried to keep it the same between tests.
When I say you hear the Rode NT1 that’s what you hear same.foe the DIY Primo EM172 microphone.
Keep the Rode NT1 microphone clean and free of dust to avoid damage to the large diaphragm condenser microphone capsule.
Conclusion
This studio kit is designed for both beginners and professionals.
Whether you’re recording voice-overs, podcasts, or instruments, the NT1 AI-1 kit delivers professional sound quality with minimal setup hassle.
Take time to experiment with microphone placement and gain settings to find what works best for your voice or instrument.
Remember to visit Rode’s website to register your product and get access to Ableton Live Lite. The registration process might take time, but you will receive your product key via email once approved.


Leave a Reply