Category: Household Appliances

  • Philips Steam Iron Thermostat repair fix

    Philips Steam Iron Thermostat repair fix

    Philips Steam Iron repair Thermostat fixed.

    Philips steam iron model specifications Philips PowerLife SteamGlide 85g 2000W
    Philips SteamGlide steam iron for clothes not working.
    Plugged in, not starting. Philips steam iron not working silent no thermostat noises.

    Philips Steam Iron repair

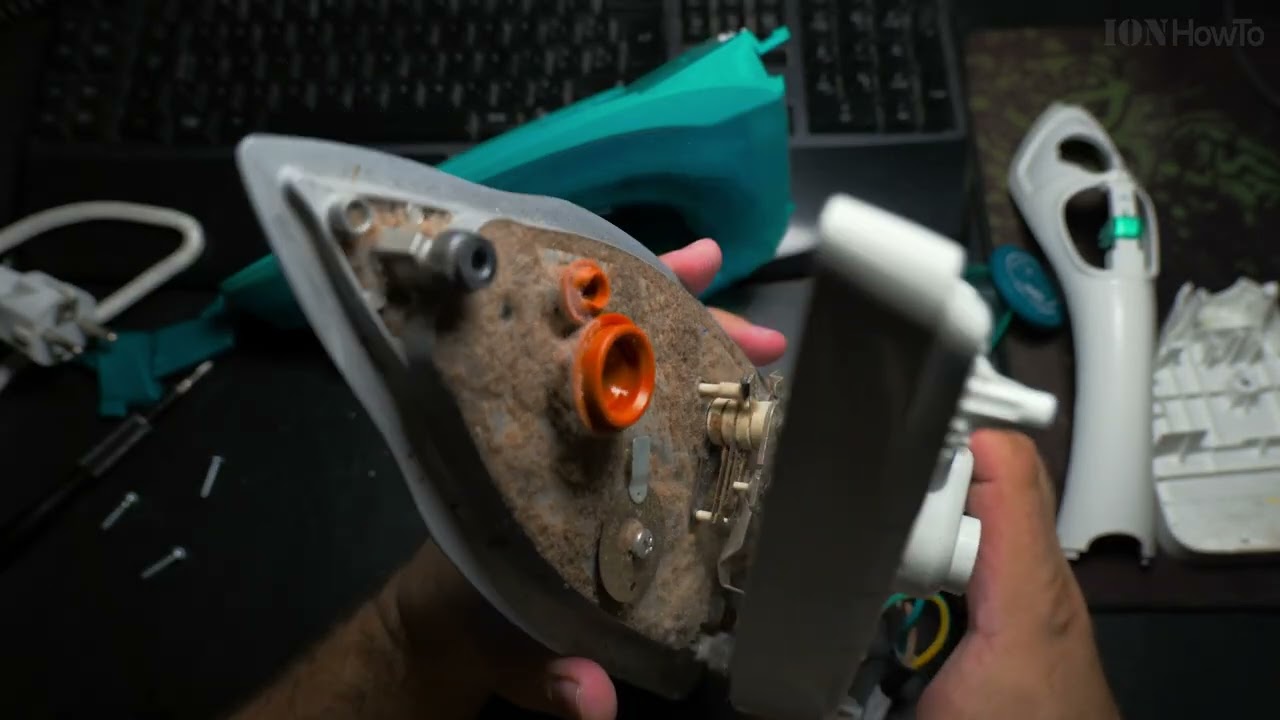
    The problem could be damaged electrical wiring, water damage, heating element broken or thermal fuse failure.
    A steam iron not working even when setting the thermostat to Maximum setting and especially if you don’t head the noise in the video might mean the steam iron has a bad thermostat or a failing thermostat.
    Clean and reposition the thermostat if needed.
    A steam iron thermostat can be replaced with a new part.

    Watch video for disassembly instructions and how to fix the steam iron thermostat.

  • Bosch ErgoMixx Stick Blender vs Braun MultiQuick 9

    Bosch ErgoMixx Stick Blender vs Braun MultiQuick 9

    Bosch ErgoMixx stick blender vs Braun MultiQuick 9 vs MultiQuick 7.

    Bosch ErgoMixx Stick Blender vs Braun MultiQuick 9

    Having to pick a stick blender seems easy but there are many options and accessories available that it makes deciding what stick blender to pick more difficult than it should.

    Stick blender must have

    A stick blender is a must have in any kitchen as with a handheld stick blender you can turn vegetables or spices into a paste in seconds.

    Sauce, puree, shake and many other delicious and healthy treats can be made using a stick blender.

    What blender to choose

    The best stick blender is a light and powerful device but you might have to compromise on one of those.

    Bosch ErgoMixx Stick Blender 600W

    Model Bosch ErgoMixx MSM66120 / 02 Type CNHR25

    Bosch Blender MSM66120 02 Type CNHR25
    Bosch Blender MSM66120 02 Type CNHR25

    The Bosch ErgoMixx stick blender 600W grey version is powerful enough for most uses and I bought the one with a chopper included.

    Bosch Stick Blender 4 blade system stainless steel plastic
    Bosch Stick Blender 4 blade system stainless steel plastic

    Stick blender and chopper for a great price, yes please.

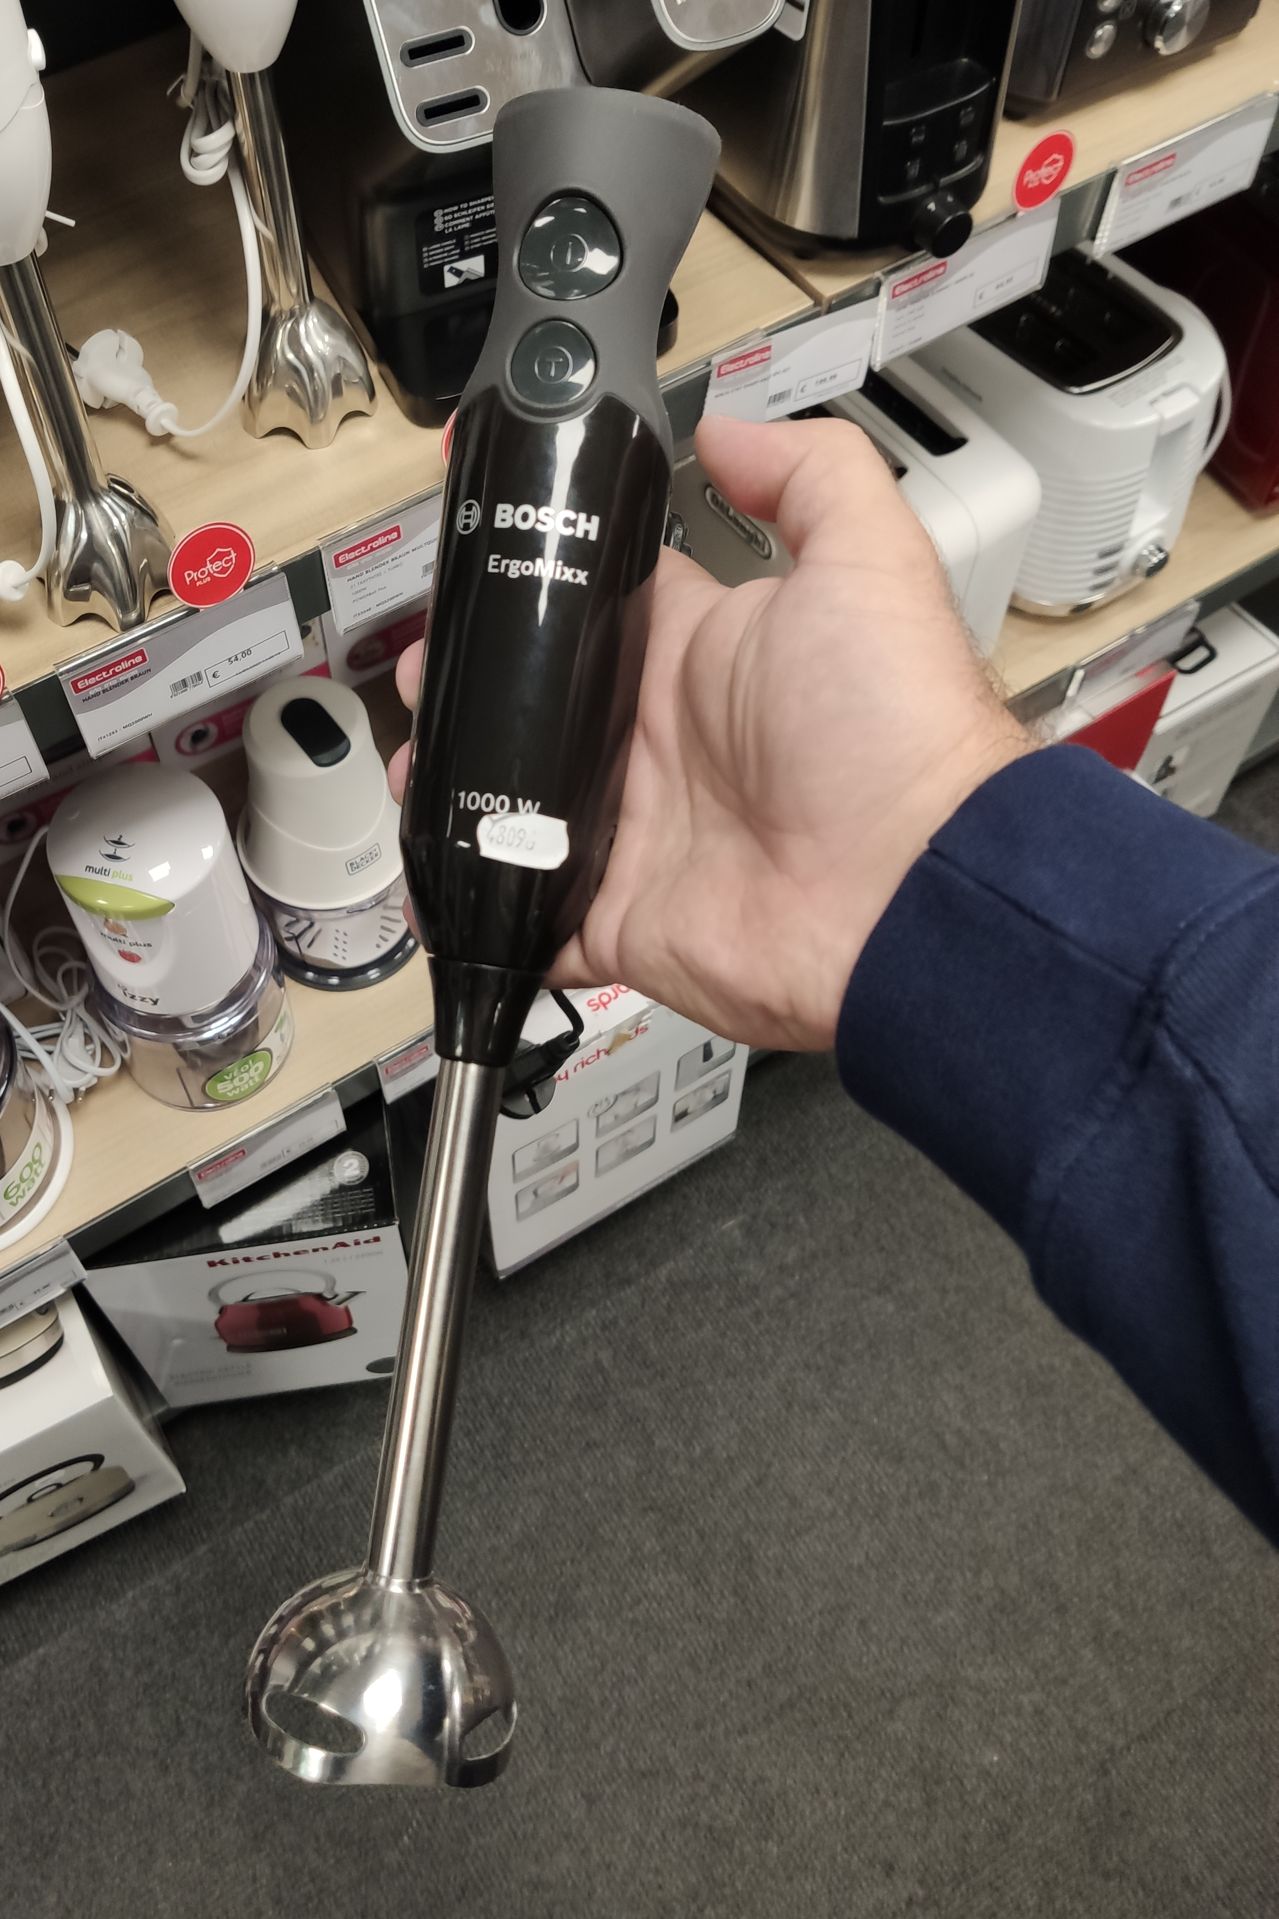
    Bosch ErgoMixx Stick Blender 1000W Black

    Bosch ErgoMixx Model number MS6CB6110 /02 Type CNHR26C

    Bosch Blender 1000W MS6CB6110 02 Type CNHR26C
    Bosch Blender 1000W MS6CB6110 02 Type CNHR26C

    The Bosch ErgoMixx stick blender 1000W black version is almost identical in size and shape to the 600W version but it’s a lot more powerful at 1000W and the color in black is more stylish.

    Bosch Stick Blender 4 blade system
    Bosch Stick Blender 4 blade system

    I would have bought the Bosch ErgoMixx 1000W stick blender but for this blender they didn’t have a chopper accessory included and it was also more expensive.

    Braun MultiQuick 9 Stick Blender

    The Braun MultiQuick 9 stick blender was my first choice.

    Even being more expensive, I wanted a blender with no plastic parts touching food and easy to use but powerful blender.

    The Braun MultiQuick 9 is very powerful at 1200W and it is mostly stainless steel but as all stick blenders with rotating parts, there is a small part made of plastic that holds the blender blades centered.

    I love the Braun MultiQuick 9 and accessories included but the thing I really don’t like is that parts inside the blender move to make the blending action better. Some kind of pumping action that, I believe, is one more reason for failure later.

    Why chose Bosh ErgoMixx over Braun MultiQuick 9

    Bosch ErgoMixx stick blenders have a slimmer blender leg and a 4-blade design that can help mix things much faster.

    The Bosch ErgoMixx Stick blender’s blade housing is more streamlined and the stainless steel appears to be well made.

    The Bosch ErgoMixx Stick blender 600W is less powerful and can be less noisy and save energy.

    If you need more power, the Bosch 1000W stick blender is the same form-factor but more powerful.

    The accessories might be compatible between the 2 blenders but included accessory sets are different.

    Bosch stick blender motor connection
    Bosch stick blender motor connection

    It’s lighter and slimmer than Braun MultiQuick 7 or MultiQuick 9 blender models.

    Why choose Braun MultiQuick 9

    Braun is a well known manufacturer of good home-ware products.

    Braun MultiQuick 9 is more sturdy and feels more solid in the hand (can feel bulky).

    The connection between the motor and the blender foot is more solid than on the Bosch ErgoMixx blenders.

    The pumping action of Braun MultiQuick can make blending certain foods easier.
    More accessories included than what Bosch offers.

  • Do it Yourself headphones holder stand

    Do it Yourself headphones holder stand

    Do it Yourself headphones holder stand.
    Keep headphones organized on your desk at home or at work.

    Headphones holder stand

    You can make a DIY headphone stand for $1 or even for free if you have a DIY clamp sitting around unused.

    This life hack trick is very simple, use a  DIY clamp to hold the headphones.

    Attach rhe DIY clamp to your desk or to a shelf near your desk. you can mount it horizontally or vertically rhen place your headphones on the clamp using a clamp as a headphone holder.

    You can easily move it around or remove it if needed.

    Any type of clamp can work but the best type of clamp to use is as seen in rhe viseo. This clamp is easy to fit to multiple surfaces and the holding power is more than enough to hold a few pairs of headphones at the same time.

    If you prefer sometimg that looks nicer you can use wooden or decorative items that have a headphone stand function aswell.

    The clamp is a quick and cheap alternative.

  • How to save electricity at home

    How to save electricity at home

    How to save electricity at home to reduce the electricity bill.
    There are a few simple steps to follow for saving electricity and reducing power consumption.

    Other than installing photovoltaic solar panels at home to reduce the cost of electricity in your home there are steps you could follow to reduce your power consumption.

    In the video you will see how to change your electricity usage to reduce power consumption.

    How to save electricity at home

    Fridge freezer temperature control

    Adjust fridge freezer temperature settings
    Adjust fridge freezer temperature settings

    Change the fridge temperature control to a setting from 1 to 5. On 5 the fridge uses more power to cool down the food more and at 1 it uses the least electricity and it will result in an increase of temperature in the fridge.

    A good setting is 3 for the fridge but you can try to reduce power consumption of the fridge further by changing the fridge temperature control to the number 2.

    The freezer also has a temperature control setting and you should keep it at normal or between lowest and normal instead of the maximum setting for the freezer.

    Use a freezer thermometer to be sure your freezer has a temperature of -15 degrees Celsius instead of -25.

    Turn off the lights

    Turn off the lights use natural light
    Turn off the lights use natural light

    Turn off the lights you don’t use and during the day, open the curtains and use natural sunlight instead of light bulbs. The sun light is much better and it’s free.

    Replace CFL light with modern LED light bulbs

    Use energy efficient LED light bulbs
    Use energy efficient LED light bulbs

    Replace CFL light with modern LED light bulbs and LED light fixtures.

    Do not use any incandescent light bulbs at all.

    Any 8W LED light bulb makes more light than a 25W CFL light bulb and it is a lot better than incandescent 60W or 100W old light bulbs.

    Turn off power to appliances when not in use

    Unplug appliances and TV when not in use
    Unplug appliances and TV when not in use

    Turn off power to appliances when not in use. Use a switch to turn the TV on and your TV box or media players and speakers.

    Turn off power to kitchen appliances when not in use, this reduces power consumption and makes your kitchen safer.

    Use central heating or Air conditioners for heating

    Use central heating or Air conditioners for heating.

    For heating, use Aircon A/C instead of electric heaters or oil heaters.

    The energy efficiency of a modern heat pump or heat exchanger aircon heater is much more efficient than a simple electric heater.

    Central heating systems are better when available.

    Set your central heating system thermostat to 19 degrees Celsius or 20 degrees in the winter to consuming less energy to heat your home.

    Use fans instead of Air conditioners

    For cooling use a fan on low speed instead of the air conditioners or aircon, A/C and use the aircon only on the hottest days or during the night.

    Use a fan instead of aircon to save electricity
    Use a fan instead of aircon to save electricity

    Washing machine Eco mode

    Washing machine should be loaded to full capacity but not overloaded.

    Use the temperature control setting to 0 degrees Celsius or 30 degrees Celsius to reduce power consumption from the washing machine.

    Also use the washing machine Eco modes when available.

    Keep the fridge full

    Keep the fridge full at all time when in use.
    A full fridge keeps cool with less electricity consumption than an empty fridge. More food in the fridge increase the thermal mass and the fridge environment will not warm up so much when you open the fridge door.

    If you travel, empty the fridge, turn it off and keep fridge freezer doors open to avoid mold growth.

    Water pressure pump

    If you have a pressure pump and a direct tap drinking water faucet, use the drinking water faucet for washing food instead of pressure pump.

    Avoid using pressure pump direct utility water tap
    Avoid using pressure pump direct utility water tap

    It will keep the pump off and you can reduce the water consumption too. Drinking water here refers to a direct utility supply not a reverse osmosis filter system. If you have a reverse osmosis filtration system, use that only for drinking water.

  • Washing machine wont open fix

    Washing machine wont open fix

    Washing machine wont open fixed.

    Fix washing machine won’t open when pressing the washing machine door open handle nothing happens and the washing machine does not open.

    Open stuck washing machine door

    Watch all the video for steps to check and how to open the washing machine, how to open the washing machine door latch and how to repair plastic with plastic welding.

    Washing machine door won’t open

    Most important is to understand what is the reason the washing machine is not opening.

    There is a time delay unlock switch that usually makes a click sound approximately 2 minutes after the washing cycle ends.

    You should be able to recognize that click sound as you have heard it many times.

    In case that timed switch is blocked for any reason it could help to press on the door of the washing machine or gently hit the washing machine door with your hand.

    Set the washing program to drain and start the washing machine. Let it run a few seconds 5 to 10 seconds should be enough.
    Set the washing machine to stop and wait 2-5 minutes.

    There should be a click sound.

    The click sound means the door is free to be opened but there is a hook in the door that you have to pull when pressing on the door opening handle.

    If there is a broken part in the washing machine door, you will see that the washing machine handle feels a bit more loose and it does not make the door open at all.

    That plastic piece can be repaired or replaced if you’re lucky and there are spare parts available for your washing machine.

    Opening a stuck washing machine door

    First and most important is to get the door open so you can take the clothes off before they start to smell like mold.

    For this you can use an old expired debit or credit card or an old membership card.

    You should bend the card slightly when inserting it to go beyond any screws that might be blocking the way.

    If the card does not work, use a plastic string or thick fishing line.

    Washing machine wont open fix
    Washing machine wont open fix

    Pull the string from the edge of the door until it goes between the door and washing machine.

    Once you have both ends of the string around the opening handle, pull firmly and the door opens like it’s magic.

    If it didn’t open, try to use a thin wire to fish the string thru the other side of the door before the hinge of the door.

    Then pull the string slowly from the opposite side until you reach the door handle.
    It’s the same as before but from the other side of the door and pull firmly to open the door.

    You might have to do it like this in case the washing machine hook is orientated inwards instead of outwards.
    On most washing machines, the door latch hook is orientated outwards.

    If the door still didn’t open, make sure you hear the click when the washing cycle is finished and try to press the washing machine door a few times again.

    After opening

    Once opened, take pictures of the door latch hook and try to see how many screws you have to remove to get the door handle removed from the door.

    Replace or Repair washing machine door handle

    These steps are important so take lots of pictures to be sure you can put it back the same way.

    Remove the door cover if needed and check for broken plastic pieces around.

    In the video bellow I was lucky to find the broken piece so I was able to weld it back in place.

    Washing machine wont open repair broken handle
    Washing machine wont open repair broken handle

    Plastic welding

    You can practice plastic welding on any plastic piece before doing it on the irreplaceable part you need.

    Plastic welding

    Usually, you would use a soldering iron to melt the plastic pieces together and use metal reinforcement inserts.
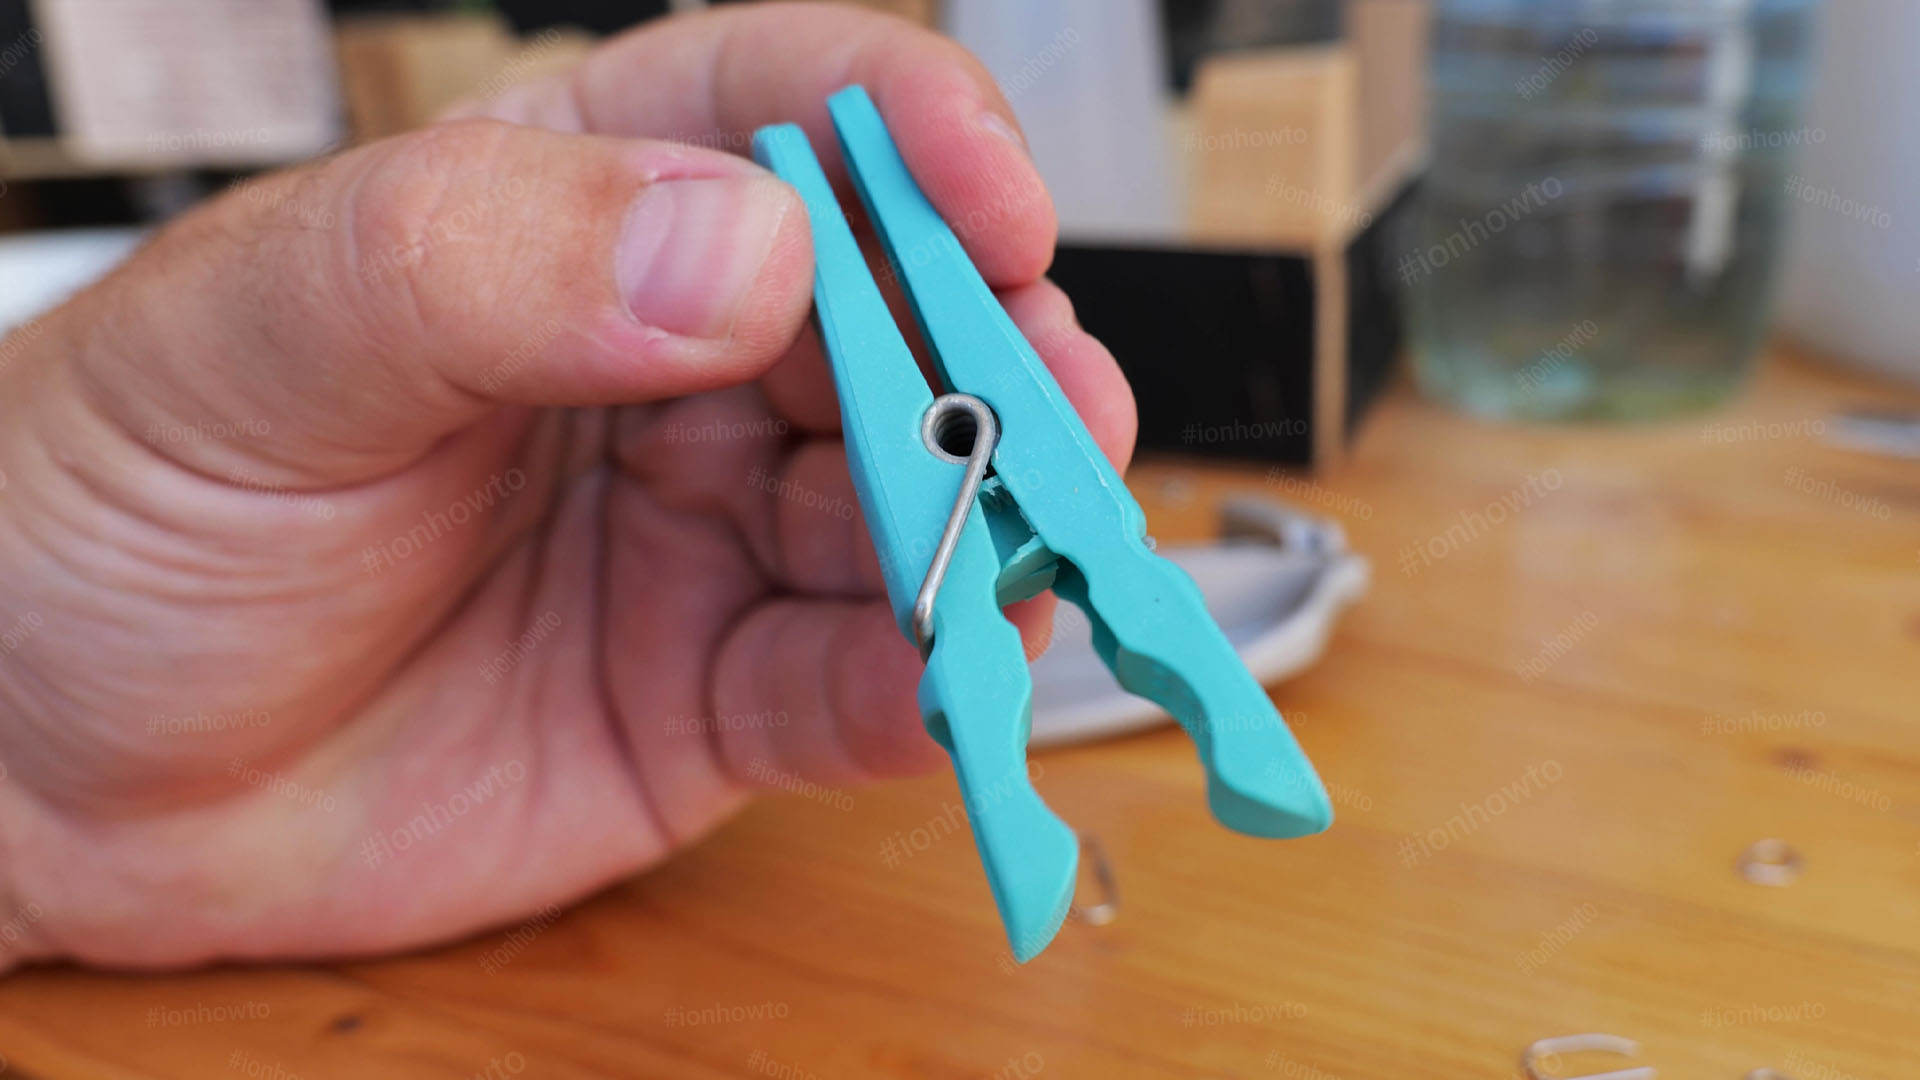
    The plastic welding reinforcement parts can be special parts made for plastic welding or you can use staples, paperclips even clothespins springs for this.

    Reinstall

    When you put all parts back together again, make sure you don’t lose any parts and check the photos you took earlier as a reference to be sure the part is installed correctly.
    When reassembled, if you press the door unlock handle, you should see the door catch hook moving. This means it’s fixed and working now.

    Reinstall all the door parts and close the washing machine door then open it!

    The interlock with time delay switch

    If none of the above works and you hear a click or no click at all 2 minutes after washing machine cycle ends, the timed delay switch might be bad and needs to be replaced.

    To replace the time delay switch, you might want to call a washing machine technician as the top of the washing machine needs to be removed to gain access to the part and it’s not a user replacement friendly part. Also, you might not be able to find the part but techs usually have a stock of most common parts needed.

  • How to connect speakers to a computer

    How to connect speakers to a computer

    How to connect speakers to a computer PC or laptop.
    Connecting speakers to a computer can be either very easy or a bit difficult.

    Computer here means either a laptop or a desktop PC.

    Wired speaker cable

    The easiest way to connect speakers to a computer is to use a wired speaker cable.
    The speaker cable sould have a 3.5mm TRS or TRRS jack on the side connecting to the computer.

    Look on your laptop or at the back a desktop PC for a round socket the size of your 3.5mm TRS jack. The speaker connector should either have a green ring around it or a symbol with an arrow pointing out from a circle.

    Green is line out
    Blue is line in
    Red is for microphone in

    Insert the speaker cable to the speaker port and set the speaker volume to the lowest.
    Play any music or video on the computer and check the volume control in Windows to increase it at about half way 50%.

    Increase the speaker volume slowly until the speaker is loud enough but not too loud.

    Bluetooth speakers

    To connect bluetooth speakers to a computer, Use a bluetooth USB dongle or enable the built-in bluetooth function on your laptop.

    Turn on the bluetooth speaker and set it in bluetooth pairing mode – check operation instructions manual for each model.

    On your computer, search for bluetooth devices and click then pair the speakers when they show in the bluetooth device list.

    Once paired, you can play music or videos wirelesly to the bluetooth spearkers.
    The best range is usually maximum 10m if there are no obstacles so 5 meters is easy.

    Thanks for reading, any questions?
    Write it bellow.

  • Plastic Welding With a Paperclip How to Weld Plastic

    Plastic Welding With a Paperclip How to Weld Plastic

    Plastic Welding With a Paperclip.

    How to weld plastic at home with a paperclip staple or stainless steel metal mesh.

    Plastic Welding With a Paperclip

    If you don’t want to reinforce the broken plastic part with stainless steel mesh or plastic welding staples and a plastic welding tool, you can follow the steps in the video bellow.

    Repairing household appliances is easy with plastic welding.

    Repair standing cooling fan with plastic welding

    Repair standing cooling fan with plastic welding

    Plastic welding with filler plastic material and a soldering iron. Diy fix broken parts from the car, home, toys and more.

    Plastic welding diy with soldering iron.

    Place the paperclip on the area where the plastic is cracked or broken.

    How to Weld Plastic
    How to Weld Plastic

    Using a soldering iron, heat-up the paperclip until the paperclip begins to sink into the melted plastic.

    Plastic Welding With a Paperclip
    Plastic Welding With a Paperclip

    Continue until the paperclip is completely embedded in the plastic part.

    If needed, use a small piece of the same type of plastic from some other part to fill-up the area around the broken plastic to provide a bit more reinforcement.

    This part is from our washing machine and it fixed the washing machine.

    Some home appliances have plastic parts that are difficult to replace and in this case there was no part number or any way to find a replacement.

    How to Weld Plastic at home
    How to Weld Plastic at home

    Welding plastic can save you a lot of money b fixing your devices or appliances instead of throwing them away and replacing them.

    You are also more eco-friendly this way by reducing e-waste since you use a device or appliance longer.

    Try plastic welding and you’ll see it’s pretty easy to do.

    The best part about welding plastics is that once the temperature of the part goes down to room temperature, the plastic part is fixed and ready to use.

    How to Weld Plastic metal reinforcement
    How to Weld Plastic metal reinforcement

    Glue can also fix many plastic parts but might not be as strong as plastic welding and it takes a long time usually until fully cured.

    Even 24 hours in case Epoxy glue is used.

  • Carabiners uses life hacks

    Carabiners uses life hacks

    Carabiners uses life hacks. What to use carabiners for at home, in the car or while camping outdoors.

    Most important is to know the maximum weight a carabiner can support before it breaks. Half that, half it again and you use a quarter of the maximum weight of the carabiner.

    Carabiner uses life hacks

    These carabiners are NOT made to support the weight of a person. For that please find another video on YouTube, there are many.

    These carabiners have a max. weight of 50 kg but I would only use them on weights up to 15 – 25 Kg. just to be safe.

    Carabiners work great on bag packs to hold a bottle of water on the exterior or a tripod while hiking.

    Carabiners are perfect keychains. You can easily add or remove keyrings from a carabiner.

    Carabiners can be easily attached to uninterrupted cables or ropes because the eyelet can open and close easily.

    What do you use carabiners for?

  • Xiaomi Vacuum Cleaner G11 the Dyson Alternative?

    Xiaomi Vacuum Cleaner G11 the Dyson Alternative?

    Xiaomi G11 is a cordless vacuum cleaner, battery powered by Lithium batteries.

    Check Amazon

    Video Review

    Xiaomi Vacuum Cleaner G11 Review

    Xiaomi G11 Vacuum Cleaner Stick unboxing, and testing.

    Review after 1 year of use

    Sending the G11 back for repairs. Problems after 1 year

    Up to 185 AW Suction with brush for carpet and tiles. Also has a powered electric brush for chairs and sofas
    Battery life max. 60 min on eco mode.
    It has a LCD display and buttons to adjust suction power and locking mode.
    The Xiaomi G11 has a dust sensor built-in to increase the power in auto mode when more dust particles are detected.
    Tiny blades in the electric vacuum brush cut hairs to avoid tangles.
    The G11 can work as a handheld vacuum cleaner for tables and to clean the car.

    Box contents of the Xiaomi G11 or V11 probably stands for Generation 11 or Version 11.
    The G11 stick vacuum cleaner will be tested in a future video to see if it really works as good as it sounds and if it’s lout or quiet.
    Subscribe so you don’t miss the testing videos.
    If you would like to test something specific with the G11 write a comment bellow this video.

    Started it after the unboxing video was finished and it’s not as loud as I was expecting it and has Auto, Turbo and Eco modes.
    Auto is powerful enough and turbo can actually pull a thinner carped up so auto would be the main way to use this.
    Also the locking button, I keep it in locked mode so I press the start button once and release to start it and press once and release to stop it.
    No need to continuously press the power button that way.

    Specifications

    Model MJWXCQ05XYHW
    Vacuum Cleaner Dimensions 341.5 × 100 × 266.5 mm
    Vacuum Cleaner Net Weight approx. 1.6 kg
    Dust Compartment Capacity approx. 0.3 L Max.
    Lithium battery rated voltage 22.2 V DC
    Rated power 500 W
    Noise level  79 db approx. less nosy than other models and similar or less noise compared to a regular bag-less corded vacuum cleaner.

    Box contents

    Xiaomi G11 Box Contents Overview Video

    What’s in the box:
    Vacuum Cleaner

    Battery Pack ×1
    Model MJWXCQ05XYHW-DC
    Rated capacity 3050 mAh 6INP6/33/115
    Nominal voltage 22.2 V
    Energy 67.71 Wh

    Power Adapter ×1
    Input 100-240V 50-60Hz 0.8A
    Output 26V 0.9A 23.4W
    Barell connector adapter positive is in the middle. Cable approx. 2m

    Electric Tangle-free Brush Head / Brush Bar ×1
    Not for liquids / water.
    Model MJWXCQ05XYHW-DS
    Rated power 90 W
    Rated voltage 22.2 V

    Electric Mite Brush ×1
    Model MJWXCQ05XYHW-CM
    Rated power 10 W
    Rated voltage 22.2 V
    Not to be cleaned with water or used on water

    Extension Rod ×1
    Crevice Nozzle ×1
    Brush Nozzle ×1
    2-in-1 Charging & Storage Mount ×1 with 2 wall mounting screws.
    User manual and quick start guide.

    Important

    Before first use I charge the battery pack for 8 hours and then the vacuum cleaner is ready to use.
    This will keep the battery in good.

    Once charged you can use the vacuum cleaner as normal.

    Subscribe and Ring the Bell to watch more videos.
    ION HowTo https://rex.red/ion-howto
    RedNumberONE https://rex.red/rno

    Buy merch https://rex.red/ionhowto-store

    Unboxing Video

    After charging I started using it but it broke. Yeah you saw that right it stopped working after 10 min. of use.

    Xiaomi Vacuum Cleaner G11 Motor Problem Stopped Working

    Sooo the Xiaomi G11 vacuum cleaner worked fine until it didn’t. Haha.
    Looks like, in my opinion, it’s a motor problem on Xiaomi vacuum cleaner G11 might be a design flaw. The propeller broke into thousands of little metal pieces.
    It went with a bang!
    Motor was still kind of spinning and all working but without doing any cleaning.
    Return / waiting for a replacement.

    The design may have a flaw or it was just a bad unit. Other than it almost exploding in my hand (it didn’t was all inside the unit and all I heard was the noise).

    Other than expensive Dyson this G11 still seems like the best option. Samsung and Bosch have some cheaper ones but less powerful.

    Xiaomi Cordless Vacuum Cleaner G11 Motor Propeller is Broken after 10 min. of use

    Lithium Stick Vacuum Cleaner Breaks in my Hand Xiaomi G11

    Lithium Stick Vacuum Cleaner Breaks in my Hand Xiaomi G11

    Lithium Stick Vacuum Cleaner Explodes Xiaomi G11

    This is a lithium battery powered stick vacuum cleaner and it it breaks in my hand while in use.

    The loud sound is probably the Xiaomi G11 motor broken or the motor propeller smashing itself against the vacuum components.

    My hand is OK and did not have any damage to myself luckily.
    Only smelled like overheated oil or a high temperature short burst.

    I’m still not sure if it’s the motor exploded or the motor propeller gets destroyed in the video.
    You can see it in slow motion.
    Did this happen to anyone you know? Could this happen with a Dyson stick vacuum cleaner too?

    Warn them not to use the stick vacuum like a regular powered vacuum cleaner.
    The motor, motor propeller and lithium battery are weak components compared to regular vortex – bag-less powered vacuum cleaners.

    Not bashing the product as I believe most of the stick cordless vacuum cleaners are ultra sensitive devices. One mistake and boom…

    Really curious if anyone with a Dyson had a failure on the motor from restricted suction. I believe this is what caused this.

    Pressed by mistake on turbo button when pulling it away from the table then bang.

    This vacuum is too powerful for it’s own good.

    Replacement Xiaomi G11

    Replacement Xiaomi G11 vacuum cleaner is here. Will see if it’s ok.

    Few videos coming up with the old Xiaomi G11 exploding in my hand and the vacuum tests and even a comparison with a classic bagless vacuum cleaner.

    Xiaomi Vacuum Cleaner G11 in box

    Xiaomi Vacuum Cleaner G11 Power Testing

    Xiaomi Vacuum Cleaner G11 Carpet Brush

    We did tests to see if the vacuum cleaner can reach under the bed or under the sofa at the end in the review video. Really wishing to show everything so these 3 videos are already too long but you can watch them if you want to see everything we tried with it.

    It does reach under the bed if it’s high but not all the way if the sofa is low. It maybe misses 10-20 cm if the sofa is too low.

    In the reach under the bed test, most important is to see that the brush head stays close to the floor and does not go up.

    If you have a low bed or sofa it will not go all the way. For the sofa it almost reaches the back but not completely. a corded vacuum is much better for that.

    Thanks for watching the videos without skipping, we try to show all the good and especially what is bad about it. Hope the videos helps. The tests video in description 28 minutes long.

    Oh and the extension gets scratched super easy when you reach under a bed/sofa. The extension arm is aluminum and as soon as it touches a sharp (wooden) edge it will show on the matte finish.

    Not great but I guess it’s normal, just something to watch out for if it can bother you.

    Testing Xiaomi G11

    Testing Xiaomi G11 vs Corded Vacuum cleaner

    Xiaomi Vacuum Cleaner G11 tests and comparison to corded vacuum cleaner.
    Testing Xiaomi G11 on carpet, tiled floor.
    Testing hair cutters function with heavy string works well.

    Testing main brush and mites brush.
    Testing crevice nozzle and generic brush nozzle.

    Xiaomi G11 Vacuum Cleaner Stick testing on multiple power modes, Eco, Auto, Turbo.

    The Xiaomi G11 is a very powerful cordless vacuum cleaner and it will save you a lot of time when using it.

    Main negative points are the battery being a lithium battery, you have to keep it away from heat and keep it charged. Lithium batteries will last longer if you take care of them.

    The good news is the battery can be replaced in few seconds.

    The bad news is the price of a new battery would be high but there is always the option to replace the cells inside diy projects time.

    The Xiaomi G11 does not have a laser or light module on any of the supplied brushes. Don’t know if it’s available as an addon but so far no laser function to see dust better when in use.

    Dyson laser function or other brands use some kind of led. This would be useful.

    Would I buy it again? Yes if the battery lasts at least 6 months.

    Update after 3 months of use

    Update after using the Xiaomi G11 for more than 3 months as the main vacuum cleaner and not touching the corded vacuum cleaner.

    The G11 is still surprisingly powerful and the Auto mode saves a lot of power and reduces the noise made by the G11 so much that you can barely notice it if someone else uses it in the next room with a door open. Most noise is made by the actual self cutting brush motor instead of the air turbine or cyclones motor.

    The extension arm got scratched very easily when using the G11 under the sofa or under the bed. It looks like it’s aluminium with a frosted finish so that finish scratches very easily. It’s not a problem for us but might be for some.

    The G11 battery

    The battery works great, you could vacuum a whole 2-3 bedroom flat and verandas approx 85 square meters and still have remaining power to do it again without charging the battery in between.

    Battery care is essential on the G11 and any cordless vacuum cleaner.

    We store the battery separate in a normal room temperature and the rest of the vacuum cleaner sits in a cleaning supplies cabinet on the veranda outside. This is to save space but still have it withing easy reach.

    Ideally you should charge the battery after every use. Lithium batteries don’t need to be fully discharged before charging (like the old NiMh batteries did).

    Main brush head and mites head are the most used accessories. We don’t use the wall mount stand because there is no space for it at the moment.

    If it was up to me, we would not buy it at all and keep using the corded vacuum cleaner.

    Corded and bag less is ok for me.
    Main reason to have any cordless is convenience. It’s why we were looking for it.

    Convenience but also similar or same suction power as the corded one is the reason we chose the Xiaomi G11 vs Dyson Bosch or Samsung.

    We don’t have carpets other than 2 small ones and foam mats but I would choose to use this on carpets and tiles with the power brush and use a corded one in heavy duty areas such as a garage.

    This vacuum cleaner does not work on wet areas – dry vacuuming only.

    Be very careful with the motor.
    If it catches on some plastic part that could block the suction in Turbo – it will pull it harder and the motor blades could break.

    I’m not sure if our first one broke because of that or it was just a bad unit but hope you saw the Xiaomi G11 motor breaking video.
    Being careful, it works really well and it really is convenient.

    All is great about ot so far, touch wood.