
How to Replace Batteries in a Remington Electric Shaver R6130
This guide works for most electric shavers, not just the R6130 model.
What You Need
Tools Required
- Soldering iron kit
- Multimeter
- Small screwdrivers
- Plastic pry tools
- Pliers – cutter
- AA NiMH rechargeable batteries
- Solder
- Electrical tape
Safety
- Unplug the shaver completely
- Work in a well-ventilated area
- Wear safety glasses when soldering
Step-by-Step Guide
Opening the Shaver
- Remove any visible screws
- Use plastic pry tools to separate the case
- Take photos as you go for reassembly
- Keep all screws organized
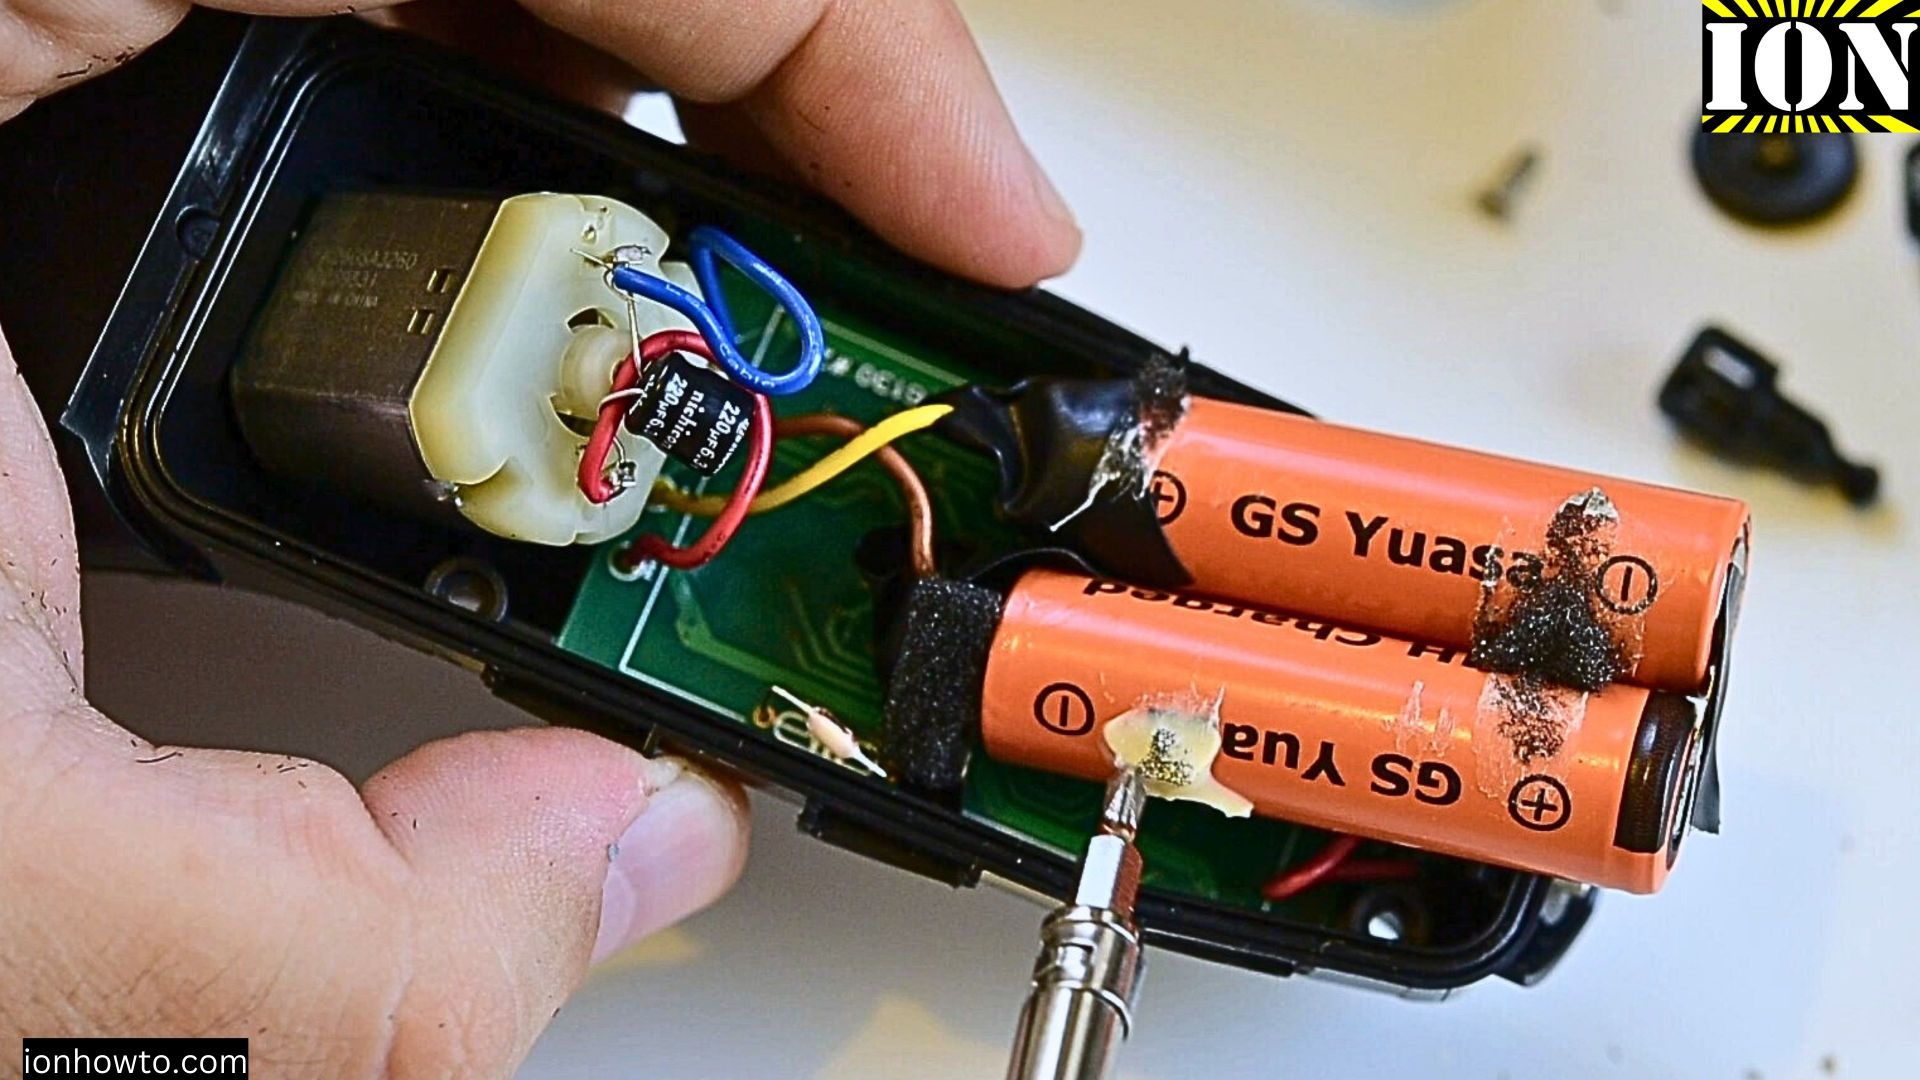
Locating the Battery
- The battery compartment is usually at the bottom
- Note the battery orientation
- Take a photo of wire positions
- Mark positive and negative connections
Removing Old Batteries
- Test voltage with multimeter first
- Note how tabs are soldered
- Carefully desolder or cut old connections
- Remove old batteries
New Batteries
- Check voltage with multimeter
- Clean contact points
- If needed, create solder tabs
- Match orientation to original
Installing New Batteries
- Position batteries correctly
- Solder positive connection first
- Solder negative connection
- Double-check connections
Test
- Reassemble partially
- Test power button
- Check charging light
- Verify motor runs
Assembly
- Clean any flux residue
- Add electrical tape if needed
- Close case carefully
- Replace all screws
Tips
- Use standard Eneloop batteries instead of expensive “pro” ones or even better, use Ikea Ladda batteries
- Look for high capacity (2400+ mAh)
Troubleshooting
If Shaver Won’t Power On
- Check solder connections
- Verify battery orientation
- Ensure full charge
- Check for loose wires
If Charging Light Won’t Work
- Clean charging contacts
- Check wire connections
- Verify charge circuit
More Tips
- Label everything during disassembly
- Take many photos
- Work on a clean, well-lit surface
- Have spare batteries ready
Maintenance Advice
- Charge fully before first use
- Don’t overcharge
- Clean contacts regularly
- Store in cool, dry place
When to Get Help
Consider replacing the shaver completely if:
- Aren’t comfortable soldering
- See damaged circuits
- Notice burning smells
- Find badly corroded components
Conclusion
This repair can save you money over buying a new shaver. Plus, you’re helping reduce electronic waste. The whole job usually takes about an hour, even for beginners.
*[NiMH]: Nickel-Metal Hydride
*[mAh]: Milliamp Hours


Leave a Reply