
How to clean a PC keyboard Wash keyboard keys Logitech G19 without looking any key caps.
PC keyboards can gather dust and food particles under the keys easily and in time, you can have a lot of dirt under the computer keys.
Watch in rhe video how to remove the keyboard keys and wash them.
Cleaning the dirt between the keys and reinstalling all keys back in the keyboard.
Had to clean the keyboard because the keys became harder to press and the keyboard was full of dust in the space between the keys.
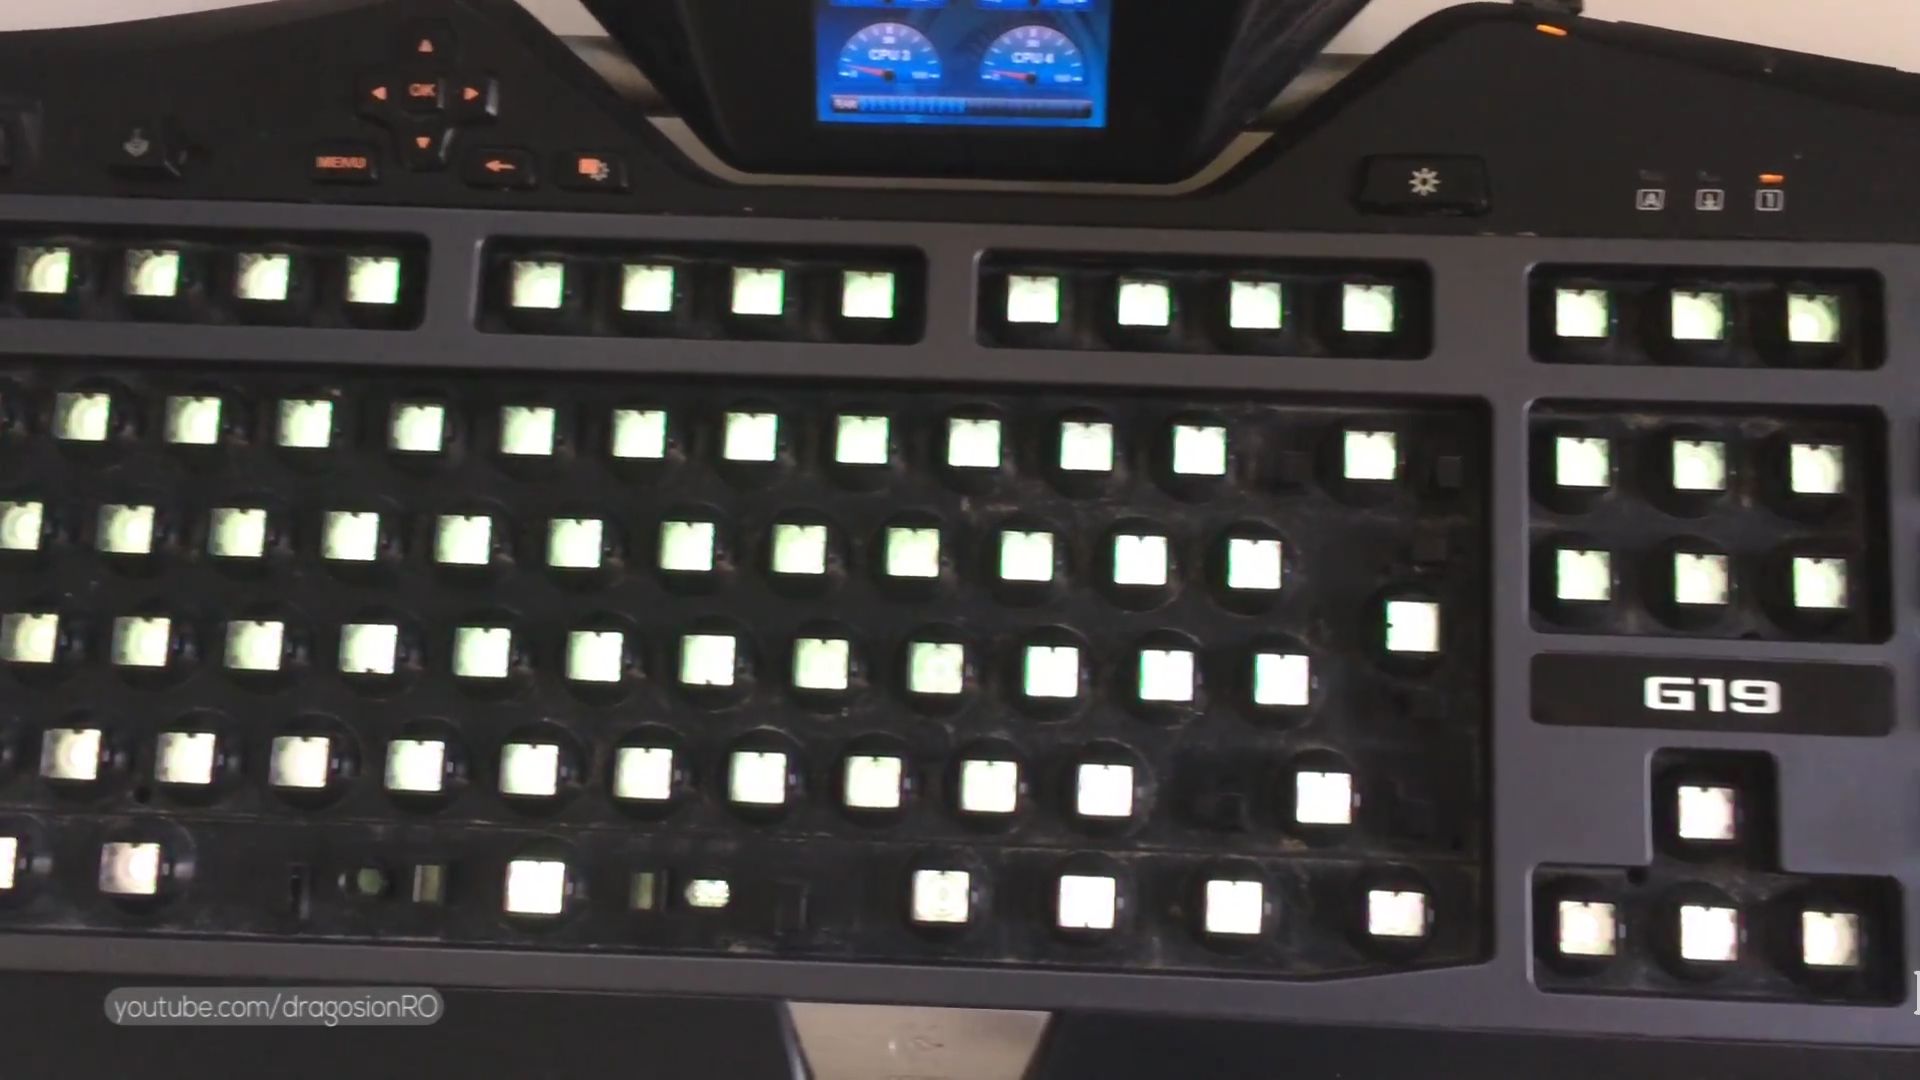
The keyboard shown is a Logitech G19 and I really like it. Have been using it for at least 6 years and it’s a great keyboard.
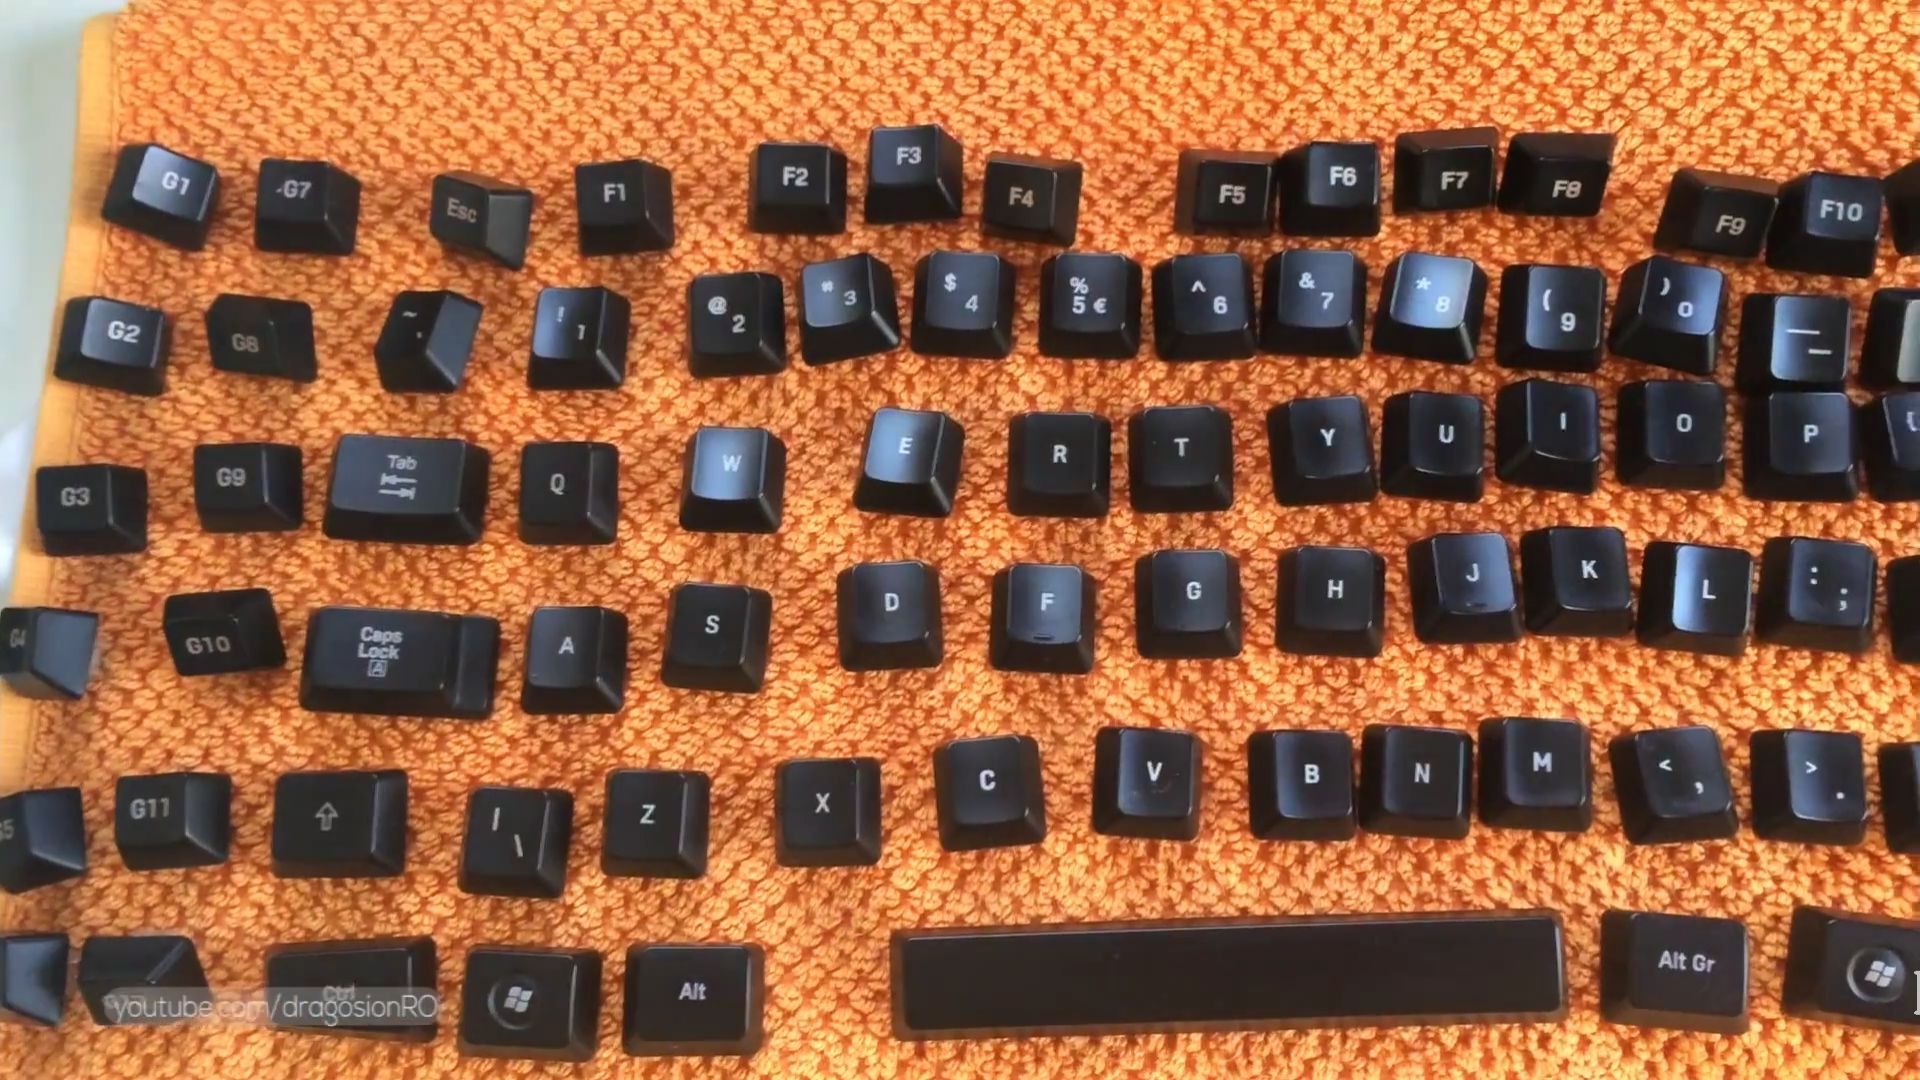
Before removing keys
Before removing the keys take a few pictures with your phone of the whole keyboard and with separate sections closer.
You will use these pictures later to know how to reassemble they keys and not the the keys mixed later during reassembly.
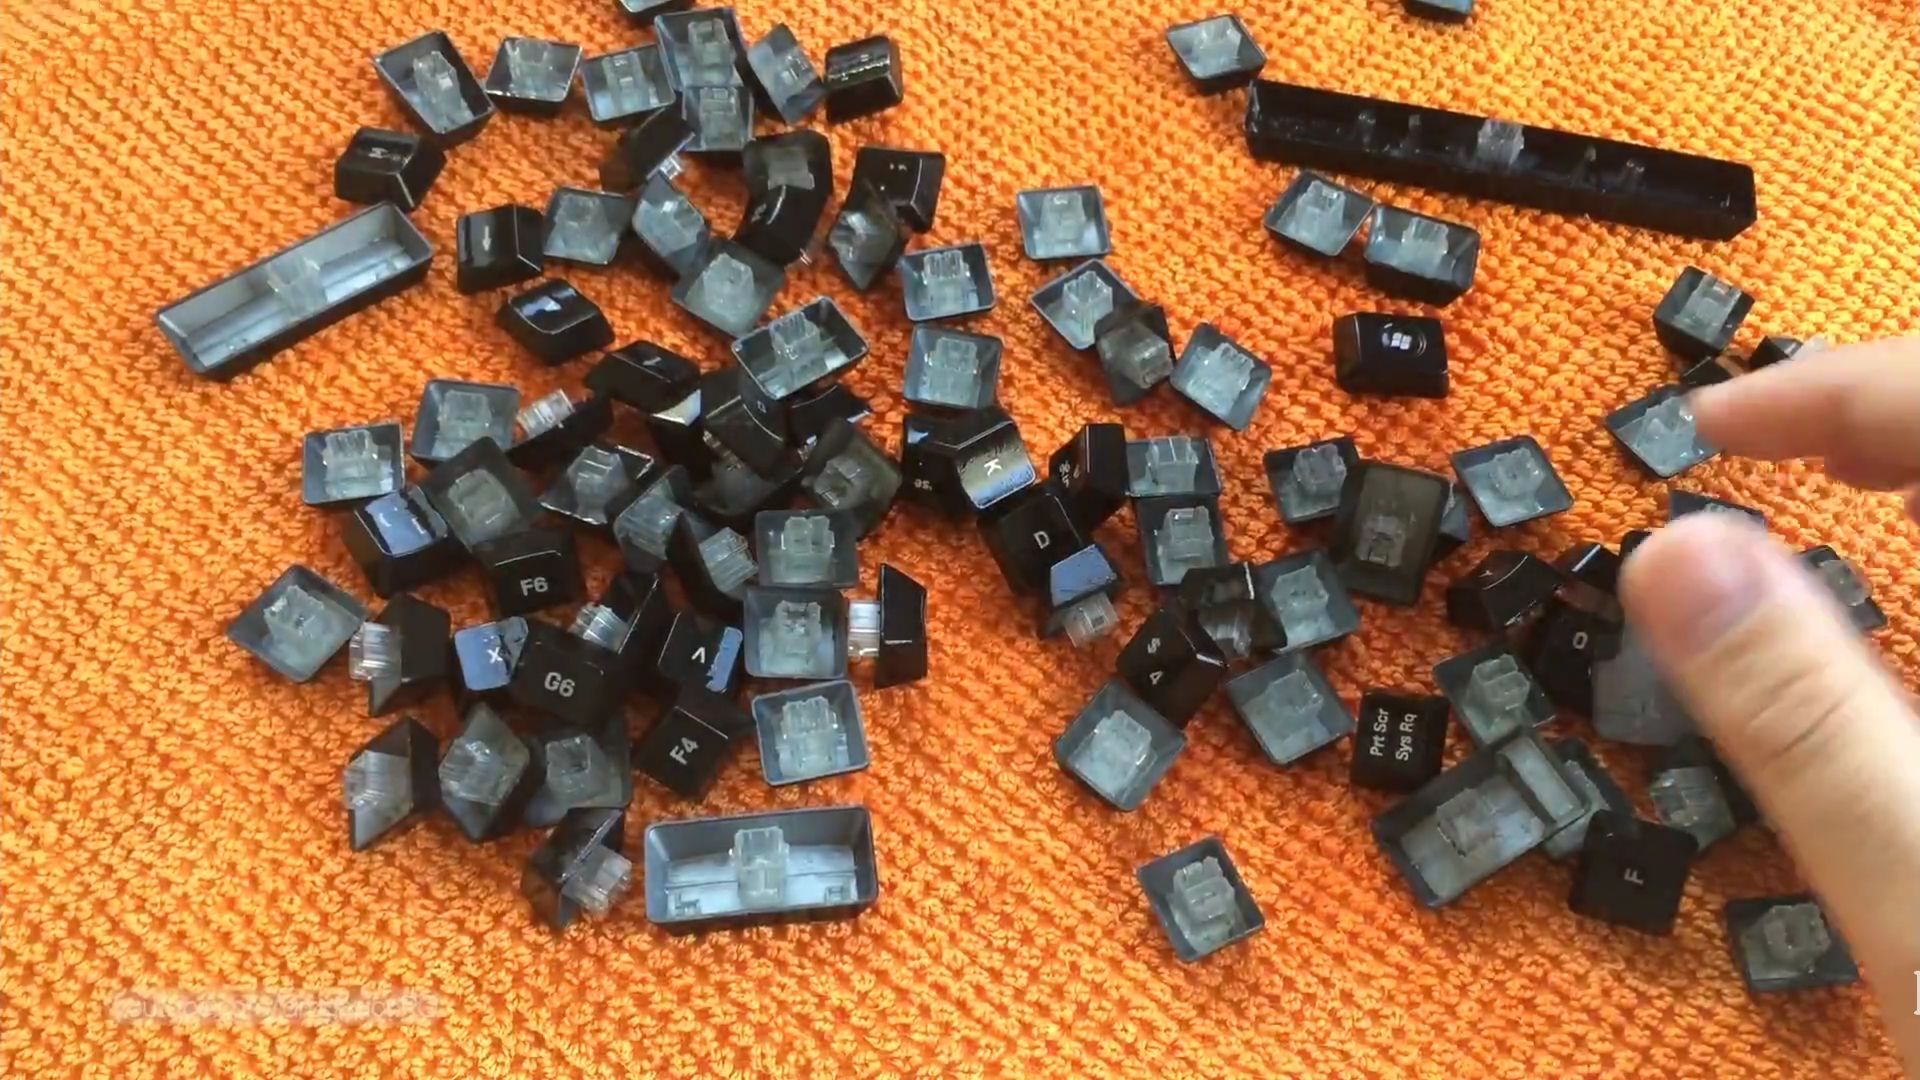
Remove PC Keyboard Keys
Use 2 spudger tools to remove the key caps or scissors or ideally a dedicated tool for removing PC keyboard keys.
Wash the keys
Remove any metal parts from enter key or spacebar key.
Place all the plastic keys in a plastic bottle. Any bittle will work fine but a larger opening bottle will be easier to fit the keys in.
Put some dishwashing soap same as if you were washing a few plated.
Close the bottle and agitate the keys inside until you see the water color turns a bit dark.
The darker the water, the more dirt is removed from the keys.
You can let the keys sit in the bottle 1 hour and then shave the bottle again to clean the keys more.
Rinse and dry keys
Rinse keys with fresh clean tap water and place the clean keys on a towel.
Use a paper towel to wipe and remove water faster.
Let the keys sit until completely dry. Idally you should wipe most water with paper towels and then let the keys sit in the sun for 30 min to 1 hour.
Vacuuming PC Keyboard
Vacuum the PC keyboard when all keys are removed using a gentle brush vacuum head or no brush head at all.
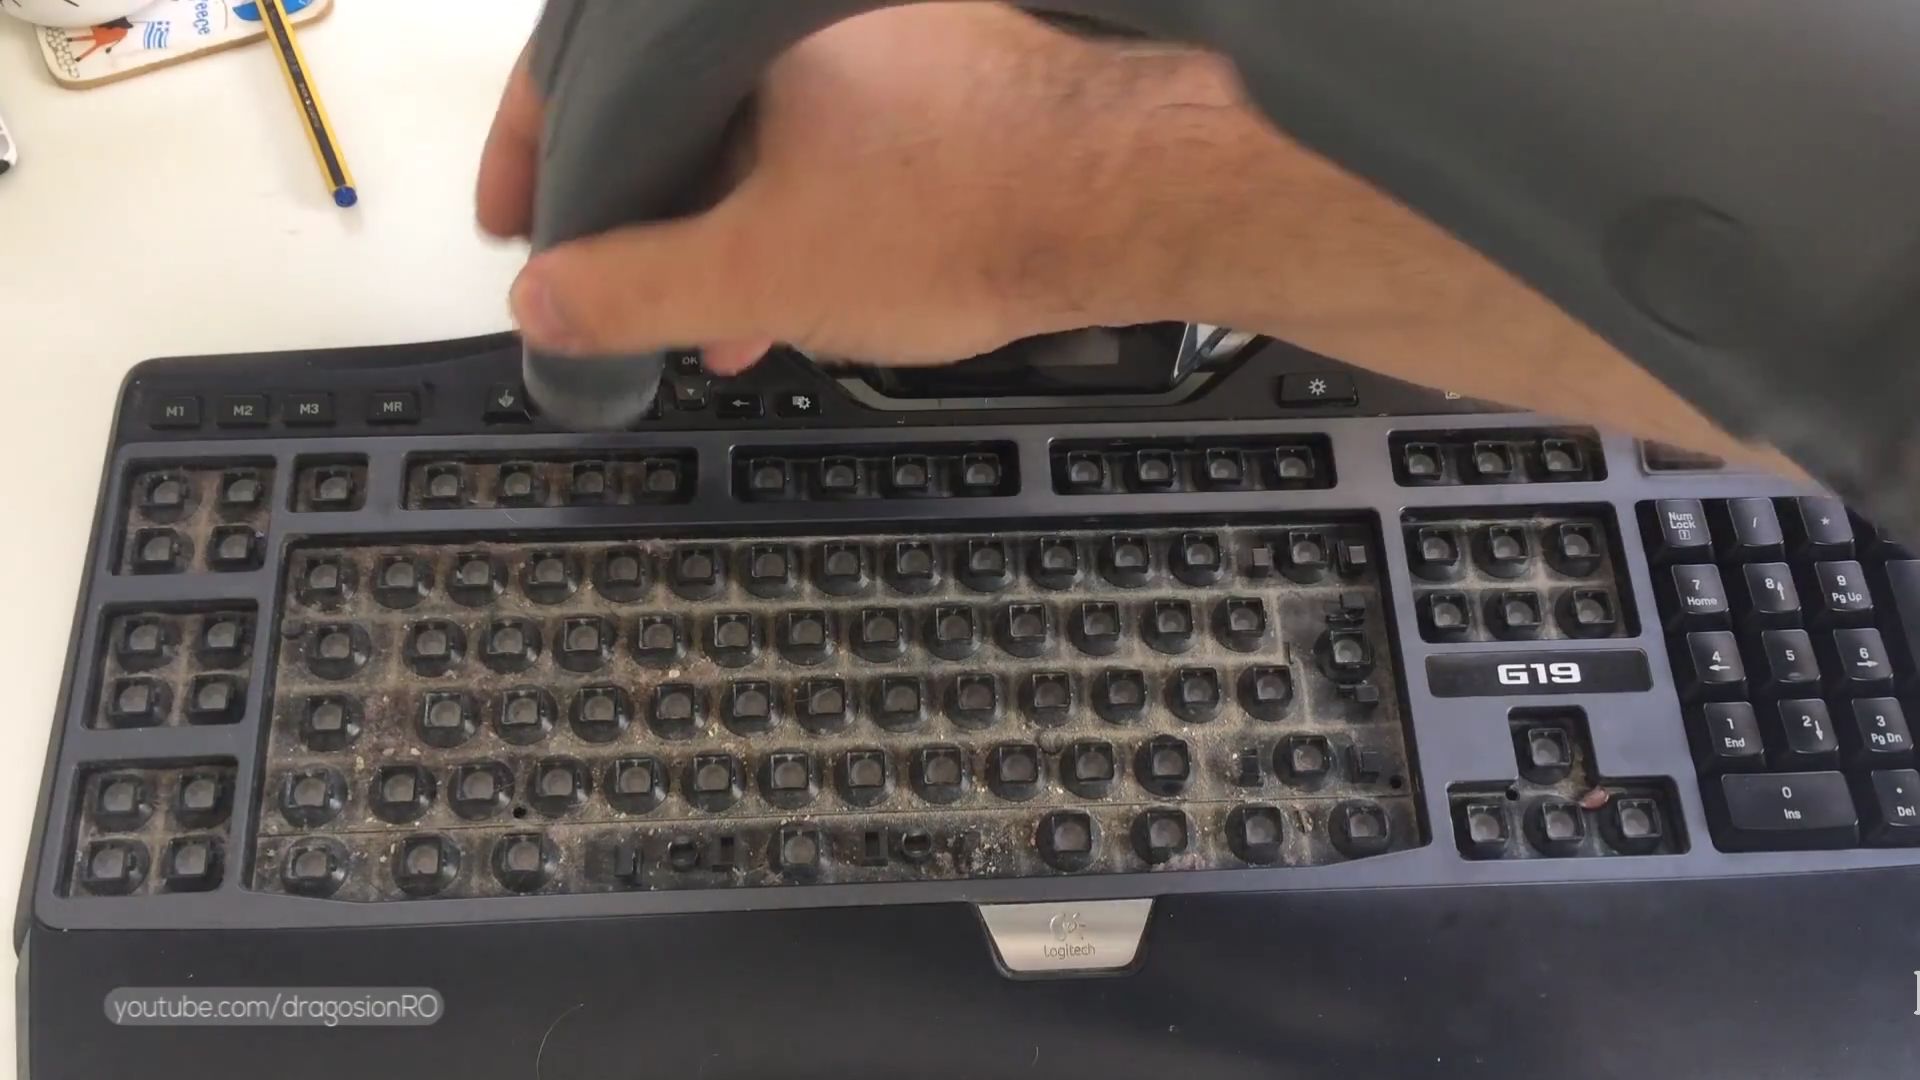
After vacuuming, use a wet wipe to clean the space between the keys.
Reassemble Keys on PC Keyboard
PC Keyboard and keys are all clean and dry, it’s time to reassemble everything together.
Reinstall any metal rods or pieces on the keys.
Place all the keys on a towel in rhe correct layout as it was in the pictures you took earlier.
Starting from left to right, insert keys one by one and press the newly inserted key to make sure it works normally.
Take extra care to insert the metal rods of the space or enter keys in the slots where they sit to act as a stabilizer for large keys.
Once all keys are back in place press all keys one by one again to make sure they work and slide normally without any unusual resistance.
Keyboard is ready to use, enjoy it!


Leave a Reply