
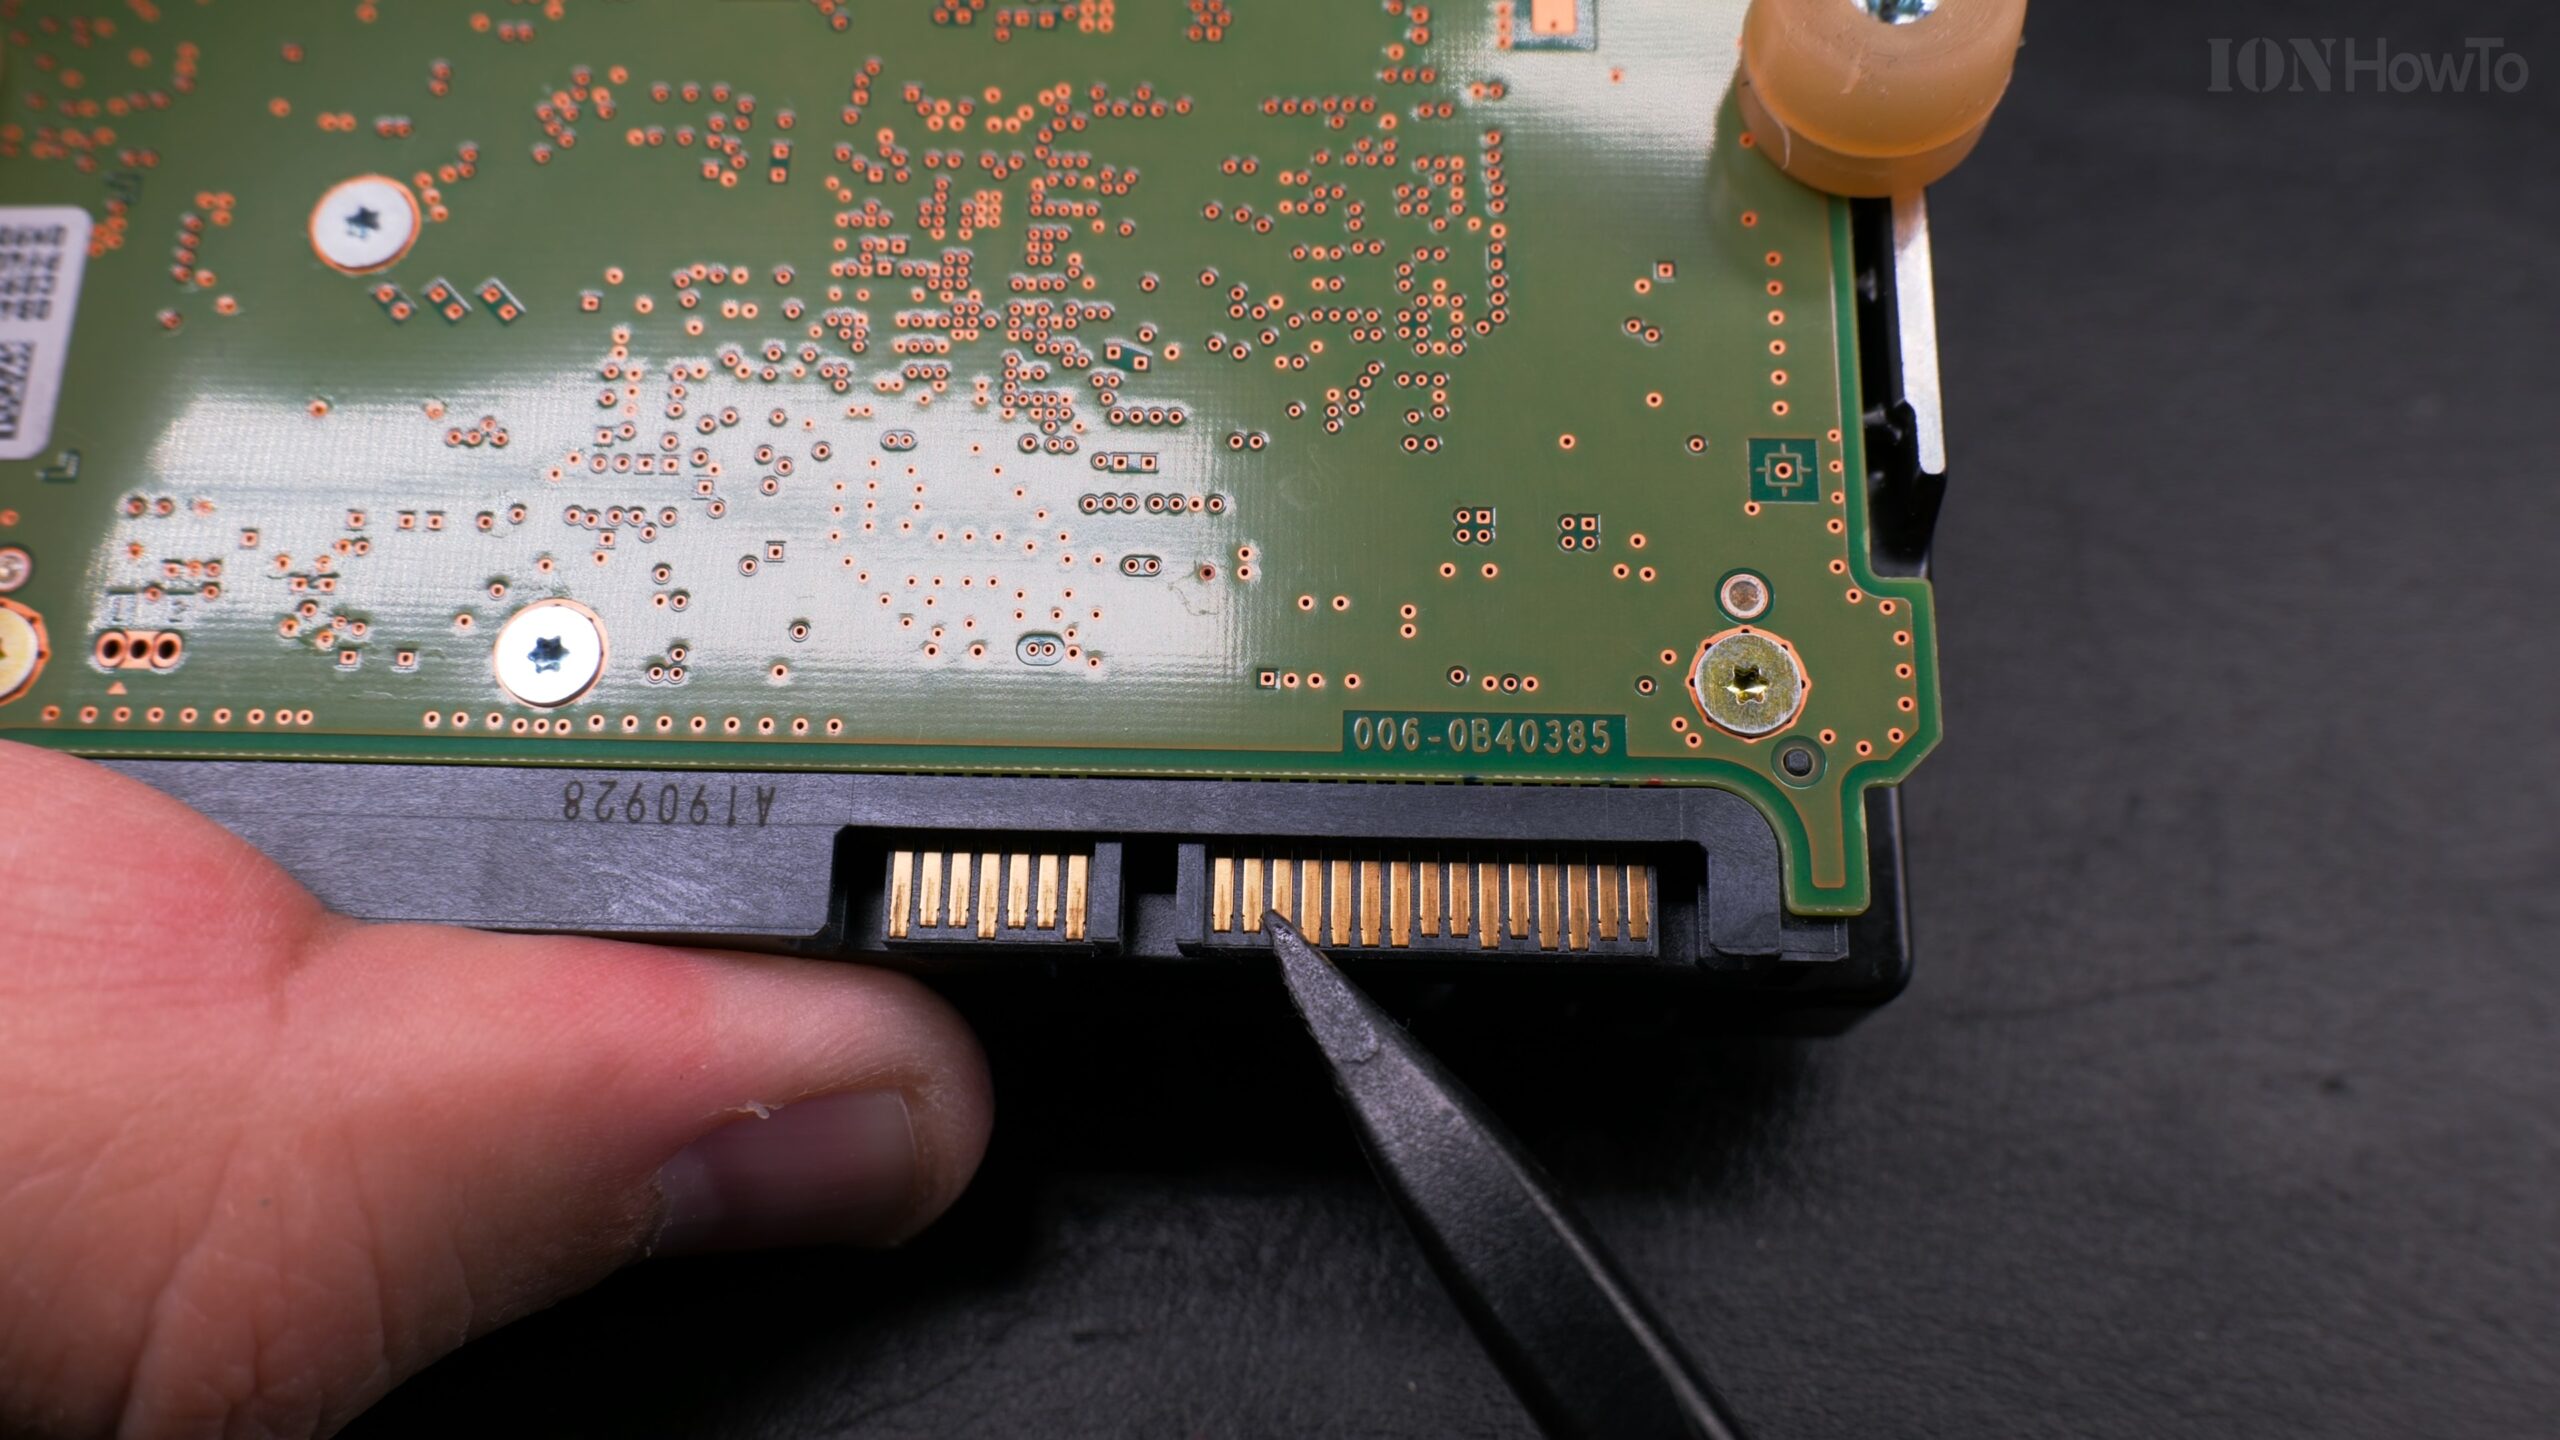
You just opened up a WD My Book or Elements external hard drive to use the hard disk inside your desktop PC. It’s called “shucking.” The drive was working perfectly minutes ago in its original case, but now it won’t spin up or show up in your computer at all. What gives? Don’t worry, the drive isn’t broken. It’s likely a simple power issue, and the fix is easier than you think. I’ll show you why this happens and exactly how to fix it with a tiny piece of tape.
Why Your Shucked WD Drive Isn’t Working
The problem is a clever (but annoying) feature designed for external enclosures. Some drives, especially WD “White Label” drives from external cases, use the 3.3V pin (Pin 3) on the SATA power connector as a “Power Disable” signal.
Quick Steps and Scenarios Overview
| What You Need to Do | Quick Jump |
|---|---|
| How to Fix It: The 3.3V Pin Mod | Jump to Step 1 |
| Step-by-Step: The Tape Mod | Jump to Step 2 |
| Important Notes and Safety Tips | Jump to Step 3 |
| What to Do After the Fix | Jump to Step 4 |
Here’s the breakdown:
- In the original WD enclosure: The power circuit doesn’t send power on that specific pin.
- In your desktop power supply: Standard PC power supplies do send 3.3V power on that pin.
- The result: When the drive detects power on Pin 3, it thinks it’s getting a “disable” command and refuses to start up. That’s why it acts completely dead.
How to Fix It: The 3.3V Pin Mod
The goal is simple: block the 3.3V power from reaching Pin 3 on the hard drive. You don’t need to cut or modify any cables permanently.
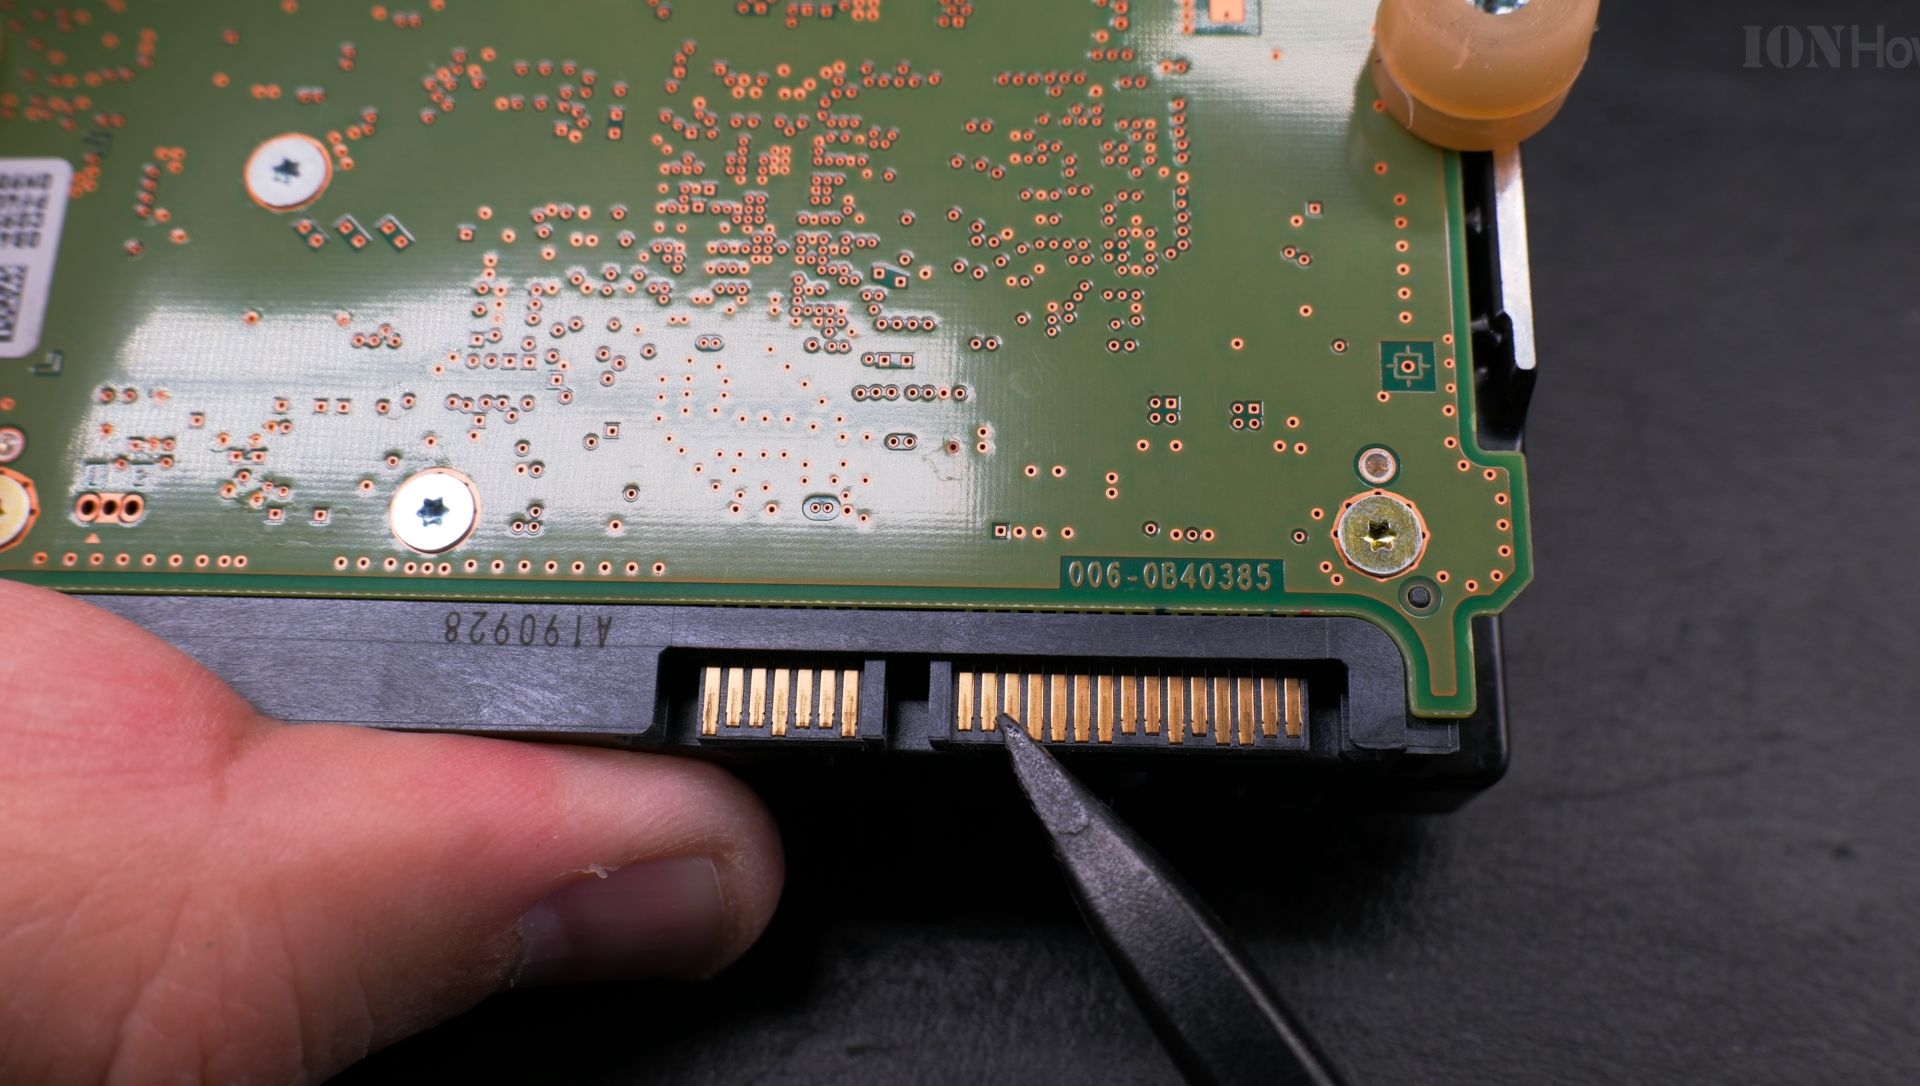
What You’ll Need:
- A small piece of Kapton tape (polyimide tape). This is ideal because it’s thin, heat-resistant, and leaves little residue.
- If you don’t have Kapton tape, a small piece of standard electrical tape will work. Just know it might leave more sticky residue if removed later.
- A pair of tweezers can be helpful for placing the tape precisely.
Step-by-Step: The Tape Mod
Step 1: Identify the Pins to Cover
Look at the hard drive’s SATA power port. The smaller set of pins on the left is for data. The wider set of pins on the right is for power.
You need to cover the first three pins on the power side (the pins closest to the small notch in the connector).
Step 2: Apply the Tape
- Cut a small strip of tape, just wide enough to cover the three pins and a little longer than the connector.
- Carefully place the tape over Pins 1, 2, and 3.
- Press it down firmly. For a more secure fit, you can fold the extra length over the edge of the connector.
Step 3: Reconnect and Test
- Plug your SATA power cable into the drive. The tape will be between the cable’s pins and the drive’s pins, blocking the connection.
- Connect the SATA data cable as usual.
- Power on your computer. The drive should now spin up and be detected in your BIOS and Windows.
Important Notes and Safety Tips
- Not All Drives Need This: This issue mostly affects specific “White Label” drives shucked from external enclosures. If your shucked drive works right away, you don’t need to do anything!
- It’s a Physical Block: You are only blocking the 3.3V wire. The 5V and 12V wires (which the drive actually uses to spin and operate) connect just fine.
- Alternative Fix – Molex Adapter: Another common fix is to use a SATA to 4-pin Molex power adapter. Molex connectors don’t have a 3.3V wire, so this bypasses the problem entirely. If you use this method, make sure to get a good quality adapter.
- Is It Safe? Yes. Desktop hard drives don’t use the 3.3V power pin for operation; they get all their power from the 5V and 12V lines. This mod is a well-known, standard practice in the DIY community.
What to Do After the Fix
Once your drive is spinning and detected, you’ll need to initialize and format it in Windows before you can store files on it.
- Right-click the Windows Start button and select Disk Management.
- A pop-up will appear for the new disk. Select GPT (GUID Partition Table) and click OK.
- Right-click on the “Unallocated” space for the new drive and select New Simple Volume.
- Follow the wizard, assign a drive letter, and format it (NTFS is the standard for Windows).
And that’s it! With one small piece of tape, you’ve turned a seemingly dead drive into a perfectly usable, high-capacity internal hard drive for your PC or NAS. It’s a simple trick that saves you money and gives that shucked drive a new life.
Helpful Tips
Check all labels, connections, and power ratings before starting so everything fits safely and securely. If any detail looks slightly different on your model, pause the embedded video above for a clear closeup view.
Related Guides
- Fix Logitech G19 Keyboard LCD Not Working or Stuck on Logo – How to Fix Logitech G19 Keyboard LCD Not Working or Stuck on Logo.
- Pen not working how to fix a BallPoint pen – Pen not working, how to fix a ballpoint pen.
- Water pressure pump not working humming not starting fix – Multistage pressure pump for clean water used for water heater boiler or pool.
- Fix Apple iPad – Browse more tutorials and practical guides in this section.


Leave a Reply