Category: Electrical

  • Ohms Law Calculator App

    Ohms Law Calculator App

    How to use the Ohms Law Calculator app available for Android device on the Play store.

    Understanding Ohm’s Law

    Understanding Ohm’s Law is essential if you are interested to learn electronics or electrical engineering.
    Ohm’s Law establishes the relationship between voltage, current, resistance and power in a DC electrical circuit.

    To simplify the process of calculating these values, there is the Ohms Law Calculator app for Android device s.

    This fast application provides a convenient tool to quickly and accurately determine voltage, current, resistance, and power values based on the Ohm’s Law calculation formulas.

    How to install the Ohm’s Law Calculator app

    Installing the Ohm’s Law Calculator App:
    Use this link Ohms Law Calculator App Free on Google Play Store from your Android device.

    Tap on the app and click the “Install” button to download and install it on your device.

    Ohm’s Law Formulas

    Ohm’s law formulas are based on relationships for DC Voltage between Voltage, Current, Resistance and Power.

    Voltage

    Voltage (V or E) is the electrical force that drives the current in a circuit, measured in volts (V).

    Current

    Current (I) is the flow of electrical charge through a circuit, measured in amperes (A).

    Resistance

    Resistance (R) is the opposition to the flow of current in a circuit, measured in ohms (Ω).

    Power

    Power (P) is the rate at which electrical energy is transferred or consumed, measured in watts (W).

    How to use the Ohms Law Calculator app

    Launch the app on your Android device.
    At the top of the screen you can chose 2 value types, they must not be the same.
    Chose from Voltage, Current, Resistance and Power.

    By default the lists are predefined to Voltage and Current but you can change these at any time without having to reset any values.

    Enter the values in the units you selected in the input boxes below.

    Once you have both input boxes filled the rest of the Voltage, Current, Resistance and Power calculations are updated automatically.

    If you would like to share the results with someone or save them in your notes, use the Share button and you can use the Android share options as you would with any other app.

    Read in the app the about us section for details about how the app works.

    Conclusion

    The Ohms Law Calculator app provides a convenient and efficient solution for calculating voltage, current, resistance, and power based on Ohm’s Law. With its user-friendly interface and additional features, it simplifies the process of electrical calculations, making it an invaluable tool for professionals, hobbyists, and students alike. Install the app on your Android device, master Ohm’s Law, and unlock the potential for accurate and efficient electrical circuit analysis.

  • Philips Steam Iron Thermostat repair fix

    Philips Steam Iron Thermostat repair fix

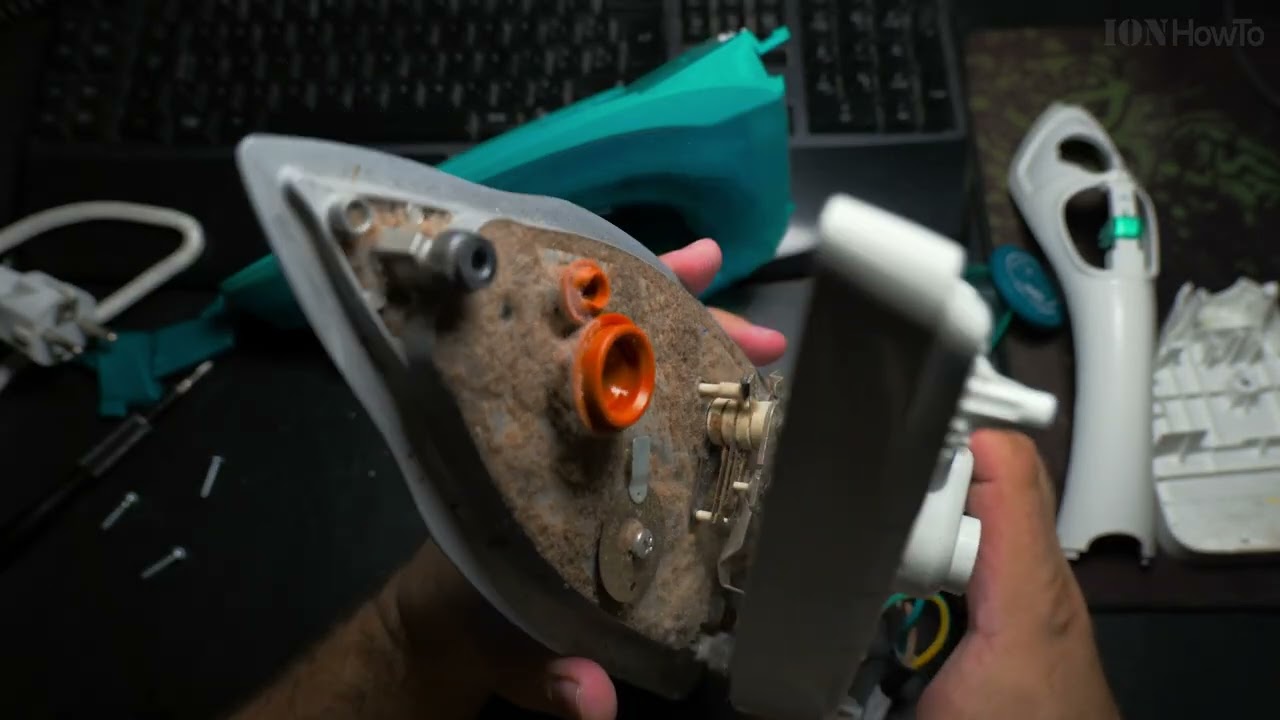
    Philips Steam Iron repair Thermostat fixed.

    Philips steam iron model specifications Philips PowerLife SteamGlide 85g 2000W
    Philips SteamGlide steam iron for clothes not working.
    Plugged in, not starting. Philips steam iron not working silent no thermostat noises.

    Philips Steam Iron repair

    The problem could be damaged electrical wiring, water damage, heating element broken or thermal fuse failure.
    A steam iron not working even when setting the thermostat to Maximum setting and especially if you don’t head the noise in the video might mean the steam iron has a bad thermostat or a failing thermostat.
    Clean and reposition the thermostat if needed.
    A steam iron thermostat can be replaced with a new part.

    Watch video for disassembly instructions and how to fix the steam iron thermostat.

  • How to use a digital multimeter

    How to use a digital multimeter

    How to use a digital multimeter for measuring electronics circuits at home or in the car.

    How to use a digital multimeter

    Volt meter function

    To measure DC voltage, set the multimeter dial to Continuous line V symbol and choose with the dial the maximum value measured and precision.

    For example, to measure continuous current 12 Volt, set the voltmeter dial to 20V DC.

    Insert the back of the black probe into Com / black port on the multimeter and the red probe into the red multimeter terminal marked with V and continuous line for DC.

    How to measure voltage

    You touch the red probe to the positive terminal and black probe to the negative terminal.

    What voltage to measure

    You can measure the voltage of your car battery before crank, during crank voltage drop and while the alternator is running.

    Measure rechargeable batteries with the 2V  option or the battery tester mode set to in 1.5V.

    Resistance ohm meter function

    To measure resistance, the red probe must be moved to the resistance measuring port.

    The resistance meter function tests the value of the resistance between 2 points in Ohms.

    How to measure resistance

    To measure resistance in ohms, you place the probes at the 2 points you want to measure how much resistance is between them.

    What to measure resistance on

    You can check the resistance in Ohms of a resistor component, a diode, measuring a cable resistance at both ends.
    You can also use the continuity tester function that beeps when the probles touch eachother and also beeps if 2 points in a circuit or cable are connected to eachother.

    DC Current measuring function

    To measure DC current, the red probe must be moved to the current measuring port.

    The multimeter has fuses that can be blown if you put too much current thru the multimeter by mistake. Fuses can be replaced easily.

    How to measure current

    Set to measure DC current at a milliamps value that matches your needs. If you need to measure amperes, you have to use the 10A function.
    The probles go in series in the circuit. When you comnect the probes, the circuit is closed otherwise the circuit is open and no current flows until you connect both probes in the circuit.

    What to measure current on

    You can troubleshoot electronics boards power usage as finding the ma / milliamps or amps value and the voltage you can use Ohms law to calculate the power used in Wats.

    Ohm’s Law Formulas

    Voltage, resistance, power and current are linked together and by knowing 2 you can find the third value using the simple Ohm’s law formulas.

    How to find Voltage from Resistence Current or Power

    V or E is voltage or energy it’s usually called E, I guess I like V more so I call it V measured in Volts. Note sqrt reffers to the Square Root function.

    V = sqrt(P x R)
    V = P / I
    V = I x R

    How to find Power from Resistence Current or Voltage

    P is for power measured in watts.

    P = V x I
    P = I^2 x R
    P = V^2 / R

    How to find Current from Resistence, Power or Voltage

    I is for cureent measured in Amps or Amperes, don’t ask me why it’s symbol is I.

    I = V / R
    I = P / V
    I = sqrt( P / R)

    How to find Resistence from Current, Power or Voltage

    R is for reaistance and it is measured in ohms Ω symbol.

    R = V / I
    R = V^2 / P
    R = P / I^2

    Diode tester function

    You can test diodes with the multimeter diode test function usually you find this at the 2k ohms on the multimeter dial.

    How to measure a Diode or LED

    Place the probes at both ends of a diode or LED module and measure the resistance.

    The diode should allow current flow in one way but block the flow of cureent in the opposite direction.

    Also in this mode if you test a LED module, the LED will start working dimly so you know the led tested works.

    AC high voltage warning

    It’s best not to use the AC high voltage test modes as this can be dangerous. That is made to check rhe voltage of your power sockets on the wall. If you have power supply problems, get an UPS or an extension with built in over voltage protection.

  • How to save electricity at home

    How to save electricity at home

    How to save electricity at home to reduce the electricity bill.
    There are a few simple steps to follow for saving electricity and reducing power consumption.

    Other than installing photovoltaic solar panels at home to reduce the cost of electricity in your home there are steps you could follow to reduce your power consumption.

    In the video you will see how to change your electricity usage to reduce power consumption.

    How to save electricity at home

    Fridge freezer temperature control

    Adjust fridge freezer temperature settings
    Adjust fridge freezer temperature settings

    Change the fridge temperature control to a setting from 1 to 5. On 5 the fridge uses more power to cool down the food more and at 1 it uses the least electricity and it will result in an increase of temperature in the fridge.

    A good setting is 3 for the fridge but you can try to reduce power consumption of the fridge further by changing the fridge temperature control to the number 2.

    The freezer also has a temperature control setting and you should keep it at normal or between lowest and normal instead of the maximum setting for the freezer.

    Use a freezer thermometer to be sure your freezer has a temperature of -15 degrees Celsius instead of -25.

    Turn off the lights

    Turn off the lights use natural light
    Turn off the lights use natural light

    Turn off the lights you don’t use and during the day, open the curtains and use natural sunlight instead of light bulbs. The sun light is much better and it’s free.

    Replace CFL light with modern LED light bulbs

    Use energy efficient LED light bulbs
    Use energy efficient LED light bulbs

    Replace CFL light with modern LED light bulbs and LED light fixtures.

    Do not use any incandescent light bulbs at all.

    Any 8W LED light bulb makes more light than a 25W CFL light bulb and it is a lot better than incandescent 60W or 100W old light bulbs.

    Turn off power to appliances when not in use

    Unplug appliances and TV when not in use
    Unplug appliances and TV when not in use

    Turn off power to appliances when not in use. Use a switch to turn the TV on and your TV box or media players and speakers.

    Turn off power to kitchen appliances when not in use, this reduces power consumption and makes your kitchen safer.

    Use central heating or Air conditioners for heating

    Use central heating or Air conditioners for heating.

    For heating, use Aircon A/C instead of electric heaters or oil heaters.

    The energy efficiency of a modern heat pump or heat exchanger aircon heater is much more efficient than a simple electric heater.

    Central heating systems are better when available.

    Set your central heating system thermostat to 19 degrees Celsius or 20 degrees in the winter to consuming less energy to heat your home.

    Use fans instead of Air conditioners

    For cooling use a fan on low speed instead of the air conditioners or aircon, A/C and use the aircon only on the hottest days or during the night.

    Use a fan instead of aircon to save electricity
    Use a fan instead of aircon to save electricity

    Washing machine Eco mode

    Washing machine should be loaded to full capacity but not overloaded.

    Use the temperature control setting to 0 degrees Celsius or 30 degrees Celsius to reduce power consumption from the washing machine.

    Also use the washing machine Eco modes when available.

    Keep the fridge full

    Keep the fridge full at all time when in use.
    A full fridge keeps cool with less electricity consumption than an empty fridge. More food in the fridge increase the thermal mass and the fridge environment will not warm up so much when you open the fridge door.

    If you travel, empty the fridge, turn it off and keep fridge freezer doors open to avoid mold growth.

    Water pressure pump

    If you have a pressure pump and a direct tap drinking water faucet, use the drinking water faucet for washing food instead of pressure pump.

    Avoid using pressure pump direct utility water tap
    Avoid using pressure pump direct utility water tap

    It will keep the pump off and you can reduce the water consumption too. Drinking water here refers to a direct utility supply not a reverse osmosis filter system. If you have a reverse osmosis filtration system, use that only for drinking water.

  • PC Computer screen flickers then goes black

    PC Computer screen flickers then goes black and turns off but ok after 5 minutes.

    After waiting 5 minutes, turning the monitor on works normally.

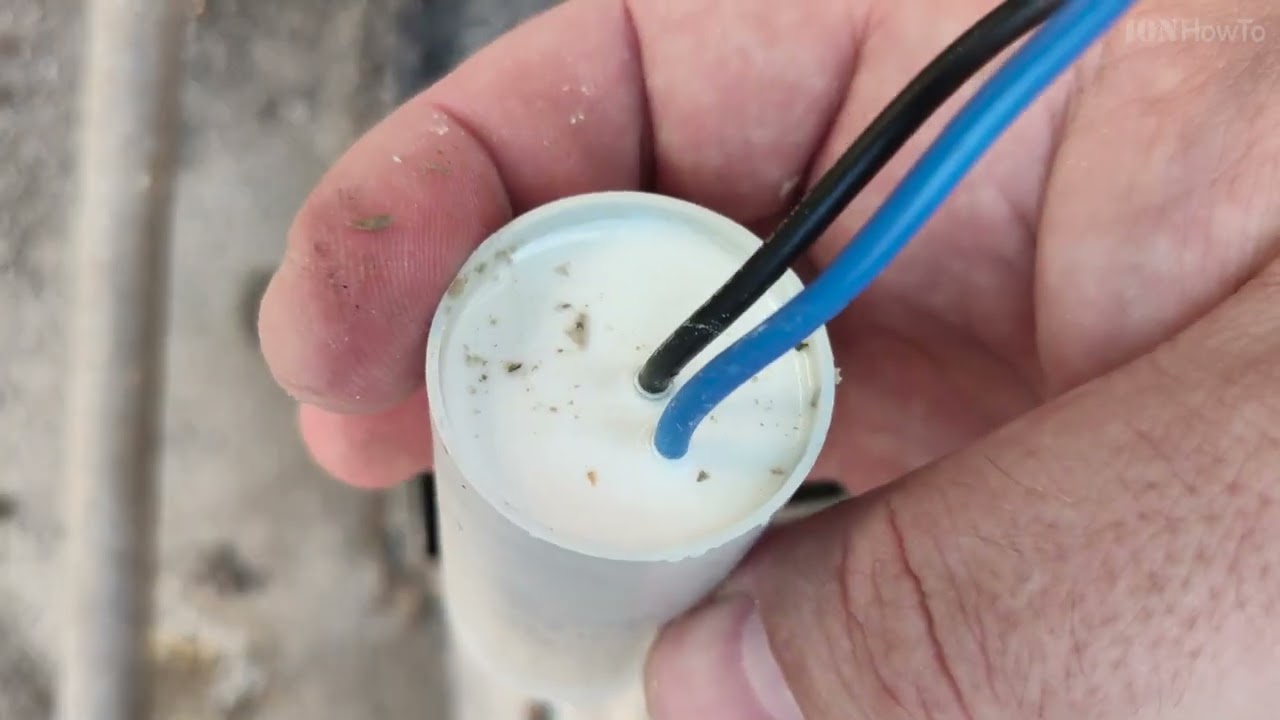
    It could be a capacitor inside the computer monitor gone bad and leaking electrolyte.
    Usually you can easily see bad caps / capacitors when are bad, they tend to bulge and inflate or leak.

  • Water pressure pump not working humming not starting fix

    Water pressure pump not working humming not starting fix

    Water pressure pump not working humming not starting.

    Multistage pressure pump for clean water used for water heater boiler or pool.

    Water pressure pump not working humming not starting

    Pump not starting humming or buzzing

    The pump works less and eventually it can even stop working completely.

    The auto pump control works and tries to start the water pump motor but the motor makes a humming noise or buzzing noise and the motor is not spinning not working.

    If the motor is humming stop the power immediately and follow the steps in the video to prevent motor coil damage and having to replace the whole pump.

    Replacement Pump

    Replacement Pump

    Check for leaks

    Check for leaks

    Expansion tank

    Expansion tank

    WARNING!

    Before opening any electrical box please read the safety warnings and call a plumber or electrician to repair or replace your water pump.
    Do not try this at home! This video and post is not meant to be an instructional video, I just show you how I did it and it might be wrong for your country or pump model.

    Danger, high voltage electricity!
    If you try to do this, you are doing it at your own risk. I am not responsible for your actions.

    Call a plumber, watch them fix it while you relax.

  • How to jump start a car with cables safely

    How to jump start a car with cables safely

    How to jump start a car with cables safely and correctly on any car. This is the the right way to jump-start a car.

    The correct ways to hook up jumper cables on a car with a dead battery that won’t start.

    I did a few mistakes in the video bellow, can you find the mistakes.

    Check Amazon

    As an Amazon Associate I earn from qualifying purchases.

    Jumper cables Jump starter battery booster

    How to jump start the car

    This can also be done with a battery jump start pack designed to start a car with a dead battery without the need for another car to give power from a good car battery.

    The jumper cables must be good thick copper high quality to avoid damage during high power transfer from the good battery to the bad battery.

    Safety First

    Bad car is the car with the dead battery and the good car is the car used to jump-start the bad car.

    The good car might have a good battery or it might also have an old weak battery.

    Doing this the wrong way might make the good car not start also.

    Bring the good car in front of the bad car facing eachother without touching.

    if the bad car is facing a wall, you can try to park the good car next to the bad car or push the bad car out of the parking spot by hand and turning the steering wheel carefully.

    Make sure both cars are in a safe area where no other cars can collide.

    If you are on the road, pull to the emergency lane or to the outer area of the road and use a car break-down reflective triangle when there is incomming traffic. Hazard lights on the bad car might work so use them even if the battery is depleted to start, it will be good enough for hazard lights.

    After you setup a refletive triange far back enough from the bad car, you can turn off the hazard lights if waiting a long time for road assistange but best is to keep the hazard lights on all the time if you are on the road and cars are passing by.

    The area around the cars has to be free of debris or other wires or cables.

    Preparation

    Use thick solid copper jumper cables only. Not the thin ones that can get hot or even melt.

    Separate the jumper cable terminals. make sure no jumper wires aligator clips are touching eachother or any part of the car.

    Lay the cables on the ground disconnected from the cars but ready to be picked-up and use.

    Make sure the jumper cables are long enough to reach both cars.

    On both cars, open the engine bonnet or hood. Usually under the steering wheel there is a pull lever to open the engine bay area.

    On both cars automatic transmission must be set to Park and manual transmission should be set to neutral.

    Both cars should have the engine turned off.

    Connect Jumper Cables

    Folow the steps bellow to connect the jumpber cables correctly and safely.

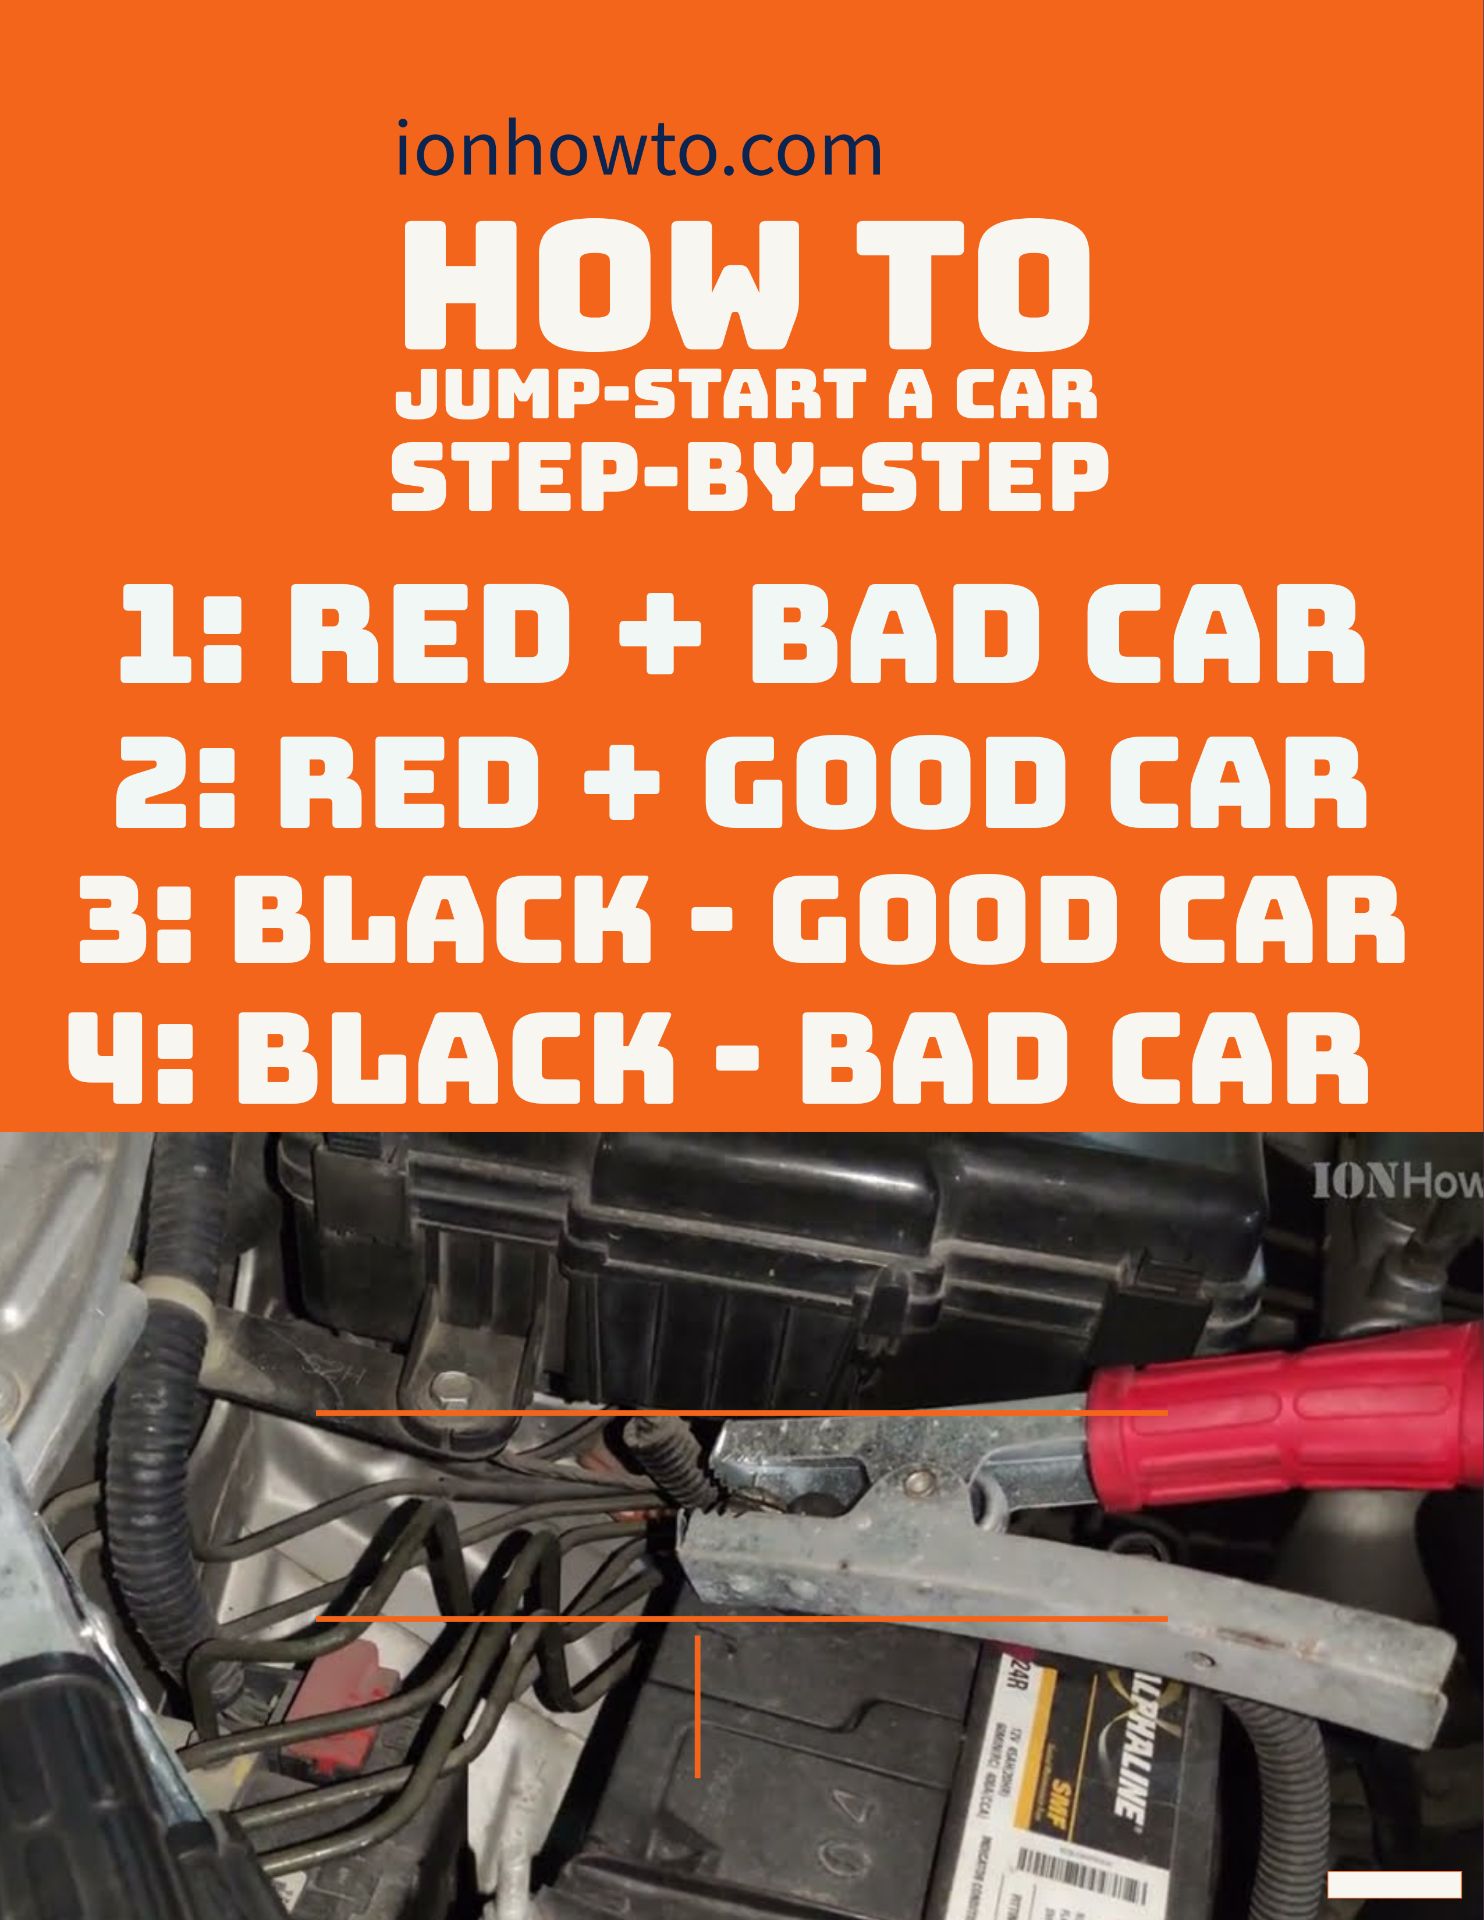
    Step 1 Red on dead battery positive +

    Connect the red jumper cable to the Positive + battery terminal of the dead car battery. The positive battery terminal is usually covered by a red plastic protective cover.

    Make sure you know for sure which battery terminal is the positive one. Positive is marked with the + plus sign or it has a red cover or both.

    Step 2 Red on good car battery positive +

    Connect the other end of the red cable to the good booster car’s battery positive terminal + same as above, it’s marked with + for positive or it has a red or any color plastic cover.

    Step 3 Black on good car battery negative –

    Do not allow red and black jumper cable ends to touch eachother at any time. Keep jumper cable aligator clips away from eachother.

    Attach one side of the black jumper cable to the good car’s – Negative battery terminal.

    Step 4 Black on dead car ground point negative –

    Connect the other end of the black jumper cable to the dead car’s chassy on a good grounding point. Usually around the engine there are good solid metal grounding points. Secure the alligator clip to the ground poing in one quick movement without moving the cable or the aligator clip around too much to avoid sparks.

    You can alternatively connect the black to the Negative – end of the dead battery directly but this can be dangerous as a depleted lead-acid car battery may release hydrogen gas and if there is a spark when connecting the jumper cable, the Hydrogen gas may ignite.

    Solid ground point is safer, make sure it’s around the engine and it’s connected to the chassy directly and not with a thin wire.

    Using a thin ground connection may melt the ground cable and run the car.

    Step 5 Start good car

    Start the engine of the donor car or booster car. This is the car with the good battery.

    Once started let the booster good car run in idle for 1-5 minutes depending on how bad the bad car’s battery is depleted.

    Step 6 Start the bad car

    While the cables are connected and the good car engine is running in idle, try to start the bad car.

    If the bad car will not start, let the good car engine run for a few minutes longer and try again.

    Once the bad car is started, let both cars engines run in idle for 1-2 minutes more with the cables connected.

    Step 7 Stop engine of good car

    Now you can stop the engine of the good car while cables are connected and the bad car engine is running.

    Step 8 disconnect cables in reversed order

    Disconnect jumper cables from both cars in reversed order.

    Make sure you do not touch the red and black ends of the cables while they are still connected to any of the cars.

    Disconnecte cables:

    • Remove black cable from bad car.
    • Remove black cable from good car.
    • Remove red cable from good car.
    • Remove red cable from bad car.

    Once the bad battery car is started, don’t stop the engine until you reach home or a car service shop to get your battery replaced as soon as possible.

    Let me know if you want to see a video about how to replace the battery in your car.

    Subscribe and Ring the Bell to watch more videos. IONHowTo RedNumberONE

    Buy merch Check it, buy it, post it and tag it #ionhowto or #rednumberone

    Any questions?

    Feel free to ask in the comments section bellow. Subscribe, Like and SHARE this article or the video.

  • Xiaomi 12S Ultra launch event live details

    Xiaomi 12S Ultra launch event live details

    Xiaomi 12S Ultra launch event live details

    Leather back feels like a camera.

    2 leather color variants. Verdant Green calf leather.

    2k Screen

    Image sensor IMX989 1-inch sensor.

    Leica Summicron lens system.

    8 Lenses system 8P for less color fringe.

    Leica filters.

    Leica certification.

    Leica team worked 6 months together with Xiaomi team closely in person not online.

    Xiaomi 12S Ultra All 3 cameras are primary cameras. 1-inch sensor coupled with Leica professional lens filters.

    Periscope lens 120X for close video of far object or people.

    Ultrawide lens 13mm f/2.2

    Adobe Lab Calibration

    Hyper OIS for ultra stabilization in video GoPro like ultra video stabilization.

    Dolby Vision recording!

    Xiaomi 12S Ultra Price

    Xiaomi 12S Ultra starts to sell in China at 5999 Chinese Yuan 8GB 256GB.

    • Y 5999 Xiaomi 12S Ultra 8GB + 256GB
    • Y 6499 Xiaomi 12S Ultra 12GB + 256GB
    • Y 6999 Xiaomi 12S Ultra 12GB + 512GB

    Xiaomi 12S Pro 3999 Y 8GB 128GB

    One more thing.

    Mediatek 9000+ versions with performance chipset is an upgraded version of Mediatek 9000.

    Cooling, 3D cooling system.

    Xiaomi Book Pro 16 inch computer laptop

    Display 4K E4 OLED

    With Touch screen integrated in the display.

    Unified color between smartphones and laptops with same calibration system.

    Dolby Vision end to end.

    CNC Unibody process.

    14.9 mm thin

    Trackpad with vibration feedback.

    Performance

    45W TPD performance level.

    70wh battery.

    Evo Intel approved

    Price for Xiaomi Book Pro 16 inch is 6499

    Xiaomi Book Pro 14 alternative version

    Home WiFi Routers

    Tri-band mesh router.

  • Vw Polo 9N Mk4 speed sensor G28 crankshaft position sensor fix

    Vw Polo 9N Mk4 speed sensor G28 crankshaft position sensor fix

    VW Polo 9N Mk4 AZQ engine speed sensor G28 crankshaft position sensor fixed.

    Watch the video first

    Engine stuttering stops while driving fix

    Bad Crankshaft Engine Speed Sensor G28 Symptoms

    VW Engine stutters engine shuts down while driving
    VW Engine stutters engine shuts down while driving

    While driving, the engine shuts off.

    Even while driving on the motorway engine shuts off.

    Imagine driving at 100km/h and suddenly the engine turns off while driving and power steering stops working the brakes servo assist stops working.

    What to do when the engine stops while driving

    If that happens, turn your hazard emergency lights on and slowly and predictable pull towards the emergency lane.

    Do not stop the car on the highway or motorway lanes but pull left or right depending on your country’s driving side.

    The steering wheel is much harder to turn when the engine is off and the brakes are almost not working.

    Even with steering wheel servo not working, you can rotate the steering wheel slowly until you are on the emergency lane.

    Because the engine is off, the car is slowing down and you might not need to press the brakes or press the brakes slightly to reduce speed sooner if you are close to an motorway exit, you want to stay out of the way of other cars.

    Other G28 sensor failure symptoms

    Some ways the G28 engine speed sensor might fail is by slight engine stuttering when you press the gas pedal from idle. You feel something is worng with the car. Acceleration is not smooth anymore.

    If the engine speed sensor failed completely, the car engine won’t start or might start run for a second then turn off.

    What does the Engine Crankshaft Position Sensor do

    The G28 crankshaft position sensor is a hall effect magnetic sensor that together with the engine flywheel with teeth will detect the engine speed and send the speed of the engine pulses to the car ECU. This information is crucial to adjust the engine timing of how each cylinder fuel injector is firing and for how to spark plugs work.

    Safety is the reason

    The engine stops for safety as incorrect G28 makes the ECU think, the engine is stalled or something very bad happened with the engine. It shuts off the engine to prevent engine damage or car damage.

    How to fix it

    Vw Polo engine speed sensor crankshaft position sensor was failing.

    Engine shutters or hesitates when pressing the gas pedal.
    Easy DIY to replace the sensor if you have the same problems.

    When I was searching the net for this it was very hard to find a video like this .. so .. here it is for you as a video and article with photos and step-by-step diy article guide.

    In the video you can see the symptoms of a bad engine speed sensor or when the engine speed sensor is starting to fail with intermittent errors.

    Confirm engine speed sensor fault

    To confirm the crankshaft position sensor fault read the engine speed using VCDS VAG-COM to log engine rpm and then open the engine RPM speed log file in Excel or any spreadsheet app like Google Sheets or Open Office.

    VW Engine stutters engine shuts down while driving diagnose
    VW Engine stutters engine shuts down while driving diagnose

    How to find the location of the G28 sensor

    To locate the engine speed sensor G28, you first find the place where the engine meets the gearbox.

    Find VW AZQ engine G28 sensor electrical connector location
    Find VW AZQ engine G28 sensor electrical connector location

    Under the engine, closer to the back of the engine block. Under the throttle body as seen in the video.

    How to replace the G28 engine crankshaft position sensor

    VW AZQ engine G28 sensor electrical connector
    VW AZQ engine G28 sensor electrical connector

    To replace the G28 engine crankshaft position sensor you have to carefully disconnect the electrical connector using a screwdriver to release the locking tab but be careful NOT to break the connector tab.

    VW AZQ engine G28 sensor electrical connector location
    VW AZQ engine G28 sensor electrical connector location

    Remove the electrical connector by wiggling it left and right or you might even spray WD-40 on the electrical connector housing to make it come out easier.

    VW AZQ engine G28 sensor remove connector
    VW AZQ engine G28 sensor remove connector

    There is one screw holding the engine crankshaft sensor in place.

    VW AZQ engine G28 torx screw
    VW AZQ engine G28 torx screw

    Can’t remember the screw bit size but you should have a Torx socket set and try a few torkx bits until you find the right one.

    VW AZQ engine G28 torx screw location
    VW AZQ engine G28 torx screw location

    Useful tips

    There may be dirt in the screw hole and the torx bit may not lock in all the way. Spray WD-40 and use a small wire or needle to pull any crusty dust out then try again.

    VW Polo 9N Mk4 G28 sensor connector on AZQ engine
    VW Polo 9N Mk4 G28 sensor connector on AZQ engine

    Pull out old G28 sensor

    Once the screw and connector are disconnected, pull the G28sensor out by wiggling the sensor body sliglty. Patience is key here!
    Sensor will come out as seen bellow.

    VW Polo 9N Mk4 G28 crankshaft position sensor connector
    VW Polo 9N Mk4 G28 crankshaft position sensor connector
    VW Polo 9N Mk4 G28 crankshaft position sensor how it looks
    VW Polo 9N Mk4 G28 crankshaft position sensor how it looks

    Install new G28 sensor

    Install the new G28 sensor as you saw it coming out. It has a specific way it goes in and when fully inserted it must allgn with the scre hole and be flush with the engine block.

    VW Polo 9N Mk4 G28 sensor socket engine flywheel inside
    VW Polo 9N Mk4 G28 sensor socket engine flywheel inside
    VW Polo 9N Mk4 G28 crankshaft position sensor removed
    VW Polo 9N Mk4 G28 crankshaft position sensor removed

    Reinstall the torx screw and install the electrical connector making sure you feel or hear it clicking when fully inserted. You can clean the connector with WD-40 2 or 3 sprays and wipe it well before installing. WD-40 makes the connector slide easier on the sensor body.
    Once they connector clicks, try to pull it a bit to make sure it’s secured in place.

    All done

    Remove any tools you might have around the car and try to start the car. If the car starts and idles well, try to drive around on an empty street and see if the engine stutters or the engine shuts off. If all is ok, you fixed it congratulations!

    Write a comment bellow on how it was for you so other readers can find out.

    Nice!

  • VW Polo 9N Mk4 Air Recirculation Problem AC goes randomly cold to hot

    VW Polo 9N Mk4 Air Recirculation Problem AC goes randomly cold to hot

    VW polo air recirculation problem AC goes randomly cold to hot.

    VW Polo 9N Mk4 air recirculation problem

    When you press the air recirculation button and it does not start or the recirculator flap doesn’t work sometimes.

    VW Polo 9N Recirculation air flap not working

    Air recirculator flap stops working randomly. Recirculator flap doesn’t start when in reverse randomly.

    Also this problem is related to a much harder problem to diagnose and fix.
    If you use Air conditioning AC is on and randomly the car start blowing hot air then cold air by itself.
    Or you use the heater and the heater power is lower than before this is because of the flap mixing air from AC and air from the heater core.
    The Heater core uses the engine coolant and a radiator to bring heat inside the car cabin so heating will only work when the engine is warm not cold.
    If the Heater does not work it might be the heater core being clogged – let me know if you want to see a video about how to unclog the heating core.

    VW Polo 9N Recirculation air flap working

    If the car moves from cold to hot by itself, this will fix it!
    It works for both the air recirculation flap problems and for random changes from cooling to heating inside the car.

    Step-by-step how to video

    VW Polo 9N Mk4 Air Recirculation Problem AC goes randomly cold to hot
    How to remove glove box on VW Polo 9N Mk4

    Read how to remove glove box on VW Polo 9N Mk4.

    Watch the whole video without skipping. Watch the video BEFORE you start working on the car.

    Steps to fix V154 or V68 motor potentiometer

    Fix Potentiometer in VW Polo 9N V154 or V68 Recirculation air flap motor
    • VW Polo 9N Recirculation Flap Not Working or AC randomly changes to heating
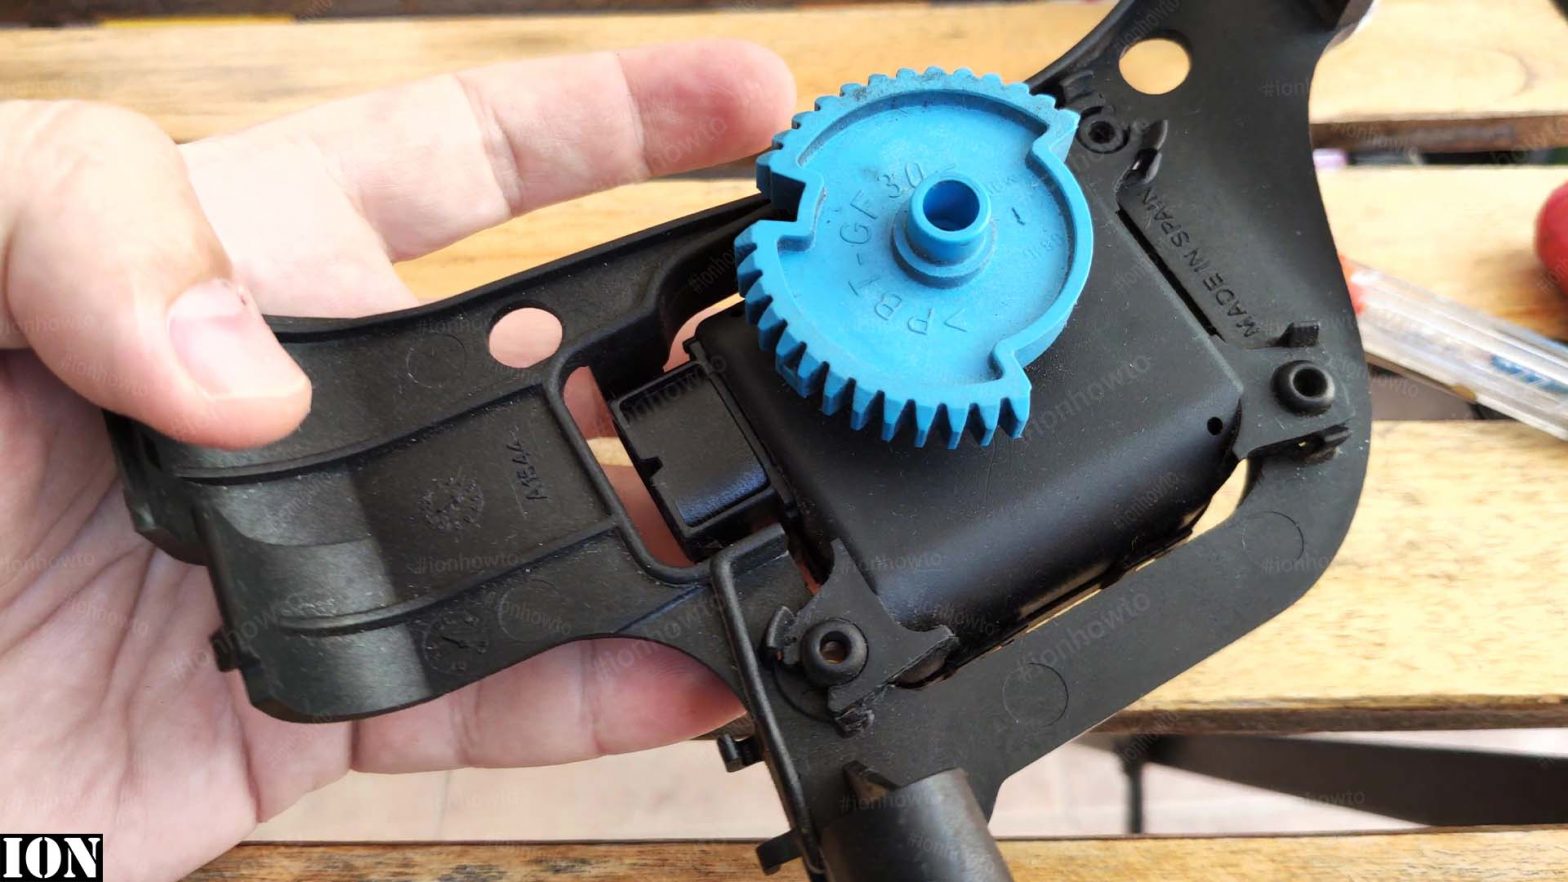
    • Acuator Positioning Sensor Acuator V154 or V68 problems 6Q2907511
    • Remove Acuator Positioning Sensor Acuator V154 6Q2907511
    • Fix V154 Motor Potentiometer with WD-40 or contact cleaner spray
    • Install V154 or V68 Motor in VW Polo 9N Mk4
    • Align Gears as seen here don’t rush, screw holes and gears must be aligned
    • Check the recirculation flap working and not misaligned or clicking when opening or closing
    • Test AC and air recirculation buttons
    • Test AC Cooling and heating function with recirculation
    • It’s fixed, comment bellow and share
    Fix Potentiometer with WD-40 in VW Polo 9N V154 or V68 Recirculation air flap motor

    Fix Potentiometer in VW Polo 9N V154 or V68 Recirculation air flap motor

    How to fix the V154 or V68 motor in VW Polo 9N Recirculation air flap motor potentiometer with WD-40.

    Video about how to open the glove box coming soon.
    Subscribe for more videos.

    Holder for Recirculation air positioning motor part number 6Q2.819.379 / 6Q2 819 379 or 6Q2819379

    VW Polo 9N V154 Recirculation air flap motor 6Q2907511
    VW Polo 9N V154 Motor Part
    VW Polo 9N V154 Motor Part

    Positioning Motor for Recirculated Air operation Code V154 or V68
    Part number: VW 6Q2 907 511 A compatible with 6Q2 907 511 or 6Q2907511
    VMC 12V motor with potentiometer sensor built-in

    VW Polo 9N Recirculation air flap motor
    VW Polo 9N V154 or V68 Recirculation air flap motor part